new posts in all blogs
Viewing Blog: artista how to, Most Recent at Top
Results 26 - 50 of 58

I'm an illustrator living in Budapest, Hungary. I post about how I paint my water colour pictures.
Statistics for artista how to
Number of Readers that added this blog to their MyJacketFlap: 17

By: Irisz Agocs,
on 5/30/2008
Blog:
artista how to
(
Login to Add to MyJacketFlap)
JacketFlap tags:
Add a tag

The newest book with my illustrations has just come out today! It is about three small toy cats. The author, Judit Berg, had very clear ideas about the cats, so the colors were already planed. I had to buy purple and dark red watercolors, because I have never used them before, but finally I'm quite happy with them. :)
By: Irisz Agocs,
on 3/16/2008
Blog:
artista how to
(
Login to Add to MyJacketFlap)
JacketFlap tags:
Add a tag
By: Irisz Agocs,
on 3/16/2008
Blog:
artista how to
(
Login to Add to MyJacketFlap)
JacketFlap tags:
Add a tag
 London
By: Irisz Agocs,
on 3/1/2008
Blog:
artista how to
(
Login to Add to MyJacketFlap)
JacketFlap tags:
Add a tag

Mi történik, ha az ember felvág egy körtét? Lássunk két felhasználást!
What does happen if you cut a pear? Let's see two different ways!
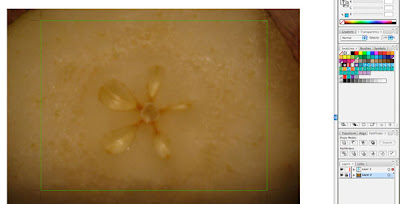 I/1. A körtét lefotózom. Nyitok egy új file-t Illustratorban, és place in paranccsal behívom a fotót. A layert lelakatoltam.
I/1. I take a photo of the pear. Open a file in Adobe Illustrator, and place the picture in, close the layer.
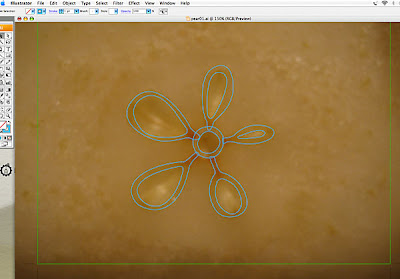 I/2. Egy új layeren a toll (pen) segítségével körberajzolom a magház formáját.
I/2. On a new layer I draw over the figure of the core using the pen tool.
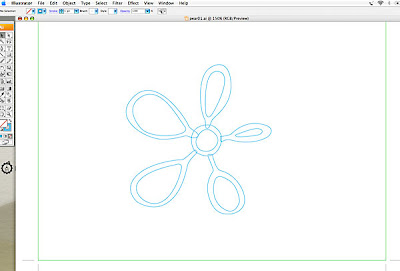 I/3. Az alsó layer-t lekapcsolva megigazgatom még a kis forma íveit.
I/3. Turn off the lower layer, and put right the curves of the object.
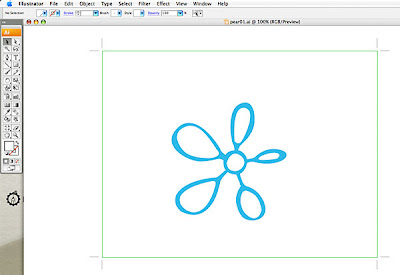 I/4. A külső íveket kék színnel kitöltöm, és a pathfinder panel-en expand paranccsal egy objektumot csinálok belőle, majd kijelölve egy-egy belső formával együtt a pathfinder panelen a divide paranccsal a belső formákat kivágom a külsőből.
I/4. Fill the outer objects with a light blue color. On the pathfinder panel expand into only one object. On the same panel with the divide command cut the inner objects from the outer one.
 I/5. Egy világos kék háttérre teszem egy sötétebb kék színt adva a formának.
I/5. Put the object on a lighter background.
 I/6. A formát megtöbbszörözve, forgatva elrendezgetem egy négyzetes háttéren.
I/6. Multiply the object, size the new ones and arrange on the background.
 I/7. Kijelölve az egész objektumot az edit menüt legördítve rákattintok a make pattern parancsra. A swatches panelen megjelenik a frissen készült pattern.
I/7. Select the object and use the make pattern command. The new pattern is appears on the swatches panel.
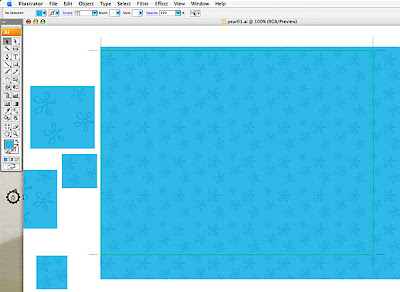 I/8 Egy nagyobb felületen kipróbálom, hogy hogy mutat a minta, és kísérletezgetek a formák rendezgetésével, méretezésével addig, amíg nem leszek elégedett a végeredménnyel.
Minden egyes változtatás után újra mintává kell alakítani a kis ábrát a 7-es pontban leírt módon.
I/8 Use the new pattern on a larger object. Try different arrangements with changing the sizes and places of the small flowers on the background. Always use the "make pattern" command to create a new pattern.
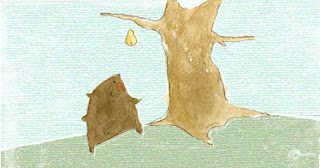
 II. A másik felhasználási módja a felvágott körtének, hogy fotózás után kisebb darabokra vágom, és beleteszem egy süteménybe, aminek a receptjét már tölthetem is fel a remek receptes blogra. :)
II. The other way to use the pear. Make smaller pieces, put into a lovely cookie and enjoy it. :)
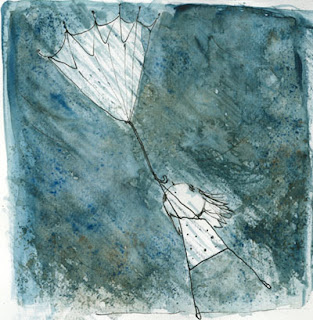
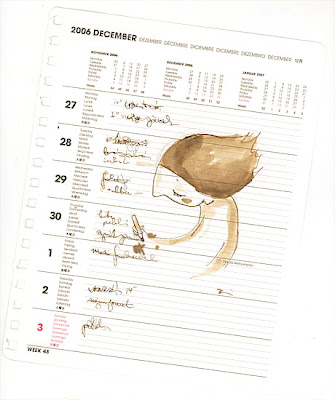
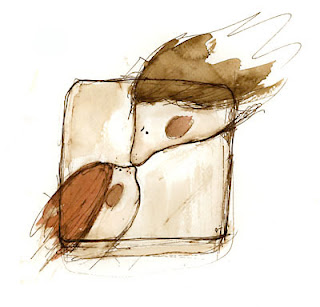 1. I made this small sketch with watercolour.
2. Scanned it.
 3. In PS made a green layer, put some noise on it.
4. Duplicated the picture layer.
5. I made one of them linear burned, and the top one is normal layer with 60% oppacity.
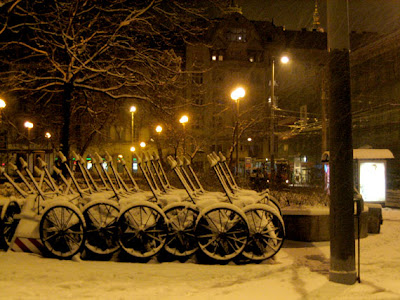
My Comfort Zone for Inspire me Thursday:
I took this picture around Christmas Day, I feel comfort if I see nature is around me :), like when it is snowing. :))
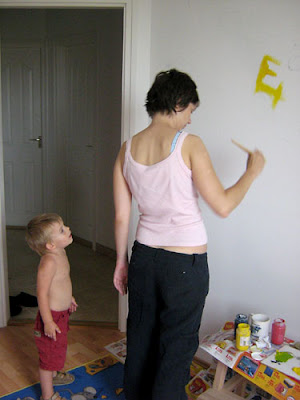
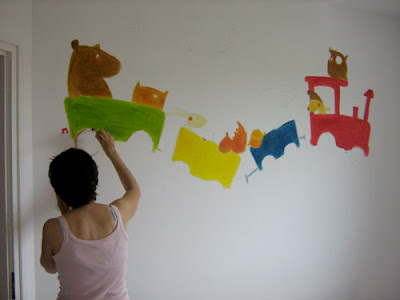
It will be a quite long post, but I really glad that I've got this lot pictures of a wall-painting process.The first step to make a good picture you need to find the best person for working together. I was lucky at this point.
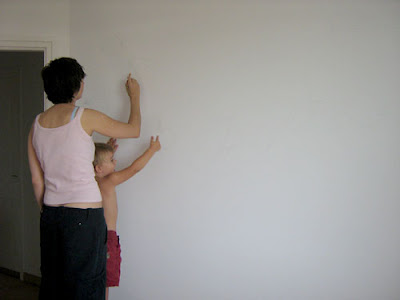 Ez a bejegyzés az átlagosnál kicsit hosszabb lesz, de nagyon hálás vagyok, hogy ilyen sok képet kaptam a nyári falfestésről.
Az első legfontosabb lépés, h. jó kép készüljön, h. az ember megtalálja a tökéletes partnert az együttműködéshez. Én nagyon szerencsés voltam, hiszen Atti barátom társult ebben a vállalkozásban (és ígérte h. ha nagy lesz, együtt fogunk festeni! )
 We were drawing the pencil lines to the wall following our sketches. We really had to focus on our job.
Felrajzoltuk a ceruza vonalakat a vázlataink alapján. Nagyon kellett figyelnünk, arra h. mit csinálunk.
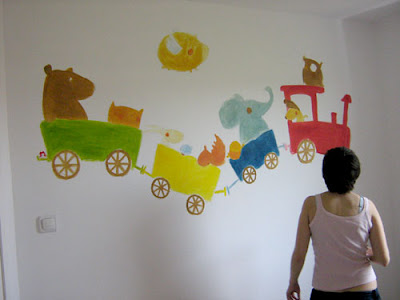
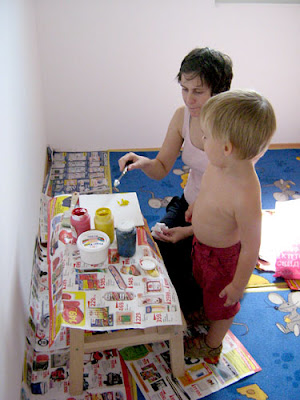 Then we mixed the right colours from the three prime colours. We can do magic easily!!!
Aztán kikevertük a megfelelő színeket a három alapszínből. Simán tudunk varázsolni!!!
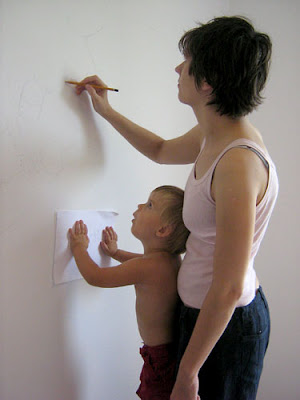
 One of us did the hard job, and the other one was controlling the whole process, and told what to do.
Egyikünk végezte a piszkos munkát, a másikunk meg ellenőrizte az egész folyamatot, és irányította a munkát.
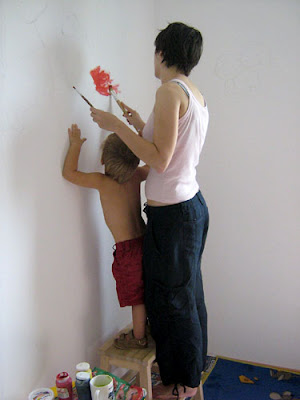 Sometimes Atti (the smaller of us) needed to show what was exactly the job.
Néha Atti kénytelen volt megmutatni, hogy pontosan mi is a feladat.
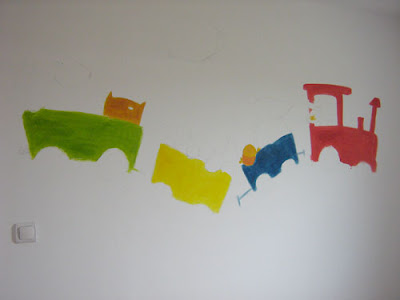 After a while things was going on their own way.
Egy idő után már maguktól mentek a dolgok.
 My friend was getting tired of the hard work, so he had to had a short nap.
 Attit lefárasztotta a nehéz alkotó munka, és elvonult egy kis pihenőre.
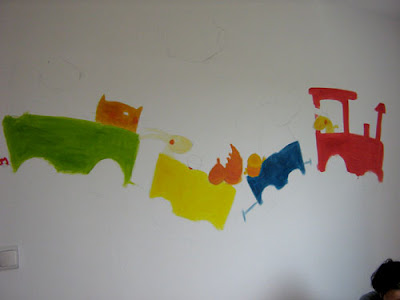
 The rest of the job was easy as a pie.
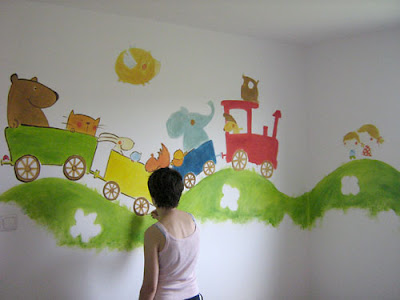 A munka hátralévő része már gyerekjáték volt :) .
 This is how easy to make a wall-painting!
Nos, ilyen egyszerű falfestést készíteni!
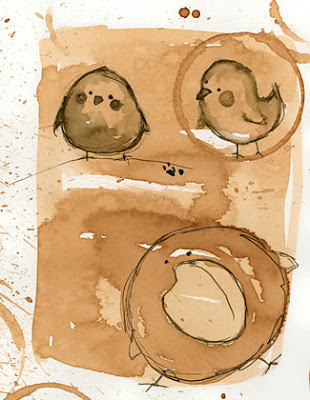
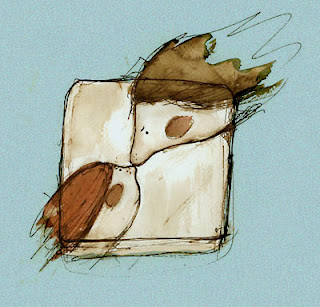
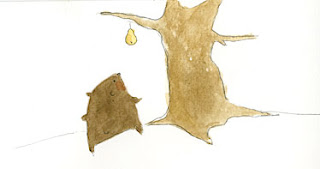
Painting with coffee is fun, but it is not too enduring, because it has no high quality pigments. But to use it for digital works it's perfect!
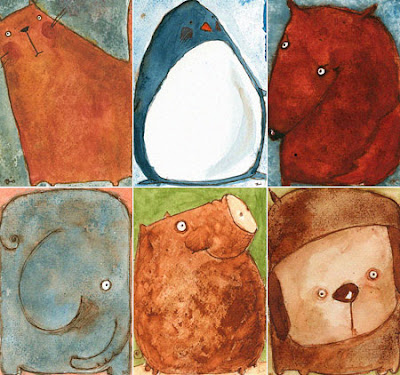
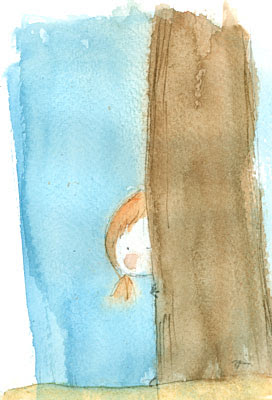
I have a series of postcard with wall-to-wall animals on.
Képeslap sorozat faltólfalig állatokkal.
Sometimes just one color give you more. I use blue and brown most of the times.
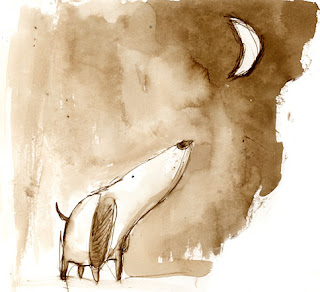
Néha egyetlen szín többet ad a képhez. Én legtöbbet kéket és barnát használok.
1. First I draw the character with pencil and then I put some watercolor on to.
Then I scan it.
1. Cerkával megrajzolom a karaktert, majd nagyon kevés akvarellel kifestem, majd szkennelem.
2. ... then I do some flikk-flakk in photoshop, and the picture is ready! :) There are so many alternatives in ps to create a mood. I really enjoy to play with it.
2. ...aztán egy kis flikk-flakk photoshopban és már kééész is a kép. Rengeteg a lehetôség hogy különbözô hangulatokat alakítson ki az ember, nagyon élvezem hogy lehet vele játszódni.
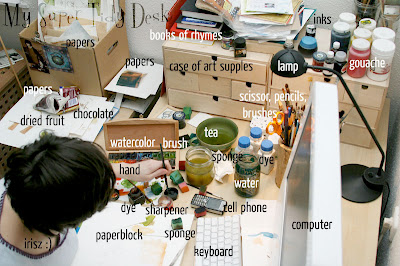
Here are all the things that I really need to work. Click on to the picture to enlarge it and see the small secret details. :))
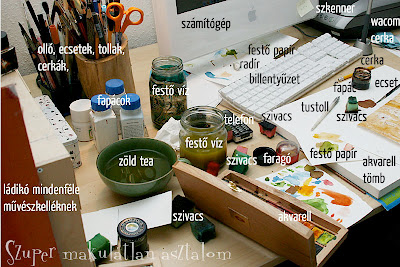
Íme az asztalom rajta a festéshez és egyéb munkákhoz szükséges és nélkülözhetetlen tárgyakkal. A képre kattintva nagyobb méretben megtekinthetôek a titkos részletek. :)
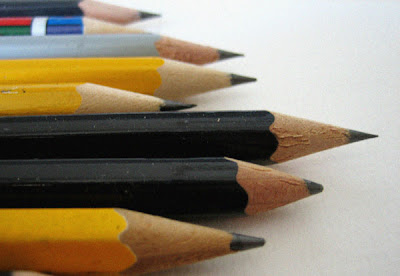 I usually use hard (HB) pencils to draw the lines before painting. The best type of these the souvenir pencils, they look fancy, and you don't really mind if it get short in very short time.
It is nice light and does not smear the paper as I draw. After that I paint the outlines, or just draw it with quill it is very easy to erase the pencil. Most of the times I just leave the pencil lines if it looks nice, and there are cases when I don't use any other medium for the outlines, leave the pencil, like on the picture below.
When I draw studies the softer pencils are lot better, like 6 - 7 or 8B.
 A festett képek előrajzolásához kemény hábés cerkát használok. A legjobbak egyébként a reklám / szuvenir ceruzák erre, mert színesek, viccesek, és nem annyira fájdalmas látni h. milyen mértékben megy össze. :)
A kemény cerka itt azért jó, mert nagyon halványan lehet vele rajzolni, nem maszatolódik, és ha ráfestek vagy ráhúzom a körvonalakat tustollal, utána jól kiradírozható. Legtöbbször rajta hagyom a cerka vonalakat is a képen, szeretem őket. És van olyan is, h. nem is húzom ki mással a körvonalat, marad a cerka, mint a fenti képen is. Ehhez azért érdemes elővenni egy puhább ceruzát, ha pedig tanulmányrajzot készítek, akkor természetesen a hattól nyolc bés cerkák kerülnek elő. :)
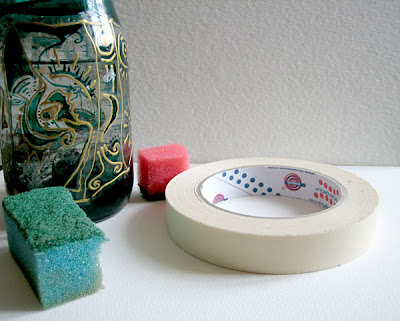 If you use watercolour block that has streched paper inside, you no need to do anything before painting.
But usually you should strech the paper before it get wet.
1. Put some water onto your paper with a sponge or a brush.
2. Wait for a few minutes untill it is nearly dry.
3. Tape the four side of your paper with your paper adhesive tape, try to strech your paper as much as you can. And later won't be lumpy.
4. Paint your pic. :) That's the best part!
5. Wait untill your paper get totally dried.
6. Take off the tape, and enjoy your work! :)
That is my recipe, but I think there are lots of different useful techniques.
Sometimes I start to paint, and I do the taping after that I paint the first level. And other times I miss the taping, but afterwards I very sad about that.
Ha olyan az akvarelltömb, amiben a lapok gyárilag egymáshoz ragasztottak, akkor nincs semmi teendô festés elôtt. Az egyedülálló lapokat viszont fel kell feszíteni festés elôtt, h. ne hullámosodjon fel az egész, és a végeredmény is egy (viszonylag) egyenes kép legyen.
1. A lapot kevés vizzel benedvesítjük, szivaccsal v. ecsettel.
2. Néhány percet várunk, amíg már csak alig marad nedvesség.
3. Mind a négy oldalát leragasztjuk papír-ragasztószalaggal a lapnak, igyekezve minél jobban feszíteni a lapot.
4. Festünk egy képet. Ez a legjobb rész a felfeszítésben :)
5. Megvárjuk amíg a lap tökéletesen száraz lesz.
6. Leszedjük a ragasztószalagokat, és örülünk a jól végzett munkának! :)
Nekem ez a bevált módszerem, biztos hogy ezenkívül is sokféleképp lehet jól csinálni.
A titok azonban, h. többször nem a festés elôtt feszítem fel a papírt, hanem az elsô nedvesebb réteg, például a háttér felvitele után, várom meg h. kicsit szikkadjon és ragasztom le. Néha pedig nem ragasztom le, de akkor szomorkodni szoktam emiatt késôbb. :)

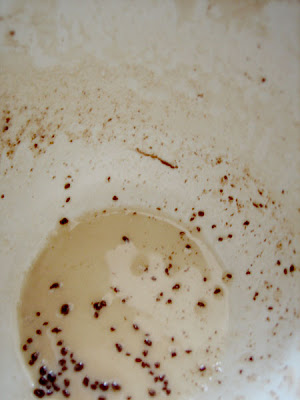
Everything is around me inspirate me, I like to take pictures in our kitchen even I am not a really good at photoing. I really like different textures for example the cacao which was left after my hot chocolate.
Bár nem vagyok túl ügyes fotózásban, azért szeretek mindenféle képeket csinálni, fôleg a konyhában. Nagyon tetszenek a különbözô érdekes véletlenszerû minták, amilyen pl a kakaó maszat a kiürült forrócsokoládés bögre alján.
By: Irisz Agocs,
on 3/27/2007
Blog:
artista how to
(
Login to Add to MyJacketFlap)
JacketFlap tags:
paper,
Add a tag

I like to use blocks rather then papersheets, because I paint in small size and a big amount. My favourite is Fabriano's watercolour studio 200 gm/m2,colled pressed, 24 x 32 cm, and there is a 75 sheets version. Most of the blocks have 20 sheets.
For some special pictures, when I use lots of water I use 300 gm heavy paper, I need to use more paint in this case.
I need to strech the papers usually, but some of the blocks the sheets are glued togeather, so You don't need to.
Általában akvarelltömböt használok, ez azért van, mert leginkább kisméretben de nagymennyiségben termelem a képeket:)
A számomra leginkább bevált termék a Fabriano gyártótól a Studio névre hallgató sorozat 200 grammmos 24x32 centis és ami a legfontosabb, 75 lapos verziója. Ez jó sokáig kitart. A legtöbb tömb 20 lapos (nem is értem!). Minél több lap van egy tömbben, annál biztosabb h. nincsenek körberagasztva a lapok, így magam feszítem fel ôket.
Ha sok vízzel való gyötrést igénylô képet készítek, akkor 300grammos papírt használok, ilyenkor jóval több festék fogy.
By: Irisz Agocs,
on 3/22/2007
Blog:
artista how to
(
Login to Add to MyJacketFlap)
JacketFlap tags:
supplies,
Add a tag
View Next 7 Posts


Happy...happy..happy cats!! Love the colors...Will you use more purple now?! GREAT! And Congratulations!
I'm not sure about using more purple. to be honest I don't use it on any other works. I have my favorite colors and I just can't use any others. :)
Your illustrations are fantastic! They never cease to leave a smile on my face. These cats are great!
Oh these are wonderful...I just love them.
these are marvellous, and congrats to you.
What absolute cuties! I love the hanging look!
Gemma
Oooh, love those cats! :D
Love,
Carra
I love them! They're so funky and cute!
I love your whimsical cats!!!
Oh my....how cute. I love it.
I really love these. All your work is fabulous. Makes me want to get back to my watercolors.
Cute cats!
These cats just make me giggle. I love their quirkiness... and the colours are such fun!
Oh, your websites are all great! I love your work... i don't know how i found you but now i'm here watching all your drawings and paintings, and all i have to say is they are wonderful! congratulations!
kisses from argentina. CHAU!
Lo que uno descubre mirando hacia arriba y que pasa desapercibido.
Muy bellos gatos en el tejado.
Saludos.