Login or Register for free to create your own customized page of blog posts from your favorite blogs. You can also add blogs by clicking the "Add to MyJacketFlap" links next to the blog name in each post.
Blog Posts by Tag
In the past 7 days
Blog Posts by Date
Click days in this calendar to see posts by day or month
Viewing: Blog Posts Tagged with: Workspace + Tools, Most Recent at Top [Help]
Results 1 - 10 of 10
How to use this Page
You are viewing the most recent posts tagged with the words: Workspace + Tools in the JacketFlap blog reader. What is a tag? Think of a tag as a keyword or category label. Tags can both help you find posts on JacketFlap.com as well as provide an easy way for you to "remember" and classify posts for later recall. Try adding a tag yourself by clicking "Add a tag" below a post's header. Scroll down through the list of Recent Posts in the left column and click on a post title that sounds interesting. You can view all posts from a specific blog by clicking the Blog name in the right column, or you can click a 'More Posts from this Blog' link in any individual post.
oddly, this accidental screenshot was taken when my screen was actually busted and looked totally nothing like this. iphone magic, i guess.
My iphone died today. I dropped it on a tile floor. I drop it all the time, but today I guess I dropped it in some extra-special way. All the stars aligned, and the screen totally went. I watched in horror as it happened—I actually felt like I was in a movie. I think that all speaks volumes to my iphone attachment, for better or for worse, and how, maybe (and I'm looking for the silver lining here, but justmaybe) it's not a bad thing for me to view this whole debacle as an opportunity for a little self-examination.
For one thing, I do not NEED to use my phone as much as I do. Yes, it is an indispensable tool. Yes, it is the biggest technological revolution since the computer and the internet. Yes, I do need it—there is no getting around that— it's the swiss army knife of productivity for me.... BUT (you knew this was coming!) the iphone does not have a conscience. It does not have an opinion. It can't tell me what it thinks I should or shouldn't spend my time doing. (Kazoo, anyone? Flinstones?) It can only go where I tell it to go, do what I tell it to do. That, unfortunately, can sometimes add up to a fair amount of time goofing off. Time that would be much better spent with my sketchbook, or my notebook... or even just hanging out with my dog more. I'm certain of this. Sure, I mostly use it for productivity-laced activities.I read helpful e-books on it. I have so many tools on it that help me communicate with others, deliver files to people, and generally keep things running well. The phone itself even assists me with off-line creative work in several ways. And when I do play a game, it's often Draw Something, which I consider a casual but engaging creative exercise, not a waste of time.
But... my iphone can't tell me to knock it off when I take the off-ramp into junkdom (Hello, Us Weekly!). It can't coach me to curb my Instagramming. (Hey I love Instagram, but I also love pie, and if I ate pie the way I Instagram..) It doesn't set a timer when I'm making photo collages in PicFrame, my latest obsession. (Think they should make an app for that?)
So, I'm coming clean: On some level, my iphone addiction actually bothers me! Yes, It is an uber-productivity tool, but it's also an uber- time-suck-and-goof-off tool if one is not really careful about it. This is something I've been aware of. It's not a secret. But here I am, now, in this situation. And it's really a great, gifty opportunity to investigate my phone habits and take steps to revise them where needed. I'm not saying it's great that I dropped and accidentally killed my phone. But I am glad that I'm self-aware enough to see this as a chance to make some small changes that I think will add up, and eventually improve— ironically—my productivity. Definitely, when it comes to sketchi
I've been planning to experiment with mounting my art prints for quite awhile now. So, when I recently decided to mount prints of my digitally-created art for mixed media on panel pieces, I searched for a good tutorial online. Guess what? I did not find one decent tutorial to use as a guide.
I Googled and Googled... I tried different phrases, different combinations of words... all of my search tricks... Still, I came up short. I didn't let that stop me! I decided to just try it myself, using my best judgement, and look at it as gained knowledge if successful, and a learning experience if not. Well, I'm pleased to share that it went just fine, maybe even better than fine! I'm very happy with the results, and now I have a new skill under my belt. In order to share with you, I took some photos for you, in case you wish to try it, too.
Here are the materials you should have ready to go: • Artists' painting matte medium of your choice (make sure it is the kind you use during the "working" phase of a painting) or another acid-free adhesive of your choice, but nothing too thick- should be around the consistency of heavy cream, give or take.* •Foam brush •A brayer •A self-healing mat board •Exacto knife •Wax paper, Reynolds Freezer Paper, or some type of wide paper with a waxy side •A bone folder (used in bookmaking and for other paper products) In this tutorial, I refer to "braying", but the bone folder can be used fairly interchangeably with the brayer, though I recommend having both on hand as each of their strengths compliment one another.
*Please note: Part of why I waited so long to try this before just biting the bullet and experimenting with mointing art prints is that I was concerned that my art print would bleed ink all over the place and there was an astounding lack of information regarding this possibility online..
3 Comments on How to mount an inkjet print onto wood panel, last added: 10/15/2011
Thanks for the step by step. Have always wanted to try this with my own artwork but hadn't been able to find out what to do until now. Found you via Holly's Blogging Your Way Course. I've signed up too.
Also, noticed you are friends with Ellen Crimi Trent and Carol Eldridge. Small world. Looking forward to chatting soon. Cx
Hi Chris! How nice to "officially" meet you! Ellen has told me about you and your beautiful art work in the past. I admire your work! :) Great stuff! Thank you for commenting. How cool that you are also in BYW- I look forward to chatting with you over there!
This is awesome Kathy! Thanks for taking the time to explain it! I went to the RISDI art show today and a girl had done this to some of her fine art-and it looked great but i had no idea how it worked-now I do!!
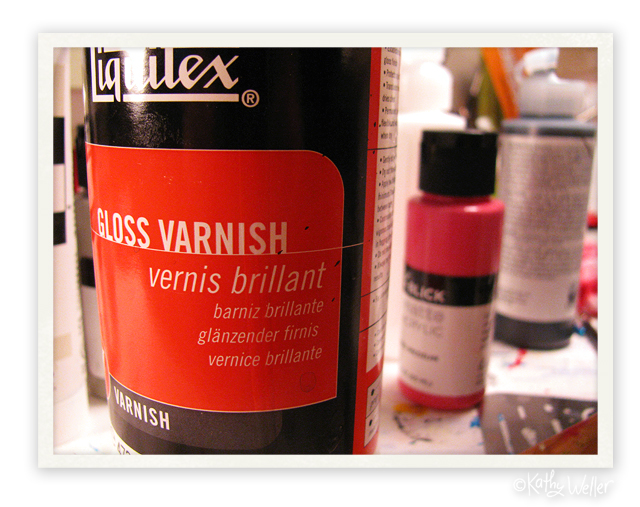
Today, I'm sharing some of my favorite painting products! I often do digital art and I LOVE it but I'm still analog to the core as well. Drawing of the pencil, paper, and pen and ink variety has always been my be-all, end-all. Hey, I was a Fine Artsmajor in college, after all! So, no matter how much I love doing art on the computer, "analog art" will always be an integral part of my life and my artwork. I've been doing it a long time and have tried many products on the market in the realms of my favorite media. There are some brands and products that haven't failed me yet and I have stuck by through the years. I also have a new favorite or two, down the page. Hey, if you've made it this far and you're still interested, please be my guest and read on! Since I enjoy both acrylic and watercolor painting, I have my favorite in each category. For watercolor, I love Holbein tube paints the best. I have a little Daler-Rowney mixed in there as well, which I have found to be solid in terms of overall quality. For acrylic painting, Iuse lighter-bodied paint for most of the detailed painting work. For this, I love the Golden Fluid Acrylics, which offers an excellent variety of dense, saturated colors in a lighter consistency of paint. A close second is the Liquitex Soft Body line, which is a little thicker than the Golden. I sometimes need to thin them a bit. However, with these richly pigmented colors and superior consistency, they are easily thinned without any pigment separation or over-wateryness of the paint. For grounds and covering larger areas, I use a heavy body paint, and Liquitex brand Heavy Body paint is easily my "go to".
Above left: this Liquitex Gloss Varnish is truly excellent. Used for the final glazing step for acrylic paintings, this is not a workable medium. I recently tried it for the first time, and I'm extremely happy with the results. Above right: A Dick Blick store recently opened near me, so I had to try their line of acrylic matte thin body paint. I usually think twice before buying a store brand simply because the quality is just not always there (quality of "house products" varies greatly, depending on the chain and the product itself, I find), but it was so reasonably priced and the variety of hues so enticing, I simply had to give it a shot! Guess what? So far, so good!
Not shown: I've been painting on the Ampersand Gessobord line of wood box panels, and these are the finest overall quality that I've tried of the boxed panels. I have recently tried the Dick Blick version as well. It's not quite as Rolls Royce-ish as the Ampersand, but it is still very solid - like maybe it's the Volkswagen. It's nicely made, and on the flat, non-boxed variety of pan
0 Comments on Geeky Painting Product Review Chat! as of 9/26/2011 10:21:00 PM
Above: the first (rejected) February layout illustration for "The Months"
Before I bought my Cintiq tablet, I had been working on a set-up that basically could not sustain me in my career as a children's illustrator in the 21st century. I was working on a Powerbook G4 and used a 3x5 Wacom Graphire tablet. It was my first lap top. When I bought it, I was under the impression that it would support doing heavyish graphics. Due to the portability factor, I went for it. Well, I was right, It did support graphic files, even really large ones. But what I did not anticipate was how hot the machine would get. That was something I discovered pretty quickly. But a more nervewracking problem with doing artwork on the machine was an issue of camouflage - the screen "trickery". The matte screen just did not show all the lumps and bumps in a working illustration. It read light yellow as white. It read light blue as white. Light grey? White again. And the sad part is that, half the time, I did not even realize it until WAY after the fact. I remember: I would make an update to my web site. Then, next day, I would go look at what I had done on a regular desktop computer monitor, live and online. I'd be absolutely horrified that the graphics had some blatant mistakes in them. Ugh!
I discovered that I hated using my lap top/tiny Wacom tablet for design work. I also discovered that I simply could not get used to illustrating with the small Wacom with the laptop screen. There was just something completely uncomfortable about the tiny tablet / lap top combo that eas pretty much unbearable. I'd used Wacom tablets (6x8 mostly) for years preceding this point, so it was not a "getting used to it" issue. It was just that the combo was not working, and it wasn't going to start working. If I was going to move forward in my career, I simply had to get the right tools—NO if's, ands or but's!
I had an experience which propelled me quickly to decide to make these major changes. It happened during my work on the book "The Months". Throughout the entire job, things on my end could have gone SO much easier had I had the proper tools and hardware. Not just the Wacom/lap top situation: I desperately needed a large-bed scanner, but I had only a little 8.5 x 11 one, and there was just no time to work on acquiring the larger-sized one that I needed during the working time frame of the job. I completed the project of course, and the book did see the light of day! But I learned some very valuable lessons. One of the most important was to suck it up and get the right tools to do the job right. After so many horrible scans and terrible time trying to retouch my watercolor paintings with the lap top / tiny Wacom Graphire combo, I decided, ENOUGH! I was a professional and I was going to buy the best tools I could. I was worth it, my work was worth it. I was not going to continue to compromise my goals and art career due to the lack of the equipment I needed to function in the present landscape.
Around that time, the Wacom Cintiq was the newest offering. I hemmed and hawed for months, but after chatting with Carlyn Beccia about the Cintiq, I was willing to jump in, sight unseen. I felt that, if I knew that Wacom tablets worked for me in general, then the Cintiq would be a great step up. I knew there would be a big learning curve, but there is a learning curve with everything. Honestly, if there's no learning curve with something new, then where's the c
9 Comments on Illustrators: Get the tools that you need to succeed, last added: 2/24/2010
Hey Kathy, wise decision. I made a similar one recently. My older wacom was cracked, scratched and the pen nibs were so worn down that I knew I needed new gear. My computer has a really wide screen and I am very comfy with the intuos so I decided to go with the new intuos 4. LARGE.
Since my computer screen is much larger than the largest Cintiq I rationalized that the intuos would be better for me and my budget. That is because my full time job is freelance illustrator and there is no other day job at this point.
Although I know that someday I may want a Cintiq... the new intuos 4 is dreamy. It comes with 10 extra pen nibs and a really sleek new design.
As a digital artist I also sprung for a wide body printer with archival inks. The tools we use are really integral to our happiness at work and our happiness at work is integral to our ultimate success.
Hi Ginger! Thanks so much for commenting and sharing your own story. The new Wacom Intuos 4 sounds sweet! Good for you for upgrading your tools.
I totally agree that the Cintiq is really spendy. Hey there are totally other options-whatever works for the individual. If what you are currently using feels right then why fix it, if it ain't broke. It takes such a lot of trial and error to get comfortable with a digital workspace plan - finding the right set up for the individual is so imperative to productivity. If I hadn't been in such a bad place with my set-up at that particular time, I probably would not have splurged on the Cintiq...but I was, and I did, and I'm very happy with it!
I'm really glad you got the printer too! I did not mention this because it was not really relevant to any of the experiences I shared in my post, but I also upgraded my printer to a printer that could print up to 13 x 19. Just having the right tools that you need, when you need them, makes a huge difference. Congrats on your toys as well!! :)
Kathy, great post and better insight into the mind of a successful illustrator.
I'd like to see the full breakdown of gear that you're now using, computer, printer, scanner, etc. too to put it all in perspective.
My full time job is graphic designer/web developer. I use a 15" MacBook Pro with 4GB of RAM. I connect to a 23" Apple Cinema Display and use a 9x12 Wacom Intuos 3. My scanner and printer aren't worth mentioning as they're on the "Upgrade next" list.
I like the portability of the MBP, but have been considering getting one of the new 27" iMacs with more CPU horsepower and way more RAM.
I'm going through this process as the moment actually. Got a great wacom tablet but need a better macbook and definitely a better scanner! What model scanner did you get? I'm also considering a new printer but I hear it works out cheaper to print elsewhere in most cases...
Hi Jim, Hi Tigz, Hope you don't mind but it makes sense to answer both of your questions in one reply. Here is my current set-up:
-Imac 24" Intel Core 2 Duo 3.06 Ghz, 4 GB RAM I first looked into the Mac Pro but quickly realized that it was not for me. Not only was it extremely expensive but it was more computer than I needed. (I'm not making video games.) Not only that but I'd chatted with several designer/illo friends who just loved the imac and said that it worked great for them. I've been very happy with mine and I think it's a lot of computer for the money.
-2 external hard drives (one for Time Machine, one which I actually work off of)
-Subscription to Mozy (off-site back up service -- backs up all files regularly)
Right before I purchased the imac I had a hard drive failure in my Macbook Pro (this was my next computer right after my Powerbook G4 - I still stuck to getting a laptop - hadn't learned my lessons yet completely ;-) But with the Cintiq screen, I no longer had to use my computer screen for visuals, so it was no longer an issue. I've since moved on to my imac (early 2009), and I use laptop strictly for goofing off or answering emails. :) )
-Cintiq 21" monitor/tablet
-Epson R1800 printer My printer was $400 new. It is a great printer and it did not cost a lot as far as printers go. What costs a lot is the Epson ink. That's life! I've had printer for a couple years at least and it still works great.
-Epson Expression 1640 XL scanner (discontinued). I bought this model on recommendation from my step-mom who is also a graphic designer. She loves this scanner and I see why. I bought one for 1K refurbished. It's an excellent scanner. I've had it about three years so far and no problems. Epson has similar models on their site.
Hope this helps paint a better picture for you guys! :) Thanks for your comments and for visiting!!
Hello! I too want to get a Cintiq and have been thinking about it off and on for a while. I haven't tried one yet, but as I have started to draw/sketch all on the computer, I would like to try one.
The only thing I am worried about is that the lines I draw match up with the motion. I have the 6x8 tablet now and it has worked good, but I want more control of where I start/stop my lines without having to adjust points all the time. How has your experience so far been with this? I am kind of picky when it comes to nice fluid lines (lately have done more loose line work) but overall for the spot illustration stuff, I prefer a nice flowing line with my set of brushes.
Thanks for the story on your experience with buying the cintique. I think we are always dealing with how to improve/further our work...and also be able to purchase stuff. After all, even though it is a tax write off, we still have to pay for it..hahah
Korey, Cintiq offers you real-time drawing. So you are drawing/painting on a computer monitor. Any lag time a person might experience is a RAM problem or a hard drive issue. the Cintiq is made to draw the line as YOU draw the line, as though you are painting on a canvas. Well, sort of.
andothersuchthings-You're welcome! Glad it helped. :)
I like your post. It's amazing how much easier doing art is when you have the right tools! I was in a similar situation a while ago... actually it was worse I didn't have any kind of graphic pad. I had to do a bit of convincing, so that my husband knew how important a tablet would be to my artwork. I ended up with a Wacom Intuos 3 6"x9". So much easier to draw/paint on a computer with this. I would have loved to have a Cintiq, but it was way out of my budget. Now to buy a computer newer than 8 years old!
I know you aren't using it for artwork now, but there should have been some options on your Powerbook to adjust your screen so it looked a little closer to what it looks on other monitors. Of course every monitor is different, so you can only adjust things to suit other people so much. I once did a really dark drawing, and posted it online, only to find out later there were light circles that appeared on every monitor but mine (my monitor was set too dark, ugh).
I'm glad to see this post because it makes me feel a little more justified in a few of the expensive decisions I've made in the past. I'm not published yet, but I'm hoping to change that soon. It was doubtful it would ever happen without the right tools!
Switching gears from digital talk, I thought I'd share some tips on cleaning a Rapidoraph pen. I have used them for 20 years and I love them.
Take the pen apart When you take the pen apart, have a wide-mouthed shallow bowl handy, or a workspace that is safe for small messy parts so you don't lose any pieces. Line your work area with paper towels to keep tidy.
First, unscrew the colored ring on your pen casing. Then, take apart the pen tip. There is a small tool that comes with the pen. It's called a "nib key". It looks kind of like a black nut (hardware - nuts and bolts, I mean). Use this to take apart the nib tip part. It's easy to do. This nut-like piece fits onto your pen over the tip. Once it is fitted on, just unscrew the tip part apart. (If you need a visual or further explanation, click here and scroll down a bit.)
Soak the working parts Soak just the pen-tip working parts (not the casing) in a Rapidograph cleansing solution such as this one. You may soak in either a mix of solution + water or straight solution, depending on how much cleaning power your pen needs. You can do the soaking in a very small vessel with solution to cover, or almost cover, the soaking parts. This way, you will only use just the amount of solution you need to get your pen clean, and no more. Make sure to cover it to keep it safely away from pets or spills. Depending on how tough a job your pen is, you may soak it for anywhere from a couple hours to a couple days, give or take.
You can do just these steps above and let your pen parts soak for awhile. Then, rinse by running under cold water. Test out your tip on some paper towel occasionally, until you can tell that the tip is clear of clogging and it runs cleanly.
This alone is the general method to clean your pen. There is an additional, optional step you can take. Totally not necessary, but works very well: the Rapidograph syringe. The Rapidograph pen cleaning kit (with syringe) You can buy a great Rapidograph pen cleaning kit from the creators of the original Koh-I-Noor Rapidograph pen. It comes with a pen cleaning solution which you would use in the first step of cleaning. The second step: you use this balloon type of gadget that you attach to the pen nib, and you get to squeeze the balloon to force all the ink out of the pen tip to help clear out your pen or water/solution in and water/solution out over and over. This uses a suctioning action to clean your pen. (The suction/balloon squeezing works like a turkey baster.) It's a lot of fun and it is very effective! It works very well to get your pen squeaky clean. (Did I mention it's fun?) (If you do this method, mix up more solution/water just for the suction cleansing.)For more information on this, instructions do come with the kit (and it is not difficult).
General DO's and DON'T's for handling/using your Rapidograph pen
•DO Be really careful with the tip. Don't bang it or bend it. Excess tapping on the tip is a bad idea as well. They are strong enough for drawing but they are not invincible and I have killed a tip or two in my time. The pens are expensive to replace, too. So treat them with care.
•DON'T shake the pen to start ink flow. This will kill your pen. To start ink flow, hold the pen in one hand vertically (tip down). While holding pen firmly, ta
0 Comments on How to clean your Rapidograph pens as of 2/1/2010 7:56:00 AM
Here is a short video blog I put together for you. There was lots of Cintiq chat on Twitter the other day, and it inspired me to show you mine and explain a little of my process with it.
I want to clarify a couple of things I talk about. Double-sized files I just started working on 2X larger files, it is not a regular something I do all the time. It is kind of an experiment and so far it seems to be working well. Personally, I am thinking "fabric" right now, so for an illo that needs to be especially crisp and sharp as it is printed on fabric, I think it's a good way to go or at least a good thing to try. But, as long as it looks GOOD at 100% (and you are sure of this, because you have done your print-check :) ), then 100% is perfect! In the case of illustrating in Adobe Flash in particular, I think working a little extra larger as needed (working for print output) is a not a bad thing because, although the line is vector, if you use the "Brush" tool exclusively like I do, the line generally has more "character" to it, more variation, than a precise line a la Illustrator. This can be a double-edged sword at times. The verdict is NOT totally in on working extra large yet... But it IS what I am doing right now. (It is ALL trial and error, isn't it?)
"If I am doing a poster, I do it at 100% and deliver it that way..." What I mean is, I will make my actual working file at actual size to print instead of twice as big. I will not make it, say, 48" x 48", if it is actually going to print at 24" x 24". I will instead work at the actual to-print size, 24" x 24". The reasons for this are two-fold. 1) I find that inking for print in Flash larger is a little more forgiving with any line variations than smaller, more detailed work like say, a 5.5" x 8.5" oversized postcard-sized piece of artwork. 2) The file size would be impossible to work in if it was 48" x 48". I think my processor would be smoking.
Anyway, Hope you like the vlog. If you have any questions at all, please post in
3 Comments on Video blog: Using the Wacom Cintiq and a brief diatribe on digital inking (for print output), last added: 1/31/2010
I have recently been introduced to Twitter by one of my grandchildren and I must say I am truly enjoying it. Gives me freedom to stay in touch with all my extended family. Gilly
I enjoyed your video and echo the concerns about digital artwork looking like you WANT it to look. I often work at 200 percent but check the finishes by printing a sample before I turn in the work. It is amazing what shows up that you didn't want to place in your image (sometimes.) My thoughts about Cintq were muddled with thoughts about a new intuos 4 tablet. Because I already have a 27 inch computer screen and am comfy with the tablet I ordered a new intuos 4 and pen. I think when I earn enough from my next book I'll still spring for the Cintiq, but for 1/4 the cost I can be happy with my tablet ... for now...
I hope you will share more of your adventures with your cintiq~
*drooling some more* :-) Thanks Kathy for answering alot of questions regarding the cintiq. I'm convinced even more that if I am going to get it the 21" is the way to go; really beneficial to see in "real" size. Hopefully I will get one later this year. I'm so close in splurging!
And I'm holding the banana peels! My computer is on standby... in triage. It refuses to wake up from the nice nap it began yesterday. It seems to start... then, zzzzz.
I did all the 101 stuff, to no avail. Now it is on to 201...
I called Apple Care. I, being an extra paranoid non-technical, 18-hour-a-day-computer-needing person, always purchase the three-year Apple Care protection plan every time I get a new machine. I thought about it last time. I'm glad I followed through. If there is anything worse than being in computer triage, it's being alone on a raft in the middle of the Pacific in computer triage. I'm glad I saved myself there.
I will need to boot my computer from the utility on the CD used to install the current operating system I'm running. That is going to have to wait because I do not have that CD with me right now. So until then, we will find out if...
A) My computer just had a little mental splinter and the utility disk works it all out! The End!
B) I have to reinstall my operating system and wipe my hard drive clean as a baby bottom. (Oh well, thank goodness for Time Machine.)
C) My computer was the unexpected extra-special BBQ'd treat at the end of the Independence Day long weekend! ...and it is now a crispy double-fried masterpiece??
Stay tuned for the next episode of the saga of Kathy's computer's monkey infiltration.
2 Comments on A barrel of monkeys..., last added: 7/8/2008
okay I hear ya which is why I just bought the Ferrari, my new imac 24" 3.06 since my computer was having problems too and I had to spend about 2 hours at the apple store to fix it!!
By the way I just though of something silly while sitting here and maybe you got it allot but hey I am a silly gal, Kathy Weller couldn't be SWELLER!!! He He just embrace my crazy humor!!
Hha ha ha ha ... ok Ellen, you made me smile despite my computer E.R.!!
I am currently reinstalling my operating system and wiping my hard drive in the hopes that i can salvage my machine... truth be told though, it's been two years and this could be the beginning of the end... we shall see!!! I better start allotting savings for a new machine. ;) So Imac is treating you well I see!!! A viable option. I wll keep my eye out.
I know, fall is the perfect time for apples, not summer... oh well. Today I say summer, because I wanted to post them!
My keyboard died today. RIP, keyboard. So it's off the to the Apple store to buy another. I seem to have a keyboard-killing gene. I go through quite a few more than most folks do, I suspect. Maybe I bang on the keys too hard? Maybe I spill too many snacks? Who knows. I do clean my keyboard every now and again, but I'm not sure how much good it does me.. or rather, it. Anyway, life is complicated for my keyboards, I guess. It's survival of the fittest. A struggle for life. Just like "Wild Kingdom"... but in my studio...
(I'm typing this on my laptop keyboard, by the way.)
Wish me luck at the Apple store. My main goal will be to leave with what I go in there for... and ONLY what I go in there for.
Hey, those summer apples above really DO fit the theme today, after all..
2 Comments on Summer Apples, last added: 6/26/2008
oh lord I spent last friday at the Apple store and was glad they could back up my stuff and fix the problem, but my power book is having operating problems so its time for a new computer. This time no laptop its an imac for me but they do not come cheap!!
SO sorry about your computer woes!! Ack!! What a nightmare. Thank goodness you were able to save your stuff. Scary!
I'm in the exact same boat, I am on a MacBook Pro but next time around I'm switching to desktop model. Did you see how much the tower is?? Eek!! I'm probably going for the imac too, next time. Happy shopping!!
Disclaimer -- I am in no way, shape or form affiliated with Digital Graphics Resources at all (except for being a past customer, and a happy one at that), but I *am* a big, gigantic, honkin' Cintiq-head, and I so enjoy pushing the Wacom Cintiq on other artists. :)
That said, DGR is currently selling the Cintiq 21UX with a $500 mail-in rebate. That's a mighty fine deal - 20% off. DGR is where I purchased my own Cintiq and I had a very good experience with them. They are independent and customer-service oriented. :)
9 Comments on Wacom Cintiq Rebate, last added: 4/22/2008
As one who's looking to buy one this year, that's a great deal. Thanks for the head's up!
Kathy Weller said, on 4/15/2008 12:44:00 PM
Thanks PJ!! Oh, and you remind me -- I should mention that the rebate is only for a limited time -- ends April 30, 2008!!
Diana Evans said, on 4/15/2008 9:21:00 PM
thanks for the tip Kathy....this is on my wish list...
Ginger*:)* said, on 4/16/2008 5:56:00 AM
Well well Weller!~ Thanks Kathy.
Eric Orchard said, on 4/16/2008 7:12:00 AM
You use a Wacom? Your stuff is so organic!
Don Tate II said, on 4/19/2008 9:12:00 AM
I may be looking to buy this year too. Mine is 6-years old. Works, but it's sometimey.
Kathy Weller said, on 4/22/2008 8:42:00 AM
Yup I hear you Don. It's like buying a (used) car, too. It's a chunk o change! $2,500. yeesh. And the deals are slim pickin's. I can say now, worth the dinero, but I think there are plenty of fence-sitters out there who maybe are really comfy with the way they use their wacom NOW, in which case it would be a wait and see. :)
Thanks for your comment, Don!!
ellencrimitrent said, on 4/22/2008 3:21:00 PM
I had thought of buying one but since I still paint allot I decided on a new Wacom!
I can't justify that if I use many different mediums in fact I have been playing with fabric these days!
Kathy Weller said, on 4/22/2008 7:45:00 PM
Eric, I forgot to say THANK YOU for that really nice comment. I appreciate it but I must confess ;)that I use both traditional AND digital media -- a lot of stuff I post in pencil here on my blog are just that - regular pencil. If it looks like watercolor/pen and ink, that's what it is. When you see stuff that looks like pastel/gouache, it's digital. :)
Have you ever had the urge to eat M&M’s in multiples of five? Maybe you try to walk out to the car in an even number of steps? Brush your teen the same number of times on each side? Top and bottom? If so, this book is a perfect square for you!
Jackson loves even numbers, especially the number 8. He always does one extra repetition to avoid an odd count. When he moves across the street from Esmerelda, he finds his love of numbers is a perfect match to her need to make some sense out of math. Not only is she okay with his numbers fetish, but her fascination with his mother’s love of singing the blues, encourages Esmerelda to frequently pop by for a visit. At school, he meets Asim, who not only understands Jackson’s love of numbers, but who might actually be better at math that he is.
Jackson and his mother were forced to move to the suburbs to avoid unpleasantness from his mother’s old casino boss. Now Jackson has a new best friend, and a potential girlfriend. His luck is running hot. Until he gets in a fight with Badman, the school bully. And a blue mustang, license plate numbers 777, the ugliest and most ominous number of them all, starts trolling his neighborhood. And finally, Esmerelda disappears.
Number 8, told in the alternate voices of Jackson and Esmerelda, is a fascinating read. I found Esmerelda’s passages more engaging in the beginning. But as Jackson begins to live outside his inner world of numbers, his passages become more active and pull you along as you feel his fear and sense of purpose. The way Anna Fienberg ties up all the plot lines leaves the reader feeling like they’ve just sat through a perfectly executed guitar riff while drinking a warm cup of cocoa. Well done.


Hi Kathy,
Thanks for the step by step. Have always wanted to try this with my own artwork but hadn't been able to find out what to do until now. Found you via Holly's Blogging Your Way Course. I've signed up too.
Also, noticed you are friends with Ellen Crimi Trent and Carol Eldridge. Small world. Looking forward to chatting soon. Cx
Hi Chris! How nice to "officially" meet you! Ellen has told me about you and your beautiful art work in the past. I admire your work! :) Great stuff! Thank you for commenting. How cool that you are also in BYW- I look forward to chatting with you over there!
:)
See you soon,
Kathy
This is awesome Kathy! Thanks for taking the time to explain it! I went to the RISDI art show today and a girl had done this to some of her fine art-and it looked great but i had no idea how it worked-now I do!!