 Library staff see a diverse crowd of students after classes end each school day. There are over-worked students looking for a place to unwind or cram in homework before after-school activities and jobs. There are also wandering bands of restless teens who don't seem to have anything in particular to do but make all the noises that weren't allowed during the day. We don't want to contribute to students' stress by piling on more work, but do want to provide them with a productive outlet for all that pent up energy.
Free-form DIY projects can provide an experience that many teens need. Happily, an afterschool craft program can also be pulled off with no advance preparation, simply by putting out a bucket of craft supplies and a pile of leftover paper with no instructions but to do with them whatever they want. With some prep-work (such as buying a few basic supplies for the DIY school supply program pictured in this blog post) a simple theme can take shape.
 Whether you choose the no-prep or just-a-little-prep route, these very loosely-structured programs provide teens a break from classwork and assignments, an opportunity to express their creativity & think flexibly, and also build social & communication skills. It's key is to let the teens decide how they want to use the supplies you provide. No lesson is necessary; instead they are allowed to learn by making.
The furniture arrangement and placement of materials in your space can have a positive effect on how the teens interact with each other. Is there a large table (or small tables that can be moved together) where you can dump all the supplies? Can you arrange the chairs so that the teens sit together? Hopefully necessary interactions (passing the scissors, divvying the duct tape) will blossom into larger conversations. Coming together as an informal group can be especially beneficial for new students, students who haven't found a comfortable niche, and students going through a period of social upheaval.
 The colorful pictures you take during these programs are also great marketing tools. Share them online through your website and social media. Include them in monthly reports. They highlight the teens doing things, and demonstrate how the library serves as a cultural public space.
There are a lot places to look online for crafty ideas should you need them: pinterest, instructables, craftsy, and snapguide are just a few. You can also consult the teens themselves: ask them what skills they'd like to learn if they had the time, what materials they'd like to test out if they had access, and what themes might interest them. Create a straw poll online or in your space (or both), or simply ask the teens in person.
More DIY teen programming resources can be found under Services on the Professional Tools section of the YALSA website.

Are you a maker? With all the emphasis on high tech gadgetry, it can make you feel a little left behind if you can't swing a 3D printer on your budget or lack the skills to wield some soldering equipment.
But, like the science-technology-engineering- math portmanteau STEM which added an "A" added to encompass art and become STEAM, the expansion of the "maker" trend to incorporate arts and crafts as a creative and productive use of time and space is a step towards recognizing the wide variety of material production that libraries have long been supporting. And it's an easy way to get in on the making trend with supplies you likely have laying around.
We've had success with this sort of low-stress, drop-in crafting at our library.

Fairhope, a top-notch public library in south Alabama, coined the term "crafterfnoon" for this sort of activity, which I am appropriating.

Don't have a dedicated makerspace? Crafternooning can take place from a cart, as Shannon Miller RTed:

Last month at the Library Technology Conference, I heard middle school librarian Jen Legatt talking about starting her makerspace with jigsaw puzzles and origami paper...so expand your thinking about making. Any space that gets people interacting and collaborating around a constructive activity works!

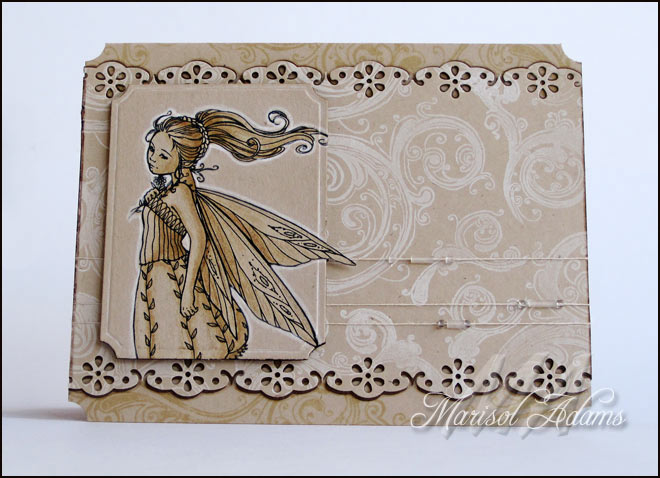
Have you ever Googled yourself? I do. It might look pretentious, but it really gives an insight to where your name is being used, and for me that includes my art. Thankfully I never find much of anything except for my own posts AND these gorgeous cards!
I license out my images to an online craft store called Crafts and Me based in the UK. She sells digital stamps and some rubber ones too. On her blog they host challenges for those who love to make their own cards and paper crafts.
You can find all of my digital stamps here ☞ http://www.craftsandme.co.uk/-c-218_240.html
Find my rubber stamps here ☞ http://www.craftsandme.co.uk/-c-290_211.html
It always gives me the biggest smile when I see these. Be sure to visit their blogs for more lovelies and inspiration!
Here are some places that you could make cards and enter into challenges, how fun is this!
Fantasy Stampers Challenge Blog -
http://fantasystampers.blogspot.com/Your Next Stamp -
http://yournextstamp.com/blog/Simon Wednesday Challenge Blog -
http://www.simonsaysstampblog.com/Treasured Times Rubber Stamp Challenges -
http://treasuredtimesrubberstampschallenges.blogspot.com/Stamptacular Sunday Challenge Blog -
http://stamptacularsundaychallenge.blogspot.com/• • • • • • • • • • • • • • • • • • • • • • • • • • • • • • • • • • • • • • • • • • • • • • • • • • • • • • • • • • • • • • • • • • • • • • • • • • • • • • • • • • • • • • • • • • • • • • • • • • • • • • • • • • •
Have a Blessed Monday!
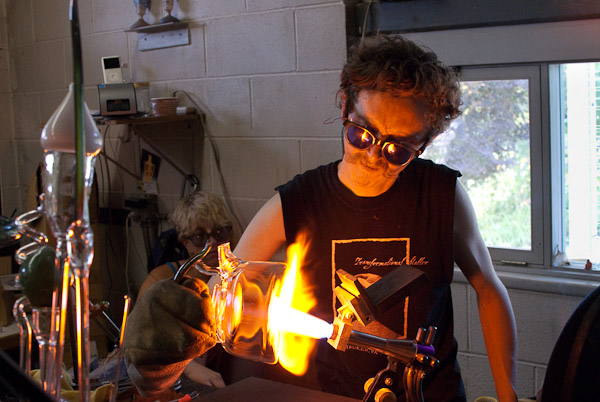
I was asked to write a short piece about a favorite North Carolina summer day trip for Artful Living, a regular newsletter from the North Carolina Arts Council. I picked something right in my back yard: Penland School of Crafts!
Check out my suggestion and more from other NC artists here.
Check out this awesome R2-D2 beanie Wendi made for me! I love it so much I've been wearing it around the house even when there's no one here to see it.
It's far too time-intensive for her to sell them affordably, but Wendi is selling the pattern as an add-on to her basic beanie pattern. To learn more,
click here to go to her craft blog, Shiny Happy World!
Jo was in a super silly mood yesterday when she helped me photograph these
Huggable Blockheads. I got silly pictures, pretend-sleeping pictures, lots (and lots) of pictures with her tongue sticking out, and a bunch of blurry shots because she was moving around so much. It took about ten times as long as it should have - and I loved every minute of it.
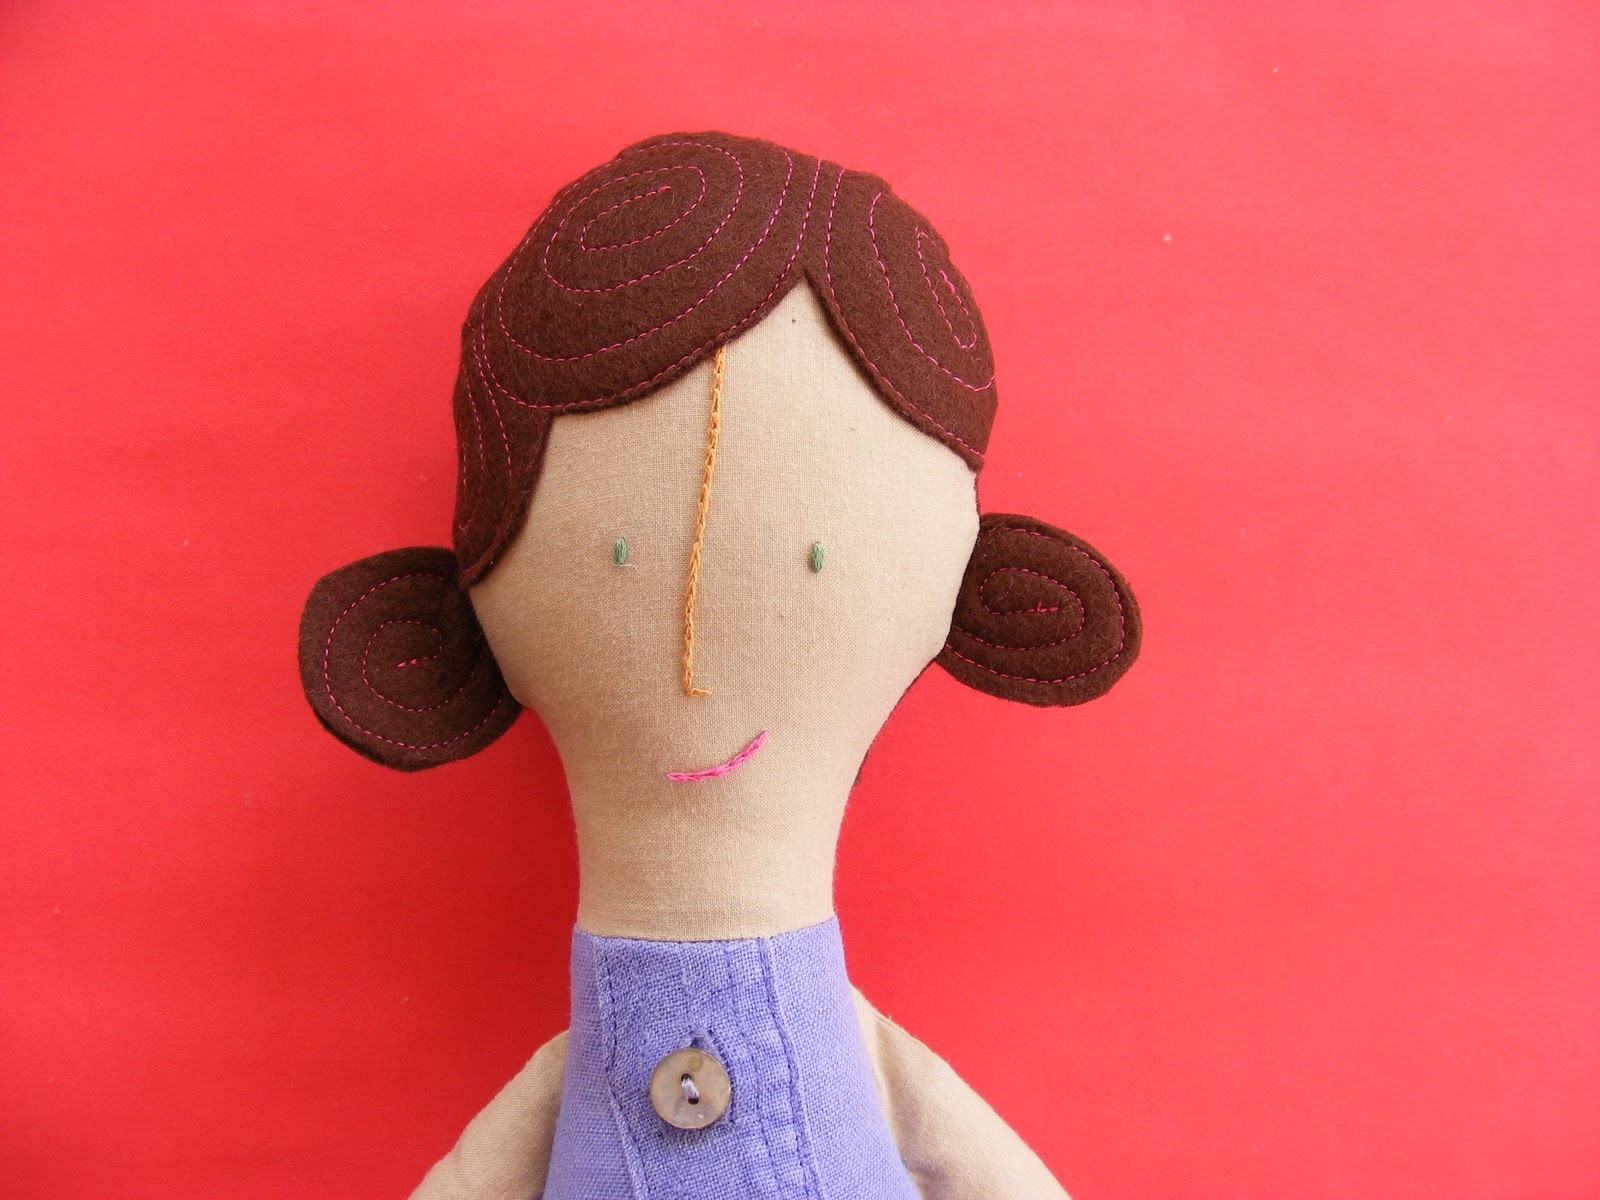
Jo saw me working on some little stitched girls for this Friday's pattern over on my
Shiny Happy World. She decided that this girl was her favorite so I surprised her by stitching it up as a little felt pin. Easy peasy - and it's so much fun to embroider on felt. I need to do it more often.
Happy day!
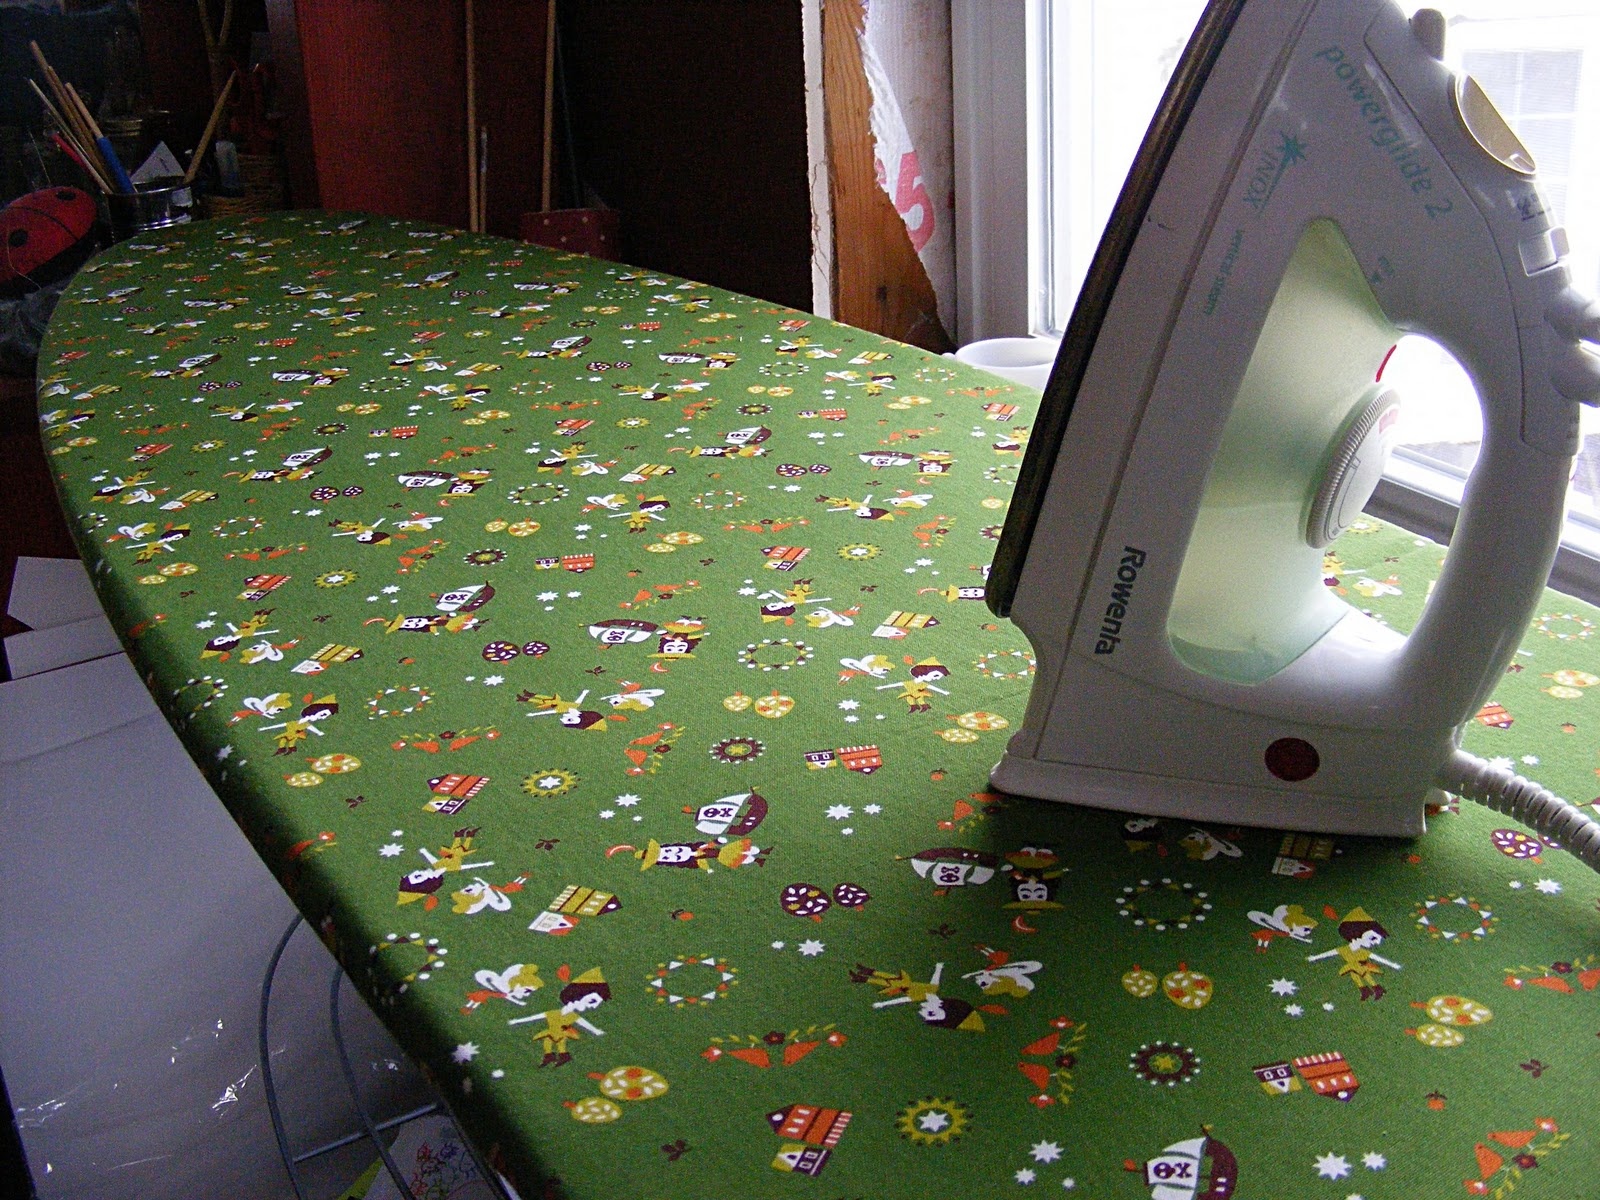
I'm getting ready to shoot a video on pressing vs. ironing (I know! So exciting!) and I decided I just couldn't do it on my old, water-stained ironing board cover. I have a magnificent Michael Graves extra-wide ironing board that I bought several years ago. When I bought it I had the foresight to buy an extra Michael Graves cover - knowing that by the time I needed a new cover the extra-wide version would be long gone. I've moved it to four homes and I finally took it out of the package today -
only to find that it was a standard-sized cover. Aaargh!
I was. . . angry. I briefly considered putting the icky old cover back on the ironing board - but it was really pretty gross. And then I realized it was just a flat piece of fabric - no shaping - nothing fancy. Even the drawstring was just slipped through the serged edge.
I realized I could use the old, stained cover as a pattern for a new cover - and one that would be way cuter than the boring Michael Graves design I had been schlepping around for years.
How about this cute Peter Pan fabric I bought in Japan? I just laid the old cover on the new fabric and cut around the edge. (New pattern weights are on my list of Things to Make Soon.)
I even made improvements! Instead of a flimsy serged edge I used some old (really old - look at that price!) seam binding tape someone gave to me. Bonus points for it being orange and looking so cute with the fabric.
I stitched the binding around the edge. I pulled the drawstring out of the old cover and reused it on the new one - I just threaded it through the binding tape using a big, blunt needle.
The original cover was tightened on the board and just knotted in place. I used this fancy sliding springy thing instead of a knot.
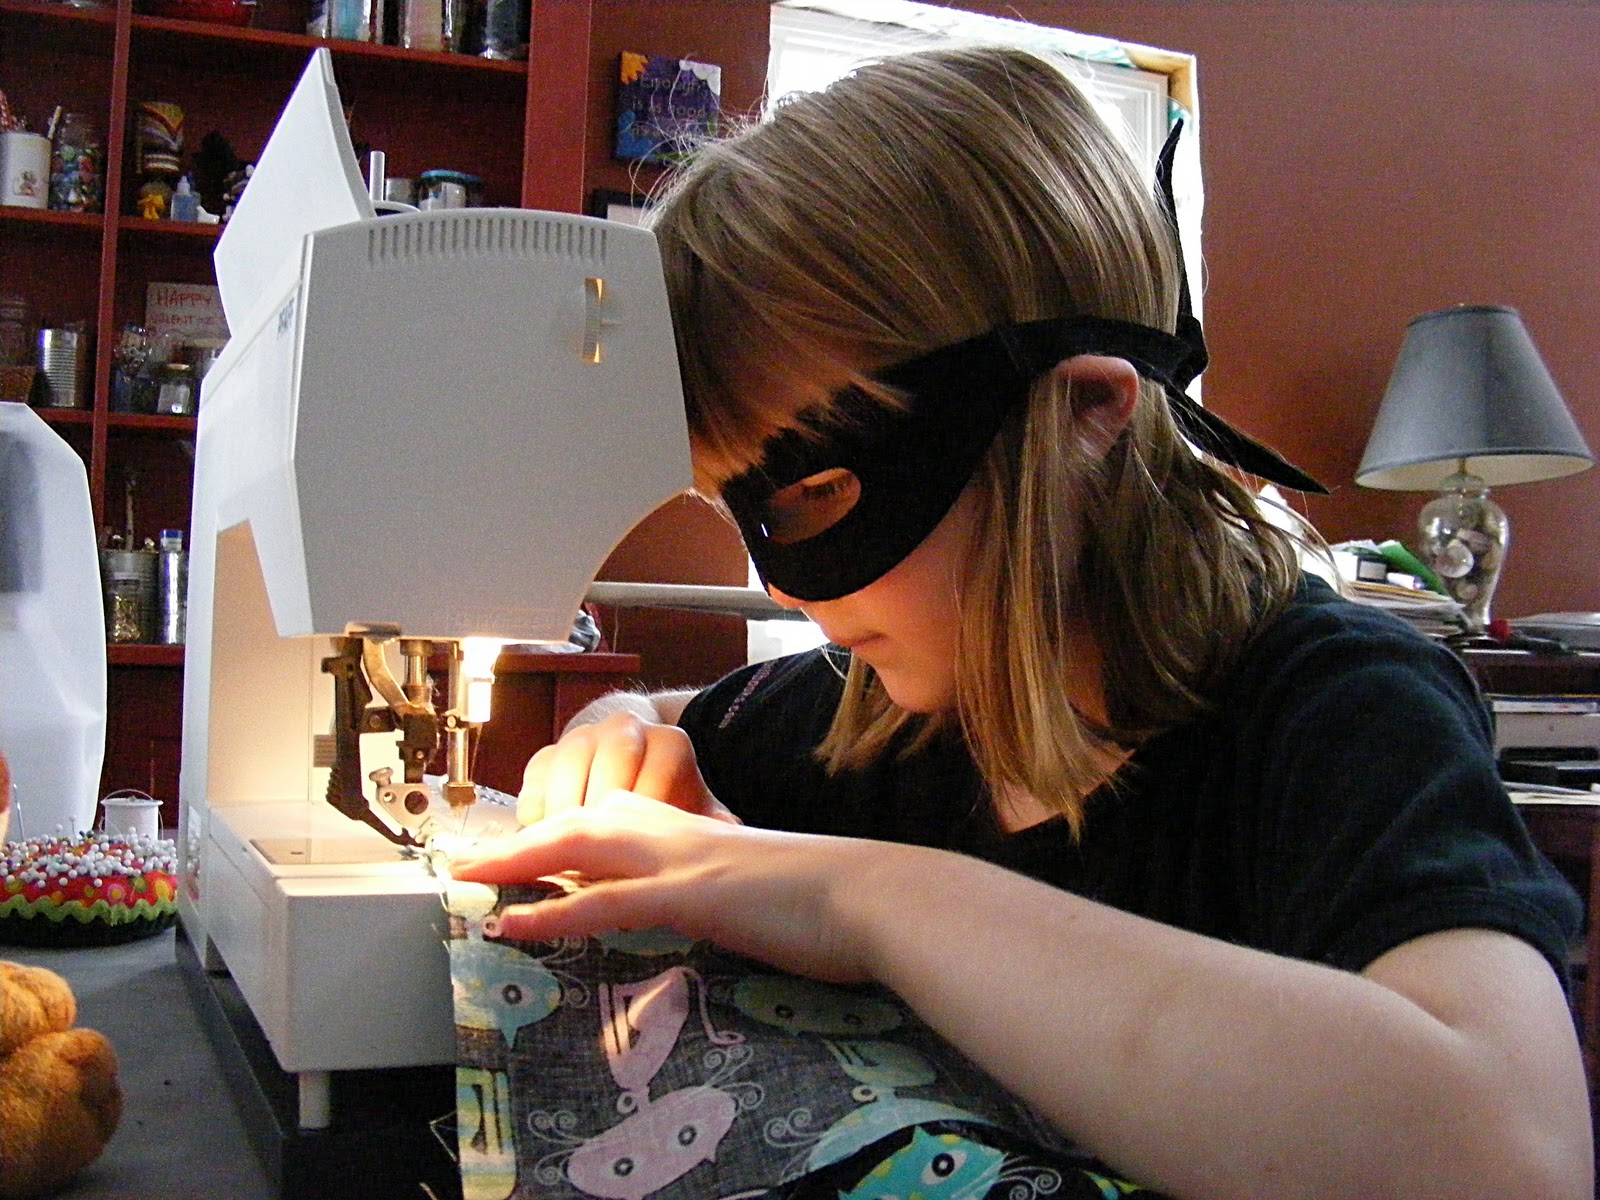
I meet a lot of people - kids and adults - who want to learn how to sew. And it's fun to teach them! I've taught kids as young as six how to sew stuffed animals, skirts, aprons, and doll clothes - all of their own design! I've taught teens how to refashion a wardrobe from thrift-store finds. I've taught grown-ups how to make clothes and toys for their children and grandchildren, and how to sew beautiful quilts without stress. And I've loved every minute of it!
I've taught at schools and summer camps, colleges and fabric stores. I've published books and online tutorials. But now I'm thinking bigger.
I've set up a whole website just for all those folks out there who want to learn to sew. Starting in 2011 there'll be two new video lessons every week - one sewing and one embroidery. There'll be lots of projects for you to practice your new skills. There'll be galleries where you can share (and show off!) your work.
By the end of the year you'll be able to sew everything from stuffed animals to clothing. You'll be the master of zippers and buttonholes. You'll know tricks for working with all kinds of fancy fabrics - from velvet to tissue lame. You'll know what tissue lame is! And you'll have fun. Hopefully, lots and lots of fun.
Through the end of the year I'm posting a lot of videos covering the basics - how to choose a machine, how to use an iron, etc. We'll start with the fun sewing stuff (and projects!) in January. So right now - if you want to learn to sew in 2011 -
sign up for my newsletter so you won't miss a thing. If you have a friend (or a child) who wants to learn to sew - get them signed up. There will be plenty of boy-friendly projects too - so get those boys signed up as well.
Gather your materials. I have
a post on choosing a sewing machine here. If you already have a machine but it's been gathering dust and you don't know how to thread it - take it in to your local sewing machine store. Have it
Jo finished her first quilt top yesterday. I'm putting the back on today for her. Proud finished pictures coming soon - but I couldn't resist sharing this one right away.
Sad news folks.
Mahar Drygoods - THE coolest place to buy kid stuff online - is closing. They carry the work of some of my favorite artists, and the day Robert Mahar emailed me to inquire about carrying my dolls was one of my best business days ever. Ever! When I "rebranded" my Shiny Happy World last year and narrowed the focus of what I do, one of the ways I articulated that focus was to ask myself about every potential product, "Is this the kind of thing Mahar Drygoods might carry?" Seriously. And now they're closing.
The good news is that they're not closed yet, and they'll still be selling some amazingly awesome stuff through the holiday season. So
head over, take a look, and buy something fabulous. They have a small handful of my dolls too, so if you think
Lucy Grace. . .
Lucy Hannah. . .
Lucy Ida. . .
Abigail Fannie. . . (sorry - she's sold now)
or
Abigail Georgia. . .
. . . would be a perfect friend for your little one, now's your chance to buy them from an amazing shop.
Isn't he a cutie?
The Anywhere Bear is a very versatile little pattern. I designed him to fit on my
free Swell Stocking pattern - and that's what you see here.
But as I was working on the pattern I realized he could be used on lots of other things. Once you get the basic applique steps down you could add him to a pair of jeans, a handbag, a tote bag, a pillow - anywhere really. And he's not just limited to fabric uses either. I have a HUGE stack of paste paper that I've made at my job at
Penland School of Crafts. And look what I did with some of it.
Instead of fabric I used my paste paper. Instead of embroidering the face I used a Sharpie. Instead of sewing him in place I glued him to the front of a card. Easy peasy and so much fun!
The pattern includes full-sized templates for the bear - sized to fit just right on the
Swell Stocking or a regular-sized greeting card. There are also complete step by step instructions (with photos, natch) on how to applique the bear to fabric. There are even some notes and suggestions to help kids with the project.
Download the free Swell Stocking pattern here.And the free Neato Ornaments pattern here.And purchase the Anywhere Bear pattern ($5) here.In 2011 I'll be offering weekly video tutorials on all kinds of sewing techniques for kids and other beginning sewists. I'll also be designing special patterns and projects that use these beginning techniques to help build your skills. If you want to be kept in the loop on all the news and updates, please
sign up for my newsletter. And if you know someone who wants to make "Learn to sew" one of their New Year's resolutions - please forward them the link. Thanks! And happy sewing!
So on Monday I released the
Swell Stocking pattern. And yesterday I shared some
Neato Ornaments. Today I'm going to show you what happens when you put them together.
Let's start simple. Cut out an ogee shape, stitch on some rickrack and a button, stitch it to the stocking and - voila - you have a fancy ornament.
I cut out three felt trees and stitched them onto a stocking front. I added a scattering of buttons in lots of colors and sizes and - cute! - a forest of Christmas trees.
The stocking might be my favorite. I cut out one ornament-sized stocking, decorated it with a bit of rickrack, then stitched it onto the full-sized stocking
leaving the top open so it acts like a pocket.
Jo went nuts when she saw me slip some lollipops into the stocking pocket for the photo shoot. "I thought that was just a decoration, but it's a pocket?! A pocket?! That is soooo cute!" Even Alan gave it props.
You can fit exactly five of the smaller ornament circles in a stack down the side of the stocking. I laid some ribbon down the center over the dots and stitched it down. The sides of the circles aren't attached and look pretty cool that way.
Yesterday I posted a link to a free stocking pattern (plus an absurd number of examples of what you can do with it). Today I bring you. . . . ornaments!
You can download the pattern here.
When I was a kid my sisters and I each got a new ornament every Christmas Eve. By the time I graduated from high school and moved out I had a fabulous collection of unique - and mostly handmade - ornaments. It's a great tradition and one I've been happy to carry on with Alan and Jo.
This year I designed a collection of ornaments inspired by vintage glass ornaments. You know the ones? Beautiful and oh-so-fragile. My collection is a whimsical interpretation of those traditional shapes and styles - made of felt and therefore safe from curious toddlers and climbing cats. Plus - they're easy enough for kids to make and the materials are inexpensive and easy to work with. Everyone wins!
So, do you like them? Do you want some for your very own? If so, here are your choices. . .
You can buy finished ornaments from me. I'm working on getting them all listed in
my shop.
You can
download the free pattern and make some yourself.
You can
download the pattern and put your kids to work making these delightful ornaments for everyone you know.
The choice is yours. Ready for some inspiration?
My favorite shape is the ogee. Sometimes I embellish them with rickrack. . .
. . . sometimes with more felt and an embroidered asterisk for a little nod to mid-century mod.
I've also included two sizes of circles. You can embellish them with rickrack. . .
![]()
It's Thanksgiving week - are you ready for Christmas yet? Feeling crafty? Want to make something swell? Well
I want you to make something swell - that's why I'm sharing
this free pattern for a holiday stocking. (The link is to a downloadable PDF.)
The pattern is just the basic template - the swellness comes in what you do with it. You can start simple with some rickrack or ribbon stitched across the top of the sock.
Easy peasy - and so cute!
Or you could get all daring and sew the trim on the other way - up and down. Oooh - creative!
Don't limit yourself to rickrack and ribbon. How about some fancy beaded trim?
Or a bit of a feather boa? Oooh la la!
Or maybe you want to go Raggedy Ann-style with some eyelet trim. The sky is the limit folks!
Do you have a bunch of buttons just hanging around in jars? I think they multiply when I'm not looking and I'm always looking for something to sew them to. You can add just a few buttons in a nice neat row. . .
. . . or a kajillion scattered over the stocking all willy-nilly.
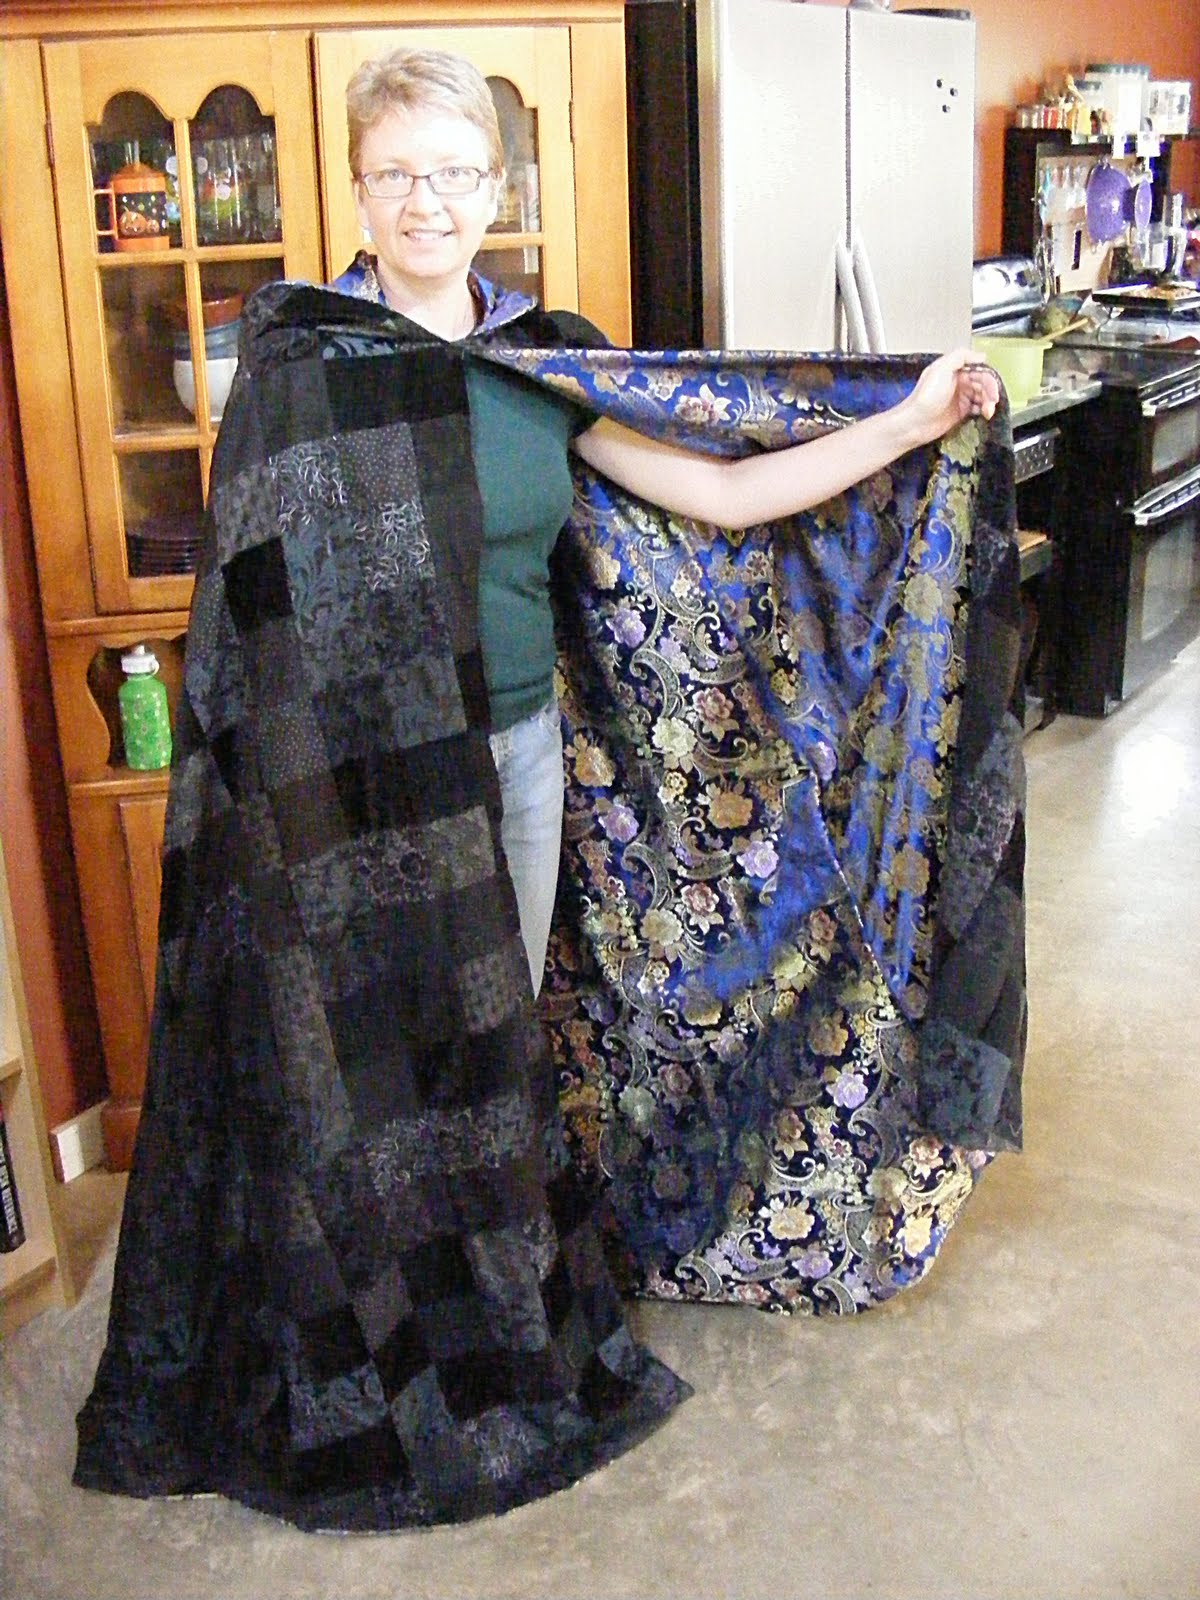
If I lived in the world of Harry Potter this is exactly the cloak I would wear.
I showed the start of the work on it here. Now it's just about done - it just needs some topstitching to help hold the layers in place.
I love the pattern on pattern. I'm going to be wearing it with a patterned shirt, too. The outside of the cloak is pieced black fabrics - anything I could find that was black or dark gray - velvet, narrow and wide corduroy, some gorgeous flocked sort of fabric with a baroque swirly pattern, jacquard and patterned cottons. I'd guess about 2/3 of the squares are straight-up cottons and the rest are "fancy" fabrics. The lining is a beautiful brocade. Now Jo wants one too - but I told her she has to wait until after Dragon*Con.
For anyone interested this sort of thing - I used Simplicity 9887 (view D) with no changes. Good pattern.
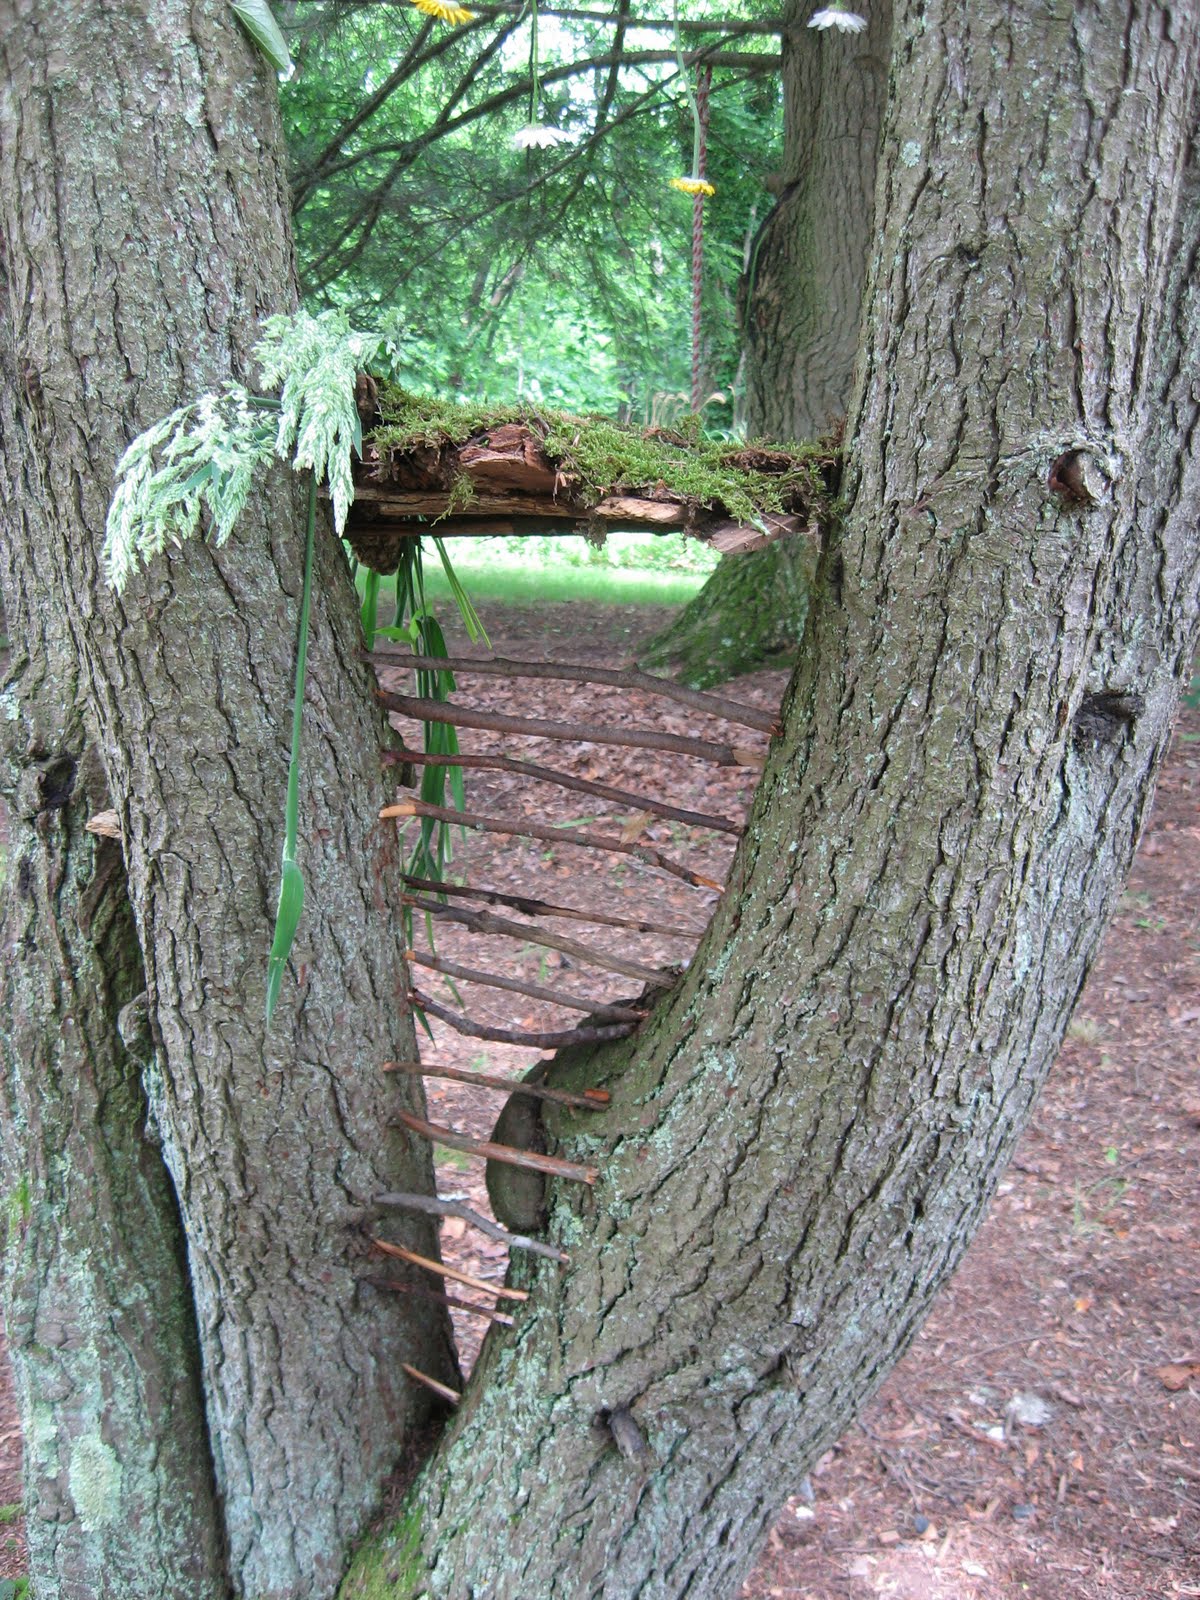
Jo came to work with me a lot this spring and summer. I work in a great old building with a nice porch for reading and a terrific backyard - so that's no hardship. She spent a solid week completely absorbed in building/improving/expanding on the most awesome fairy house ever.
I love this little ladder. Where does it lead?
To this breezy little platform - a piece of bark, wedged between two trunks and covered with soft moss. I love the pretty "curtain" of upside-down flowers tied to an overhanging branch. See?
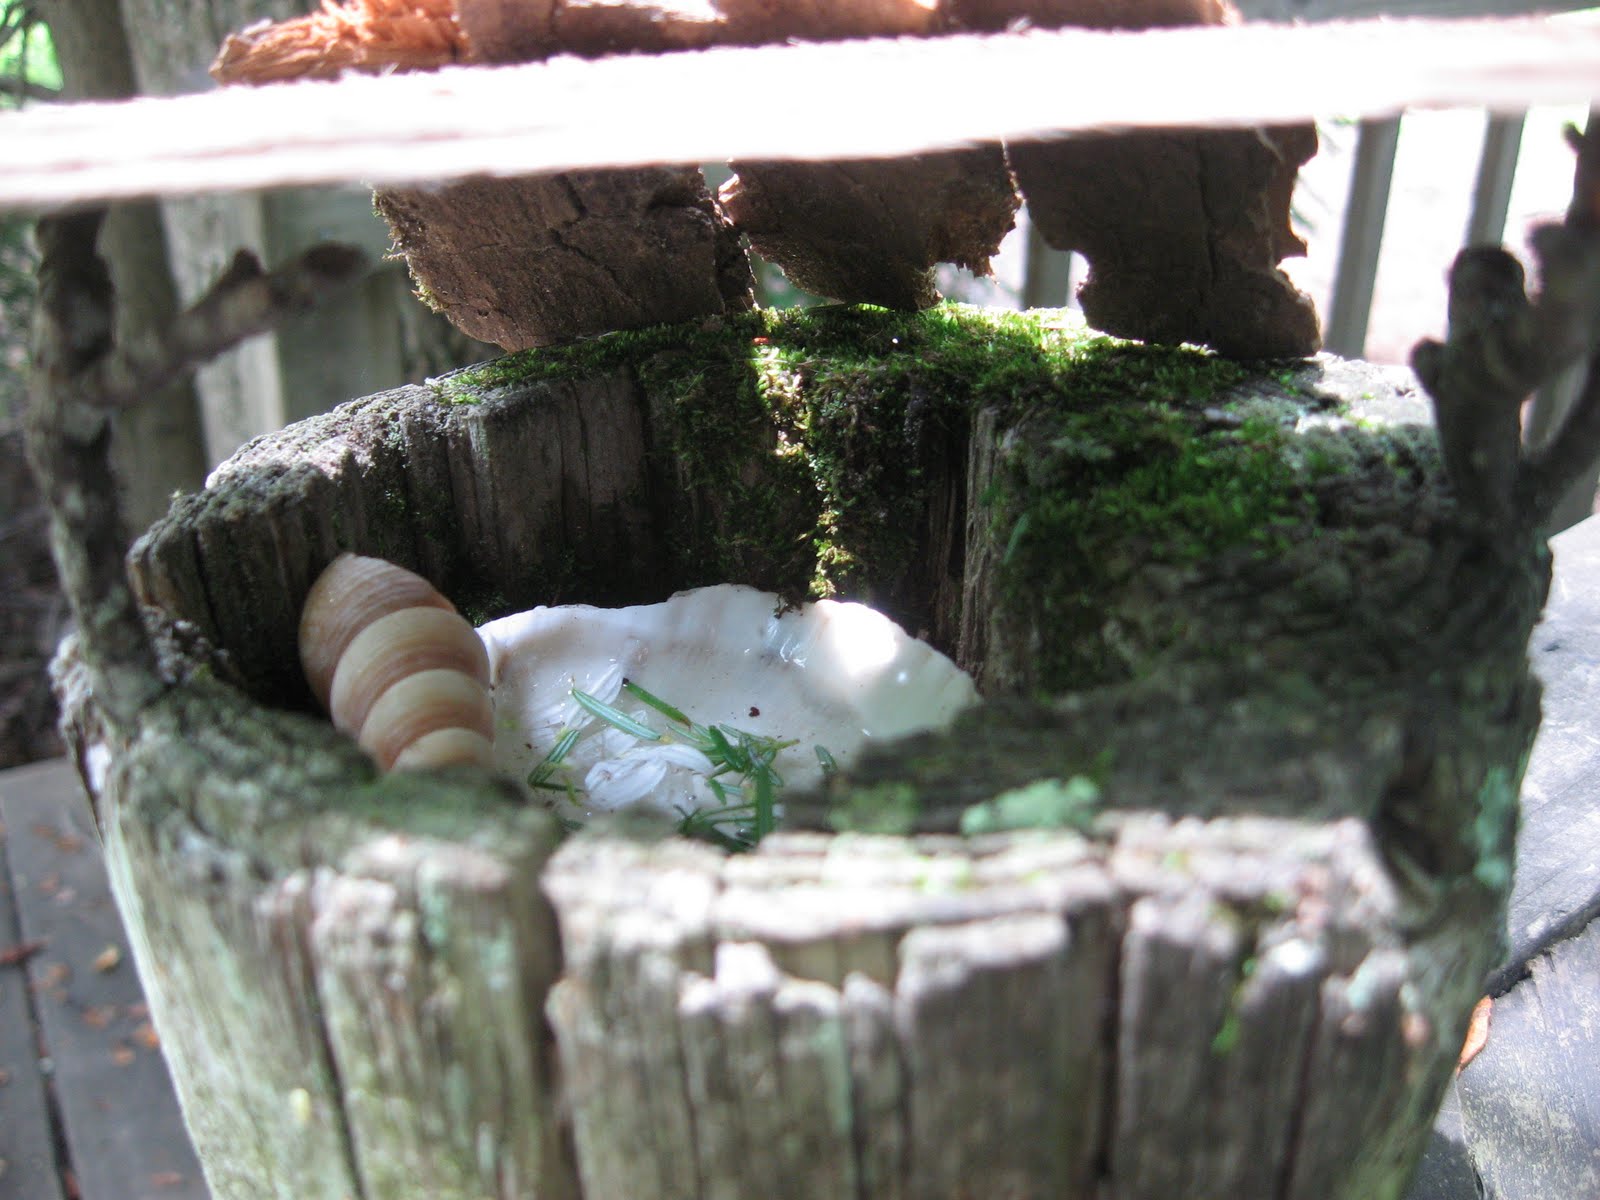
And here's my favorite part. Around the corner of the building is a little tree fort that the kids love to play in. The centers of some of the oldest support posts are rotting out. Jo built a little shed over one.
Take a look at what's inside!
Half a scallop shell filled with water! Jo told me it's an onsen (a Japanese-style hot tub). You have no idea how much I wish this was sized for me - the perfect quiet, mossy, woodsy getaway.
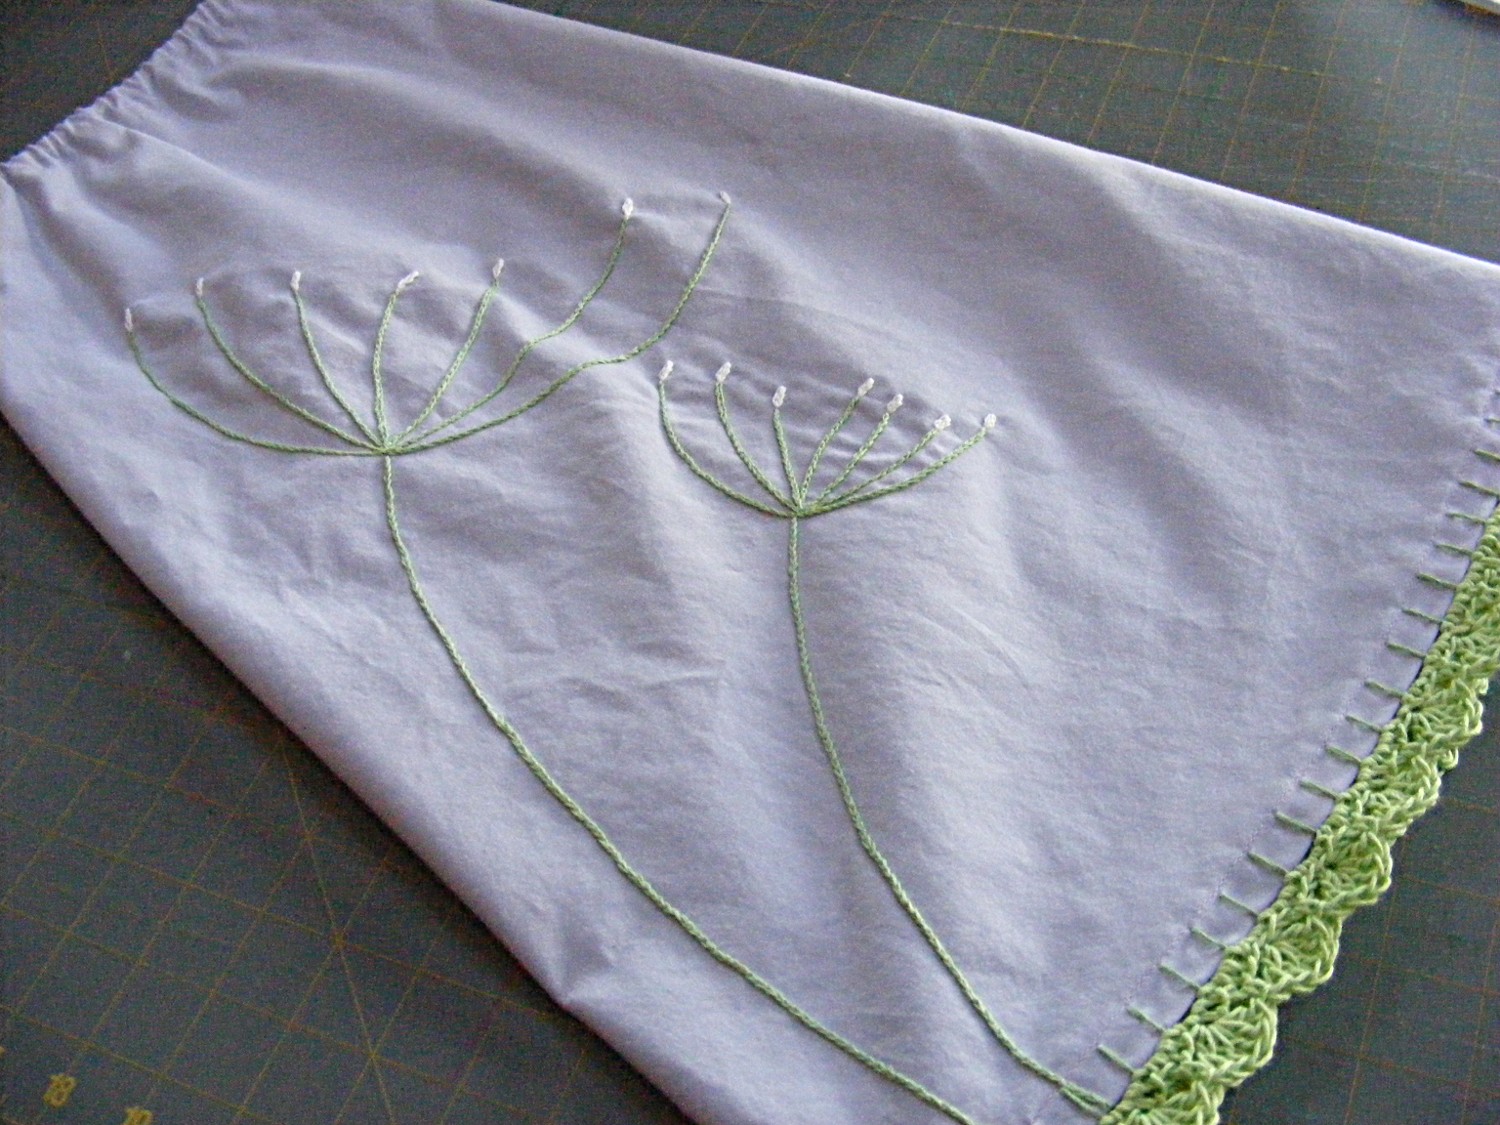
I finished my new skirt (started on
my stash-busting weekend) and I almost love it. Queen Anne's Lace is one of my favorite flowers, and I'm happy with how that embroidery turned out. But I'm not 100% sure about the crocheted hem. I used
this tutorial from
You Go Girl! and I love the scallops, but I'm not sure about the blanket stitch used to anchor the crochet. It just feels a little. . . much. I'm going to try this again (Jo's already asking for it on a skirt for her) but this time I'm going to try a 1/2 inch backstitch right on the bottom fold line. We'll see. For now - I have a pretty new skirt to wear in Japan - and the only thing I had to buy was elastic.
Tara over at
Scoutie Girl has been declared April to be
Stash-Busting Month - and she's been linking to some great tutorials. We've been doing our own stash-busting here at Gratz Industries - making a bunch of new clothes for me and Jo without buying anything (except some elastic). I already showed off
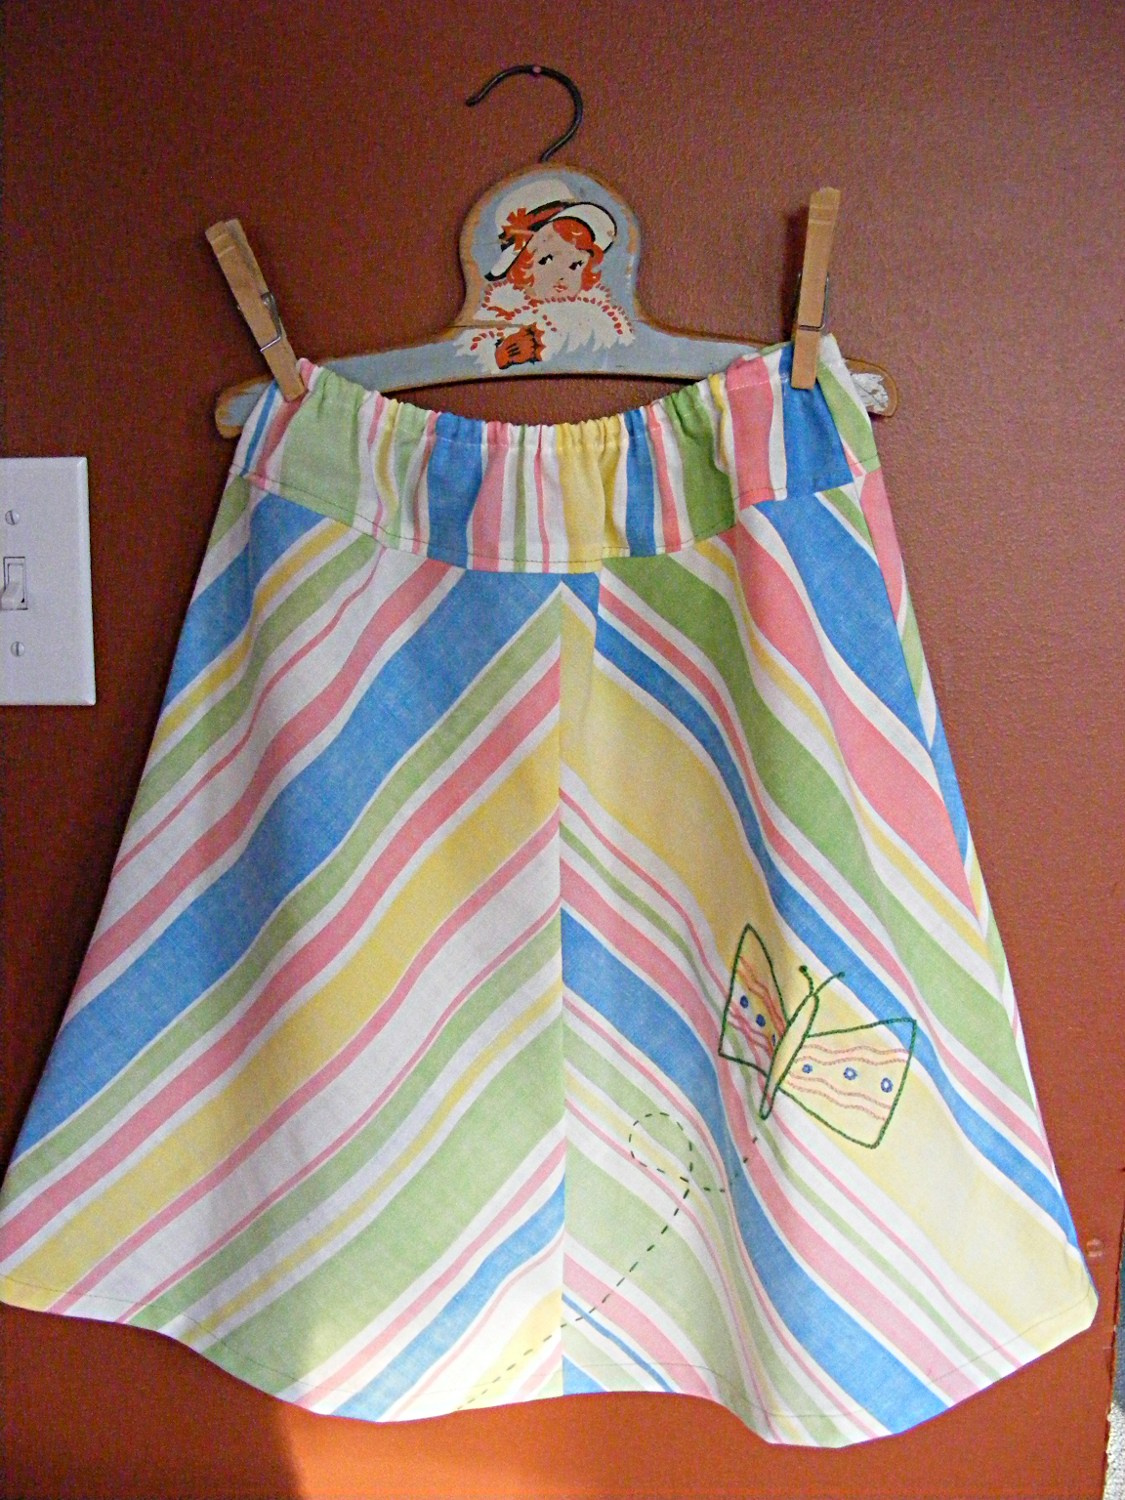
Jo's new butterfly skirt (made with a sheet I bought at Goodwill several months ago) - this weekend I went sew crazy and churned out everything you see in that pile above.
I started off with some jammie pants. This is what I wear all the time and every pair I own is threadbare and sad. I used the pattern in
Heather Ross's Weekend Sewing book and tweaked it to fit me a little better - now I have new comfy pants and a perfectly-fitted pattern to make a bunch more.
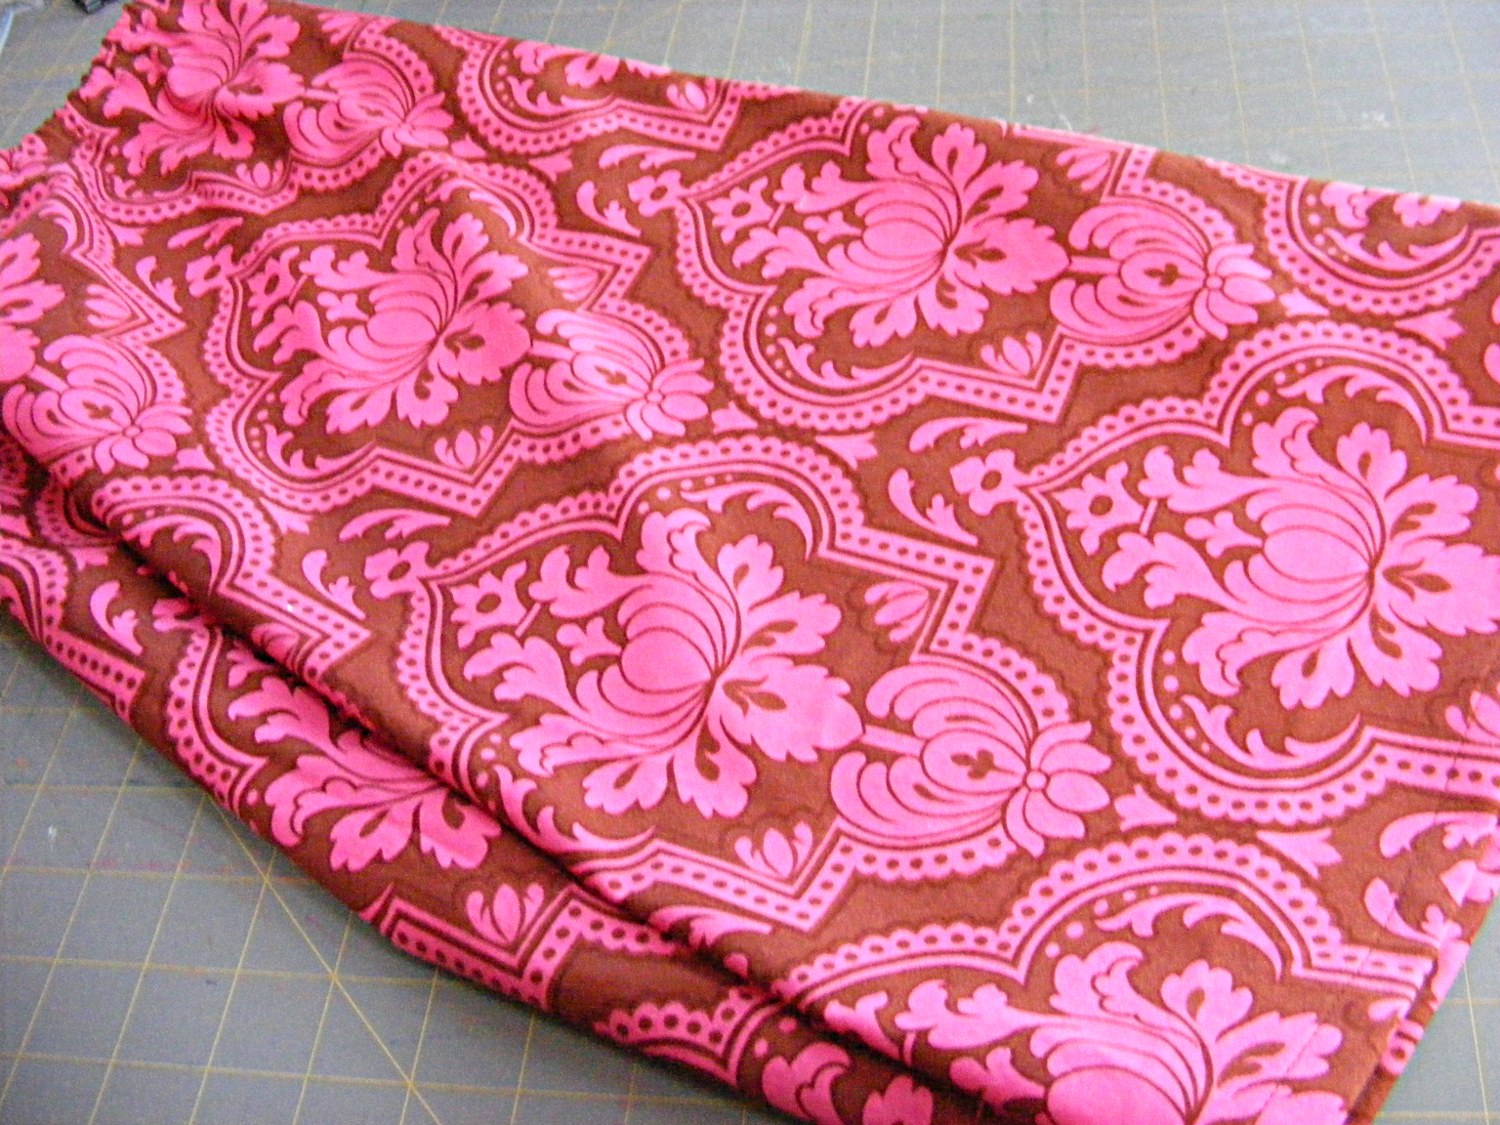
I got together with a few friends last week to spend a day sewing skirts. I ended up making a bunch for Jo - but this weekend I drafted a new pattern for myself and got cracking. This is such great fabric that I simply sewed it up with no embellishment. The fabric has been in my stash for YEARS.
This one is made from a pretty lavender sheet. I embroidered a couple of Queen Anne's Lace blooms (one of my favorite flowers) and I got a start on doing a little scalloped crochet on the hem. I've never done that before - I'm eager to see how it turns out.
This is the biggie. More fabric I've had in my stash for years - I don't even remember what I bought this for. I'm appliqueing a bird on it and I have some very elaborate embroidery planned. I may be finishing this on the flight to Japan - we'll see.
Almost everything Jo owns is suddenly too small. I'm not joking - we just cleaned out her closet and more than half the clothes had to go! Luckily, I've been on a sewing jag lately - and Jo has lots of new clothes to show for it. Clothes that fit.
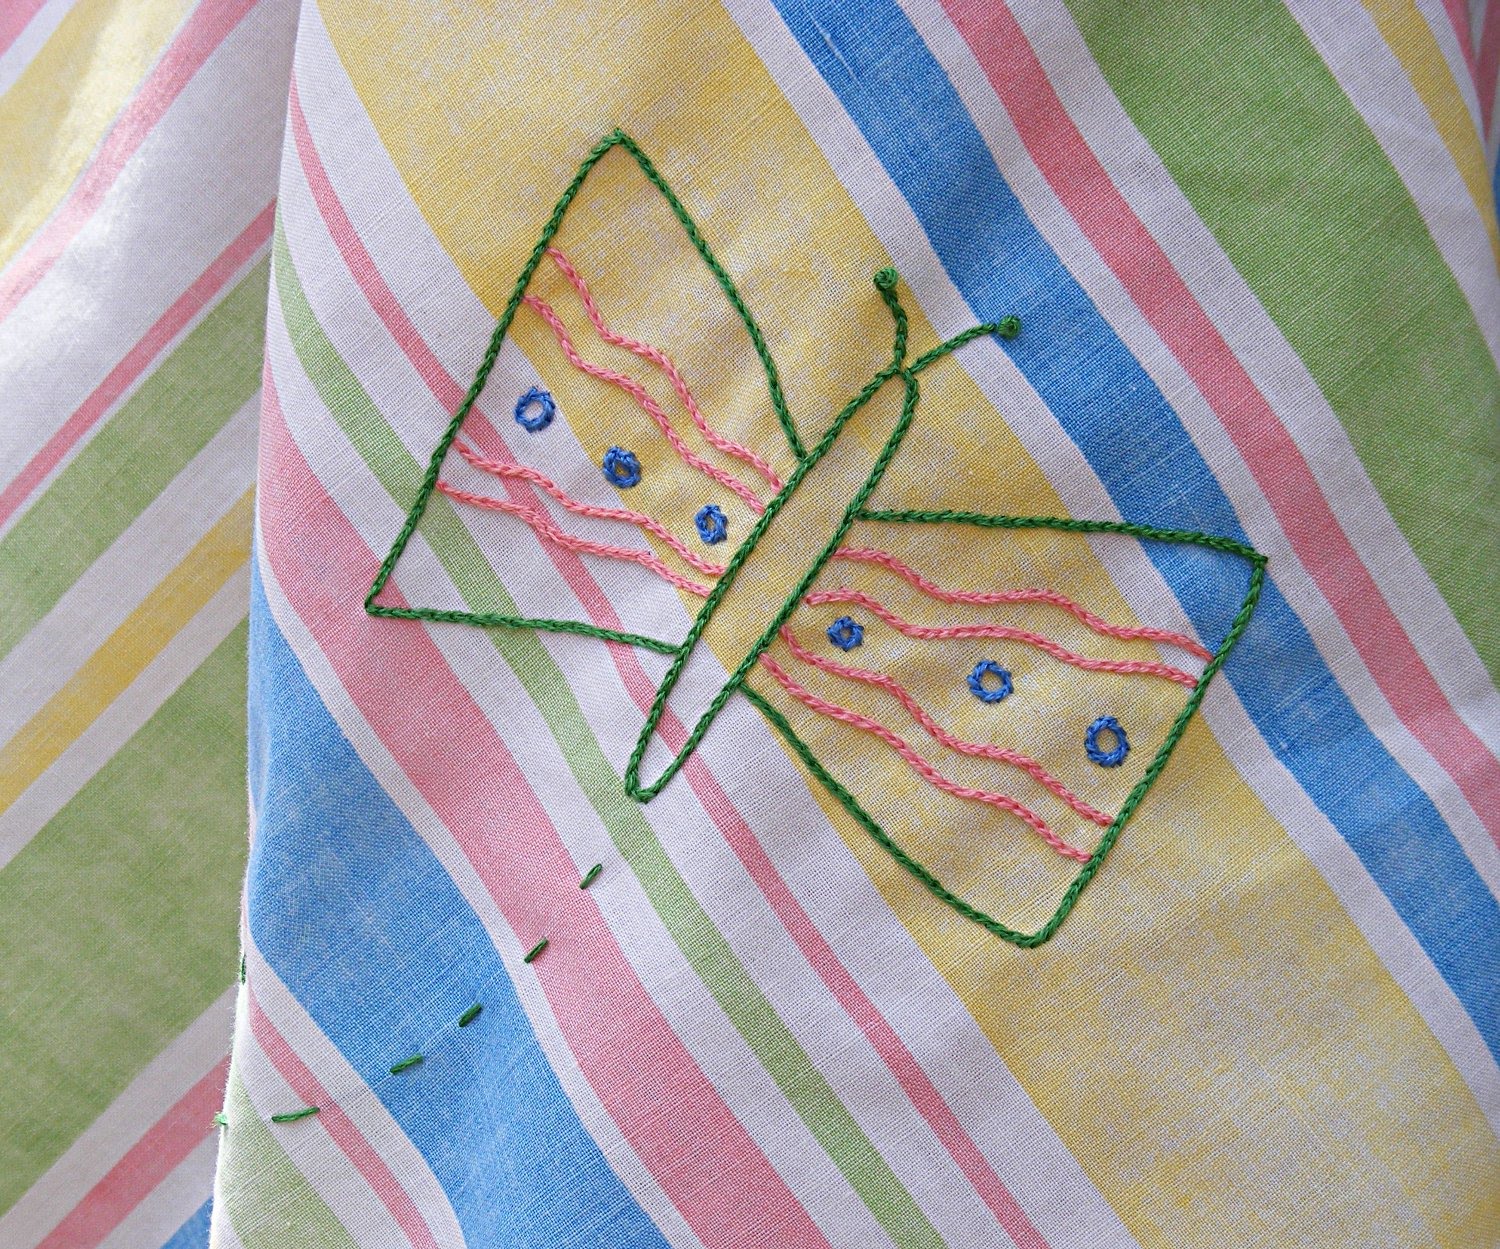
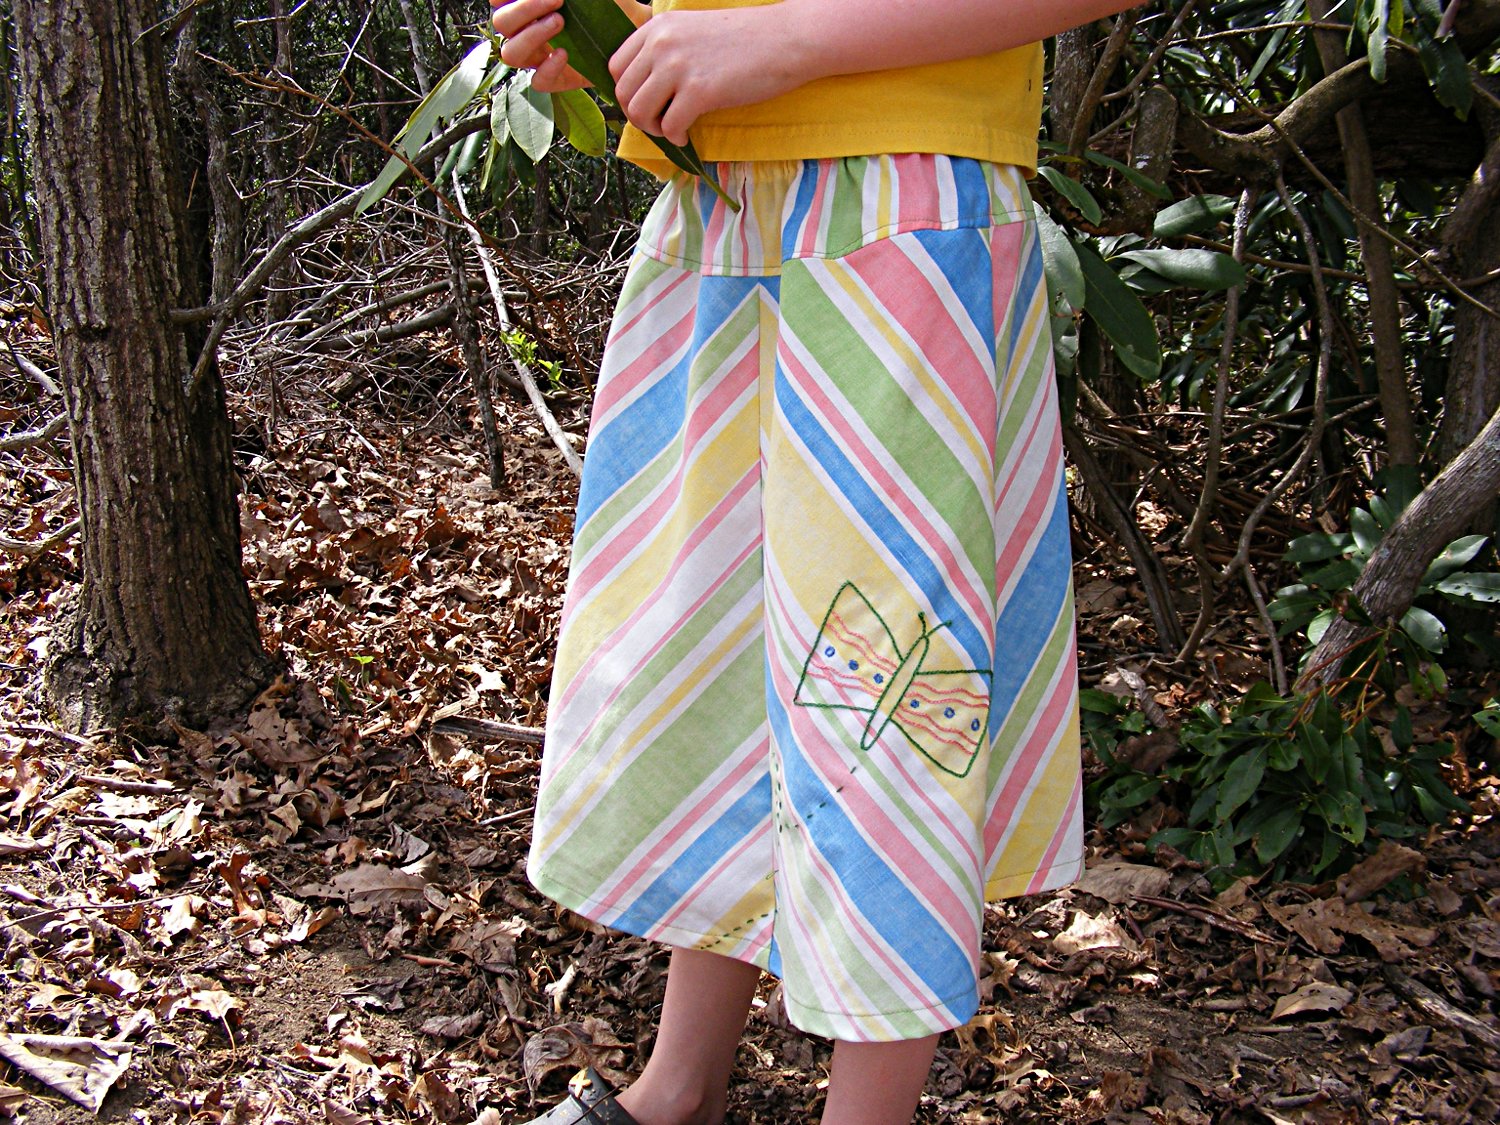
I drafted a new A-line skirt pattern for her last week and made a couple of simple skirts - but I haven't photographed those yet so I'm going to start the show with this butterfly skirt. I hacked the pattern up a bit. I made a yoke out of the top few inches and then split the rest of the skirt down the center. Then I cut the lower half on the bias so I could chevron the stripes. The fabric is a really soft sheet I got at the Goodwill. Jo liked the result, but thought the skirt was "kind of plain" and asked me to add a butterfly.
So I did. We doodled a couple of pages of butterflies before we got one that Jo approved of and I spent a lovely evening stitching and watching a couple of episodes of Jeeves & Wooster. Aaah. . . bliss. If you want this butterfly to do your own stitching, you can
download the line drawing here. It's all split stitch, and I have a tutorial for that
here. I highly recommend a quiet evening of relaxing stitching. It's good for the soul.
Jo liked the results - so there's one new skirt hanging in the closet.
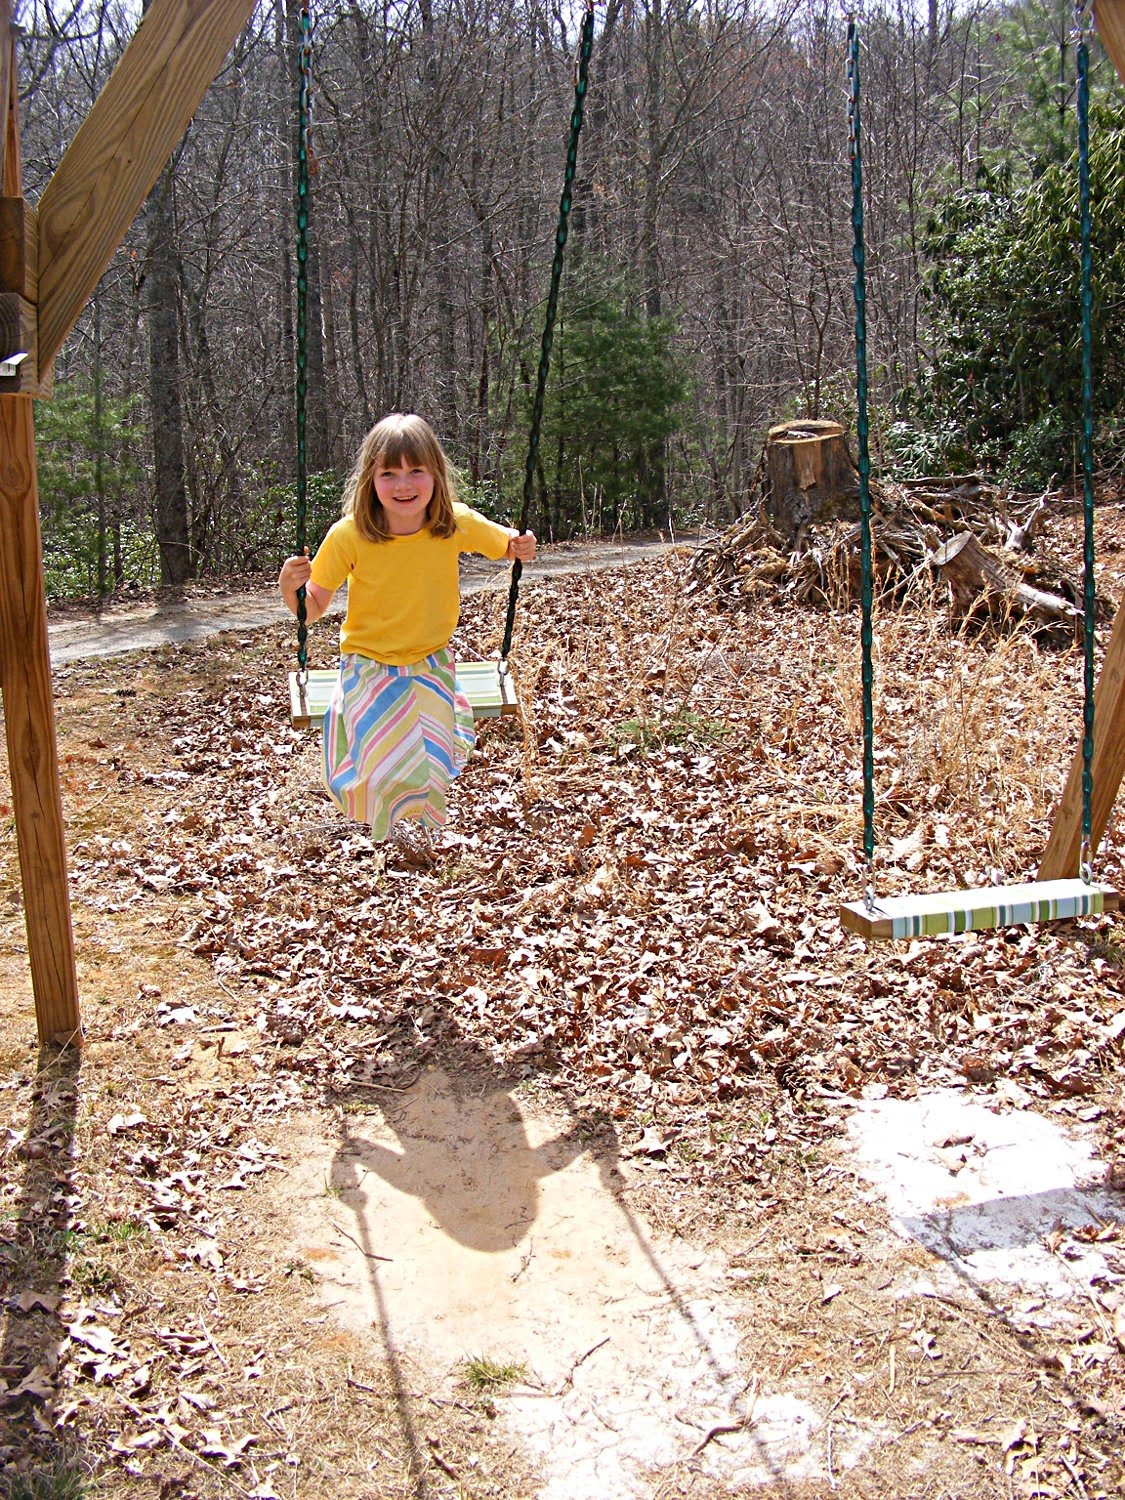
It even passed the swing test.
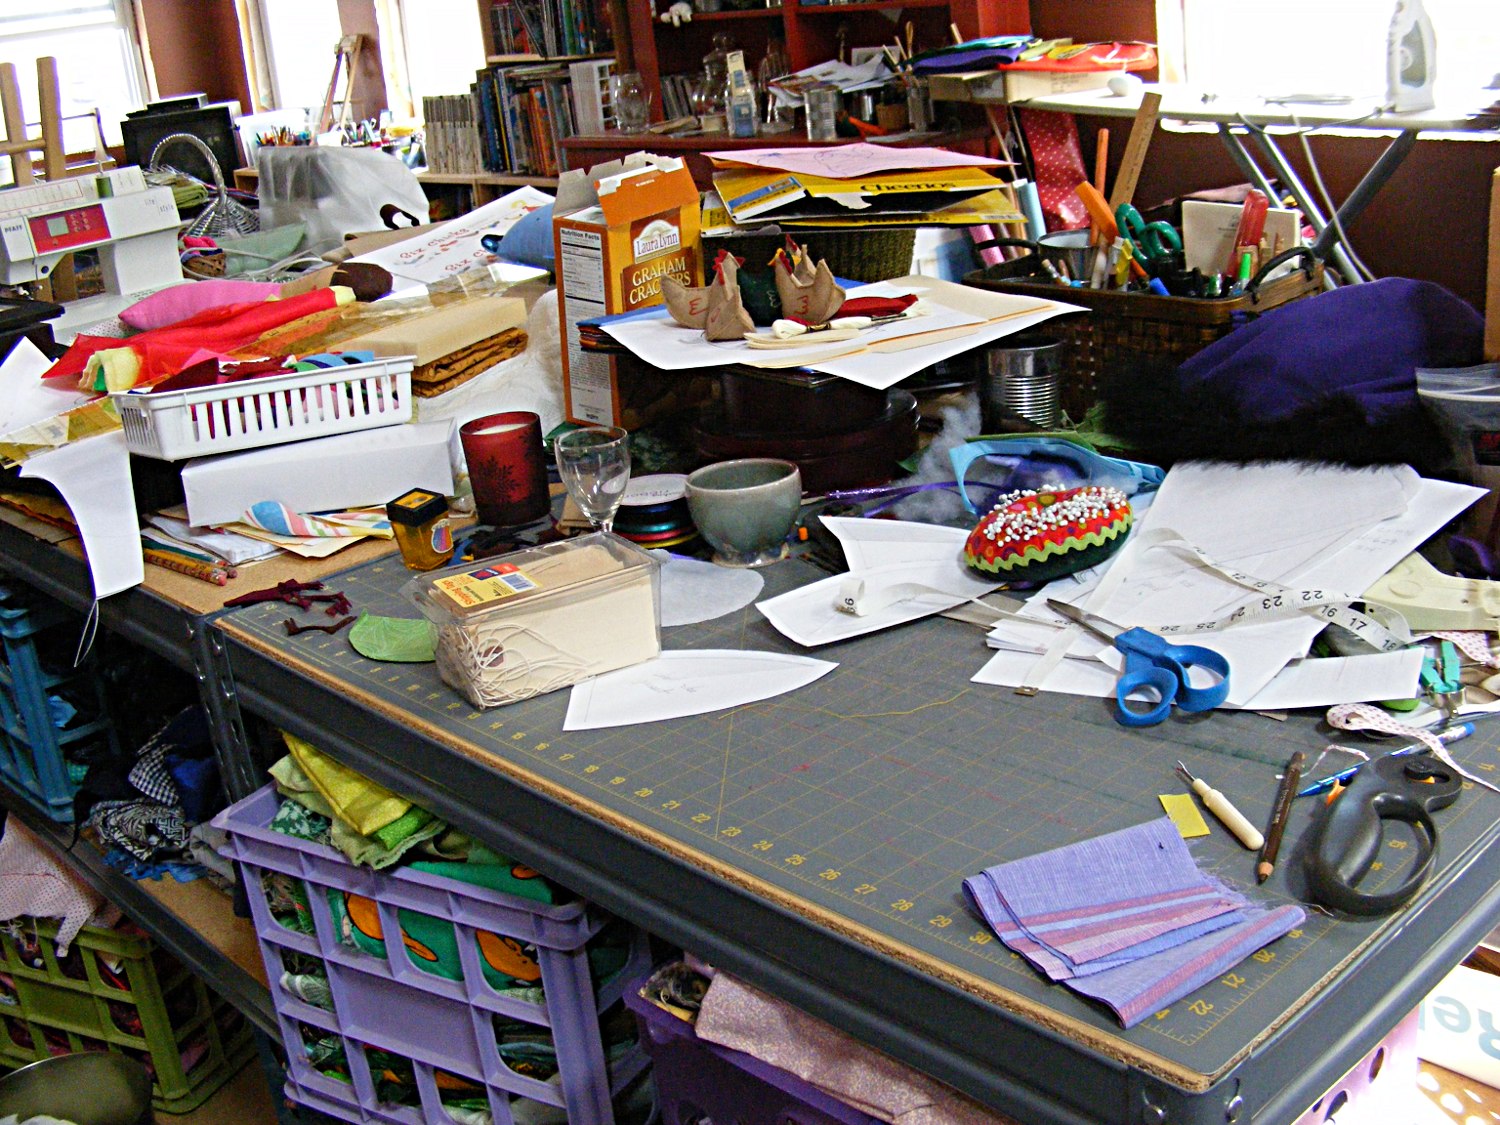
I have a nice big worktable. It's 4 ft. x 8 ft. with lots of shelving underneath - and I have a separate table for my sewing machine. It's fabulous! Except that it usually looks like this and I end up working in one tiny corner.
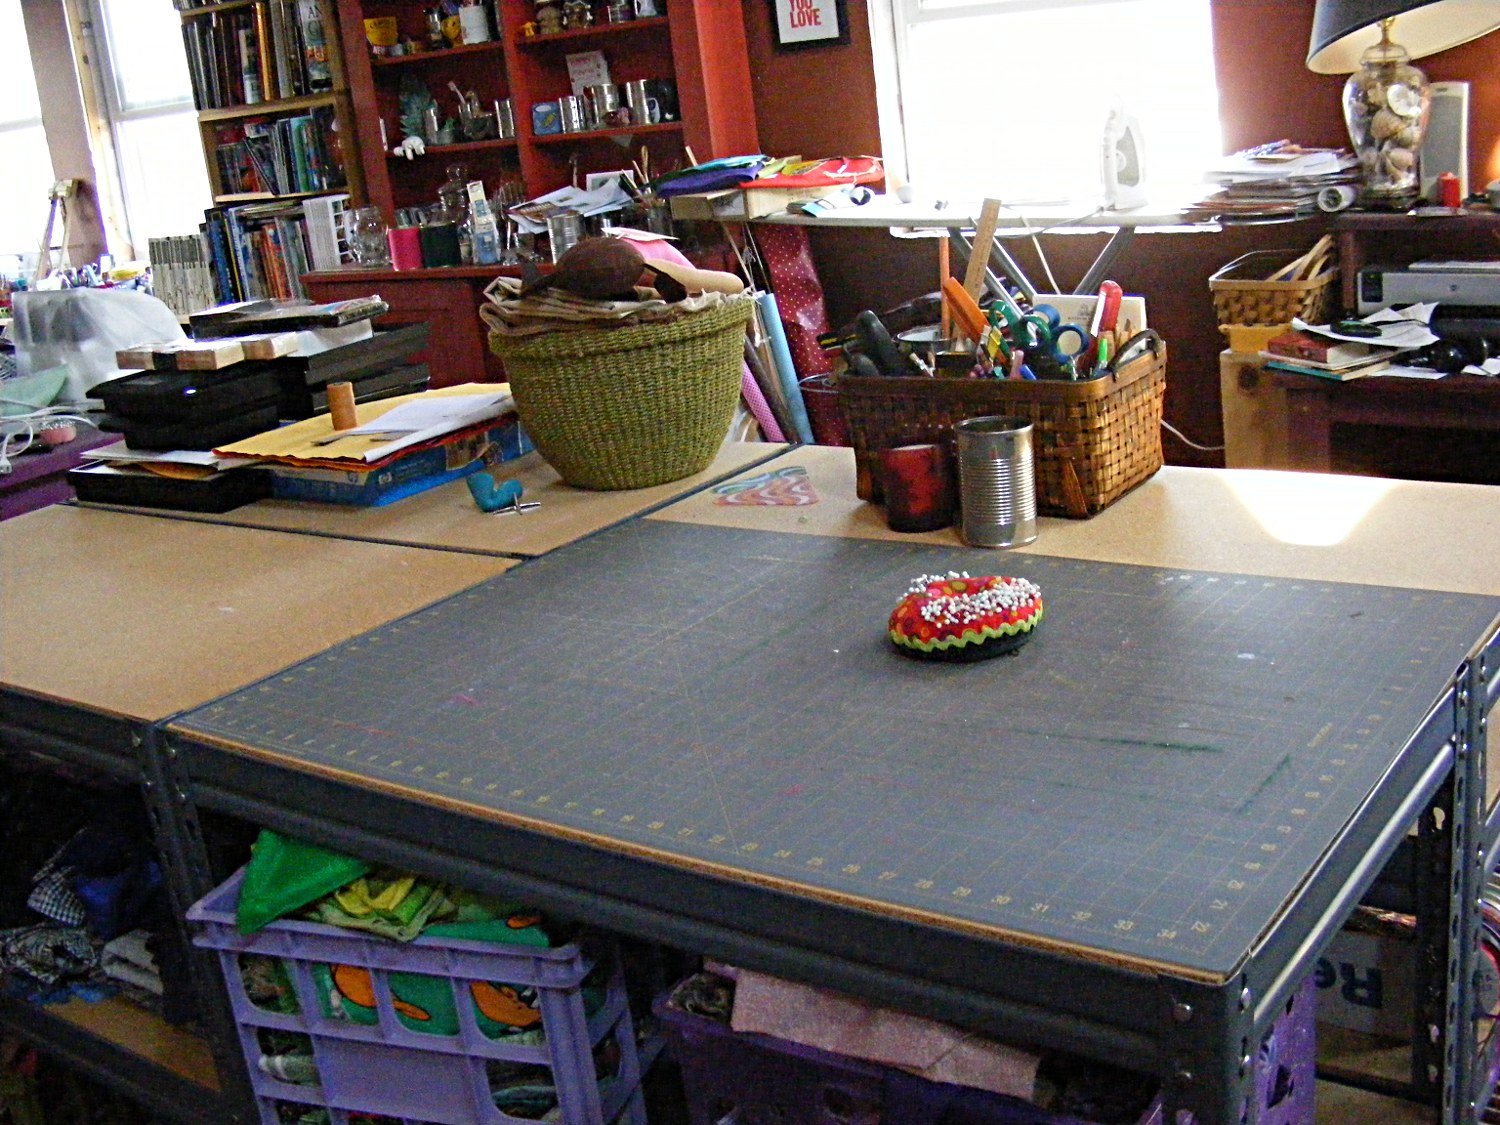
So on Monday I went into a cleaning frenzy - and now it looks like this. .
Yay! And the really great news is that I've finished three projects since I cleaned it off. I LOVE working on a nice big space! Let's see how long I can keep this up.
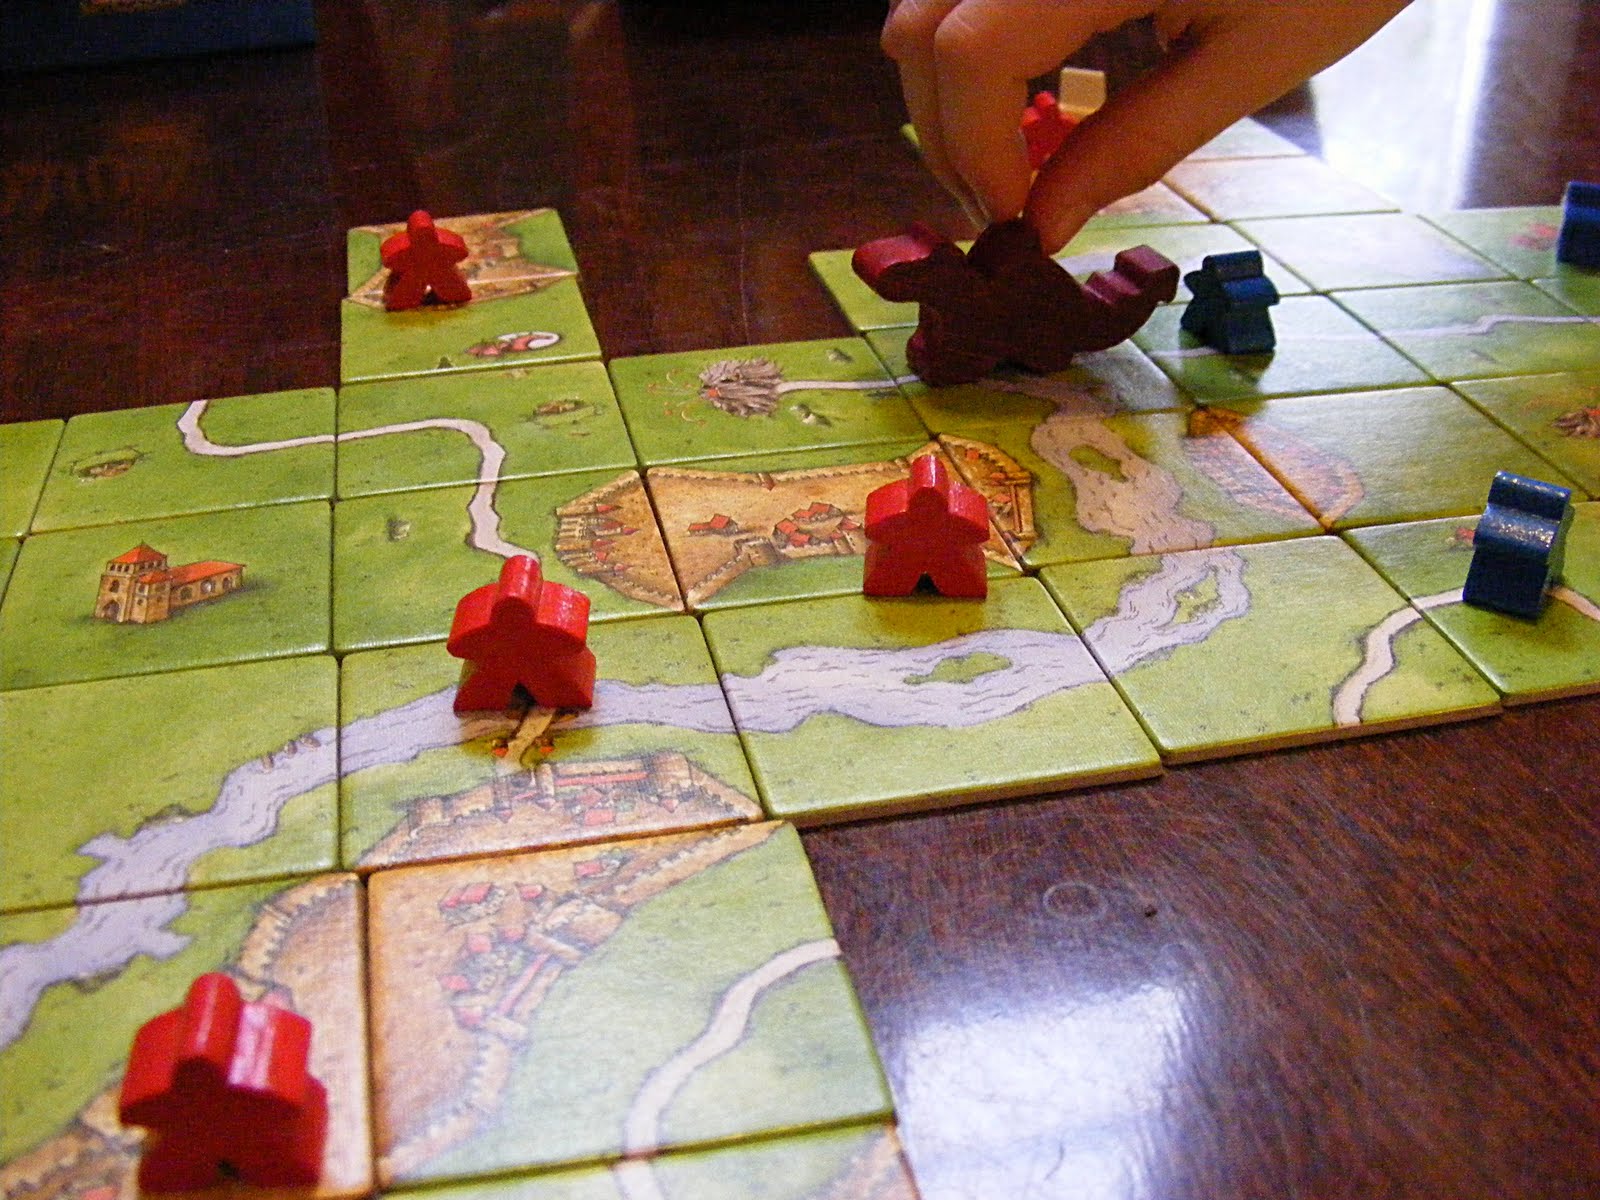
Jo and I have been busy, busy, busy all week long - so today was for sleeping in, relaxing, and having some fun together. We started out by breaking open our new
Princess and Dragon expansion set for
Carcassonne. Thanks Alan! We've been eager to give it a try and it didn't disappoint - adding a different strategic twist to an already terrific game.
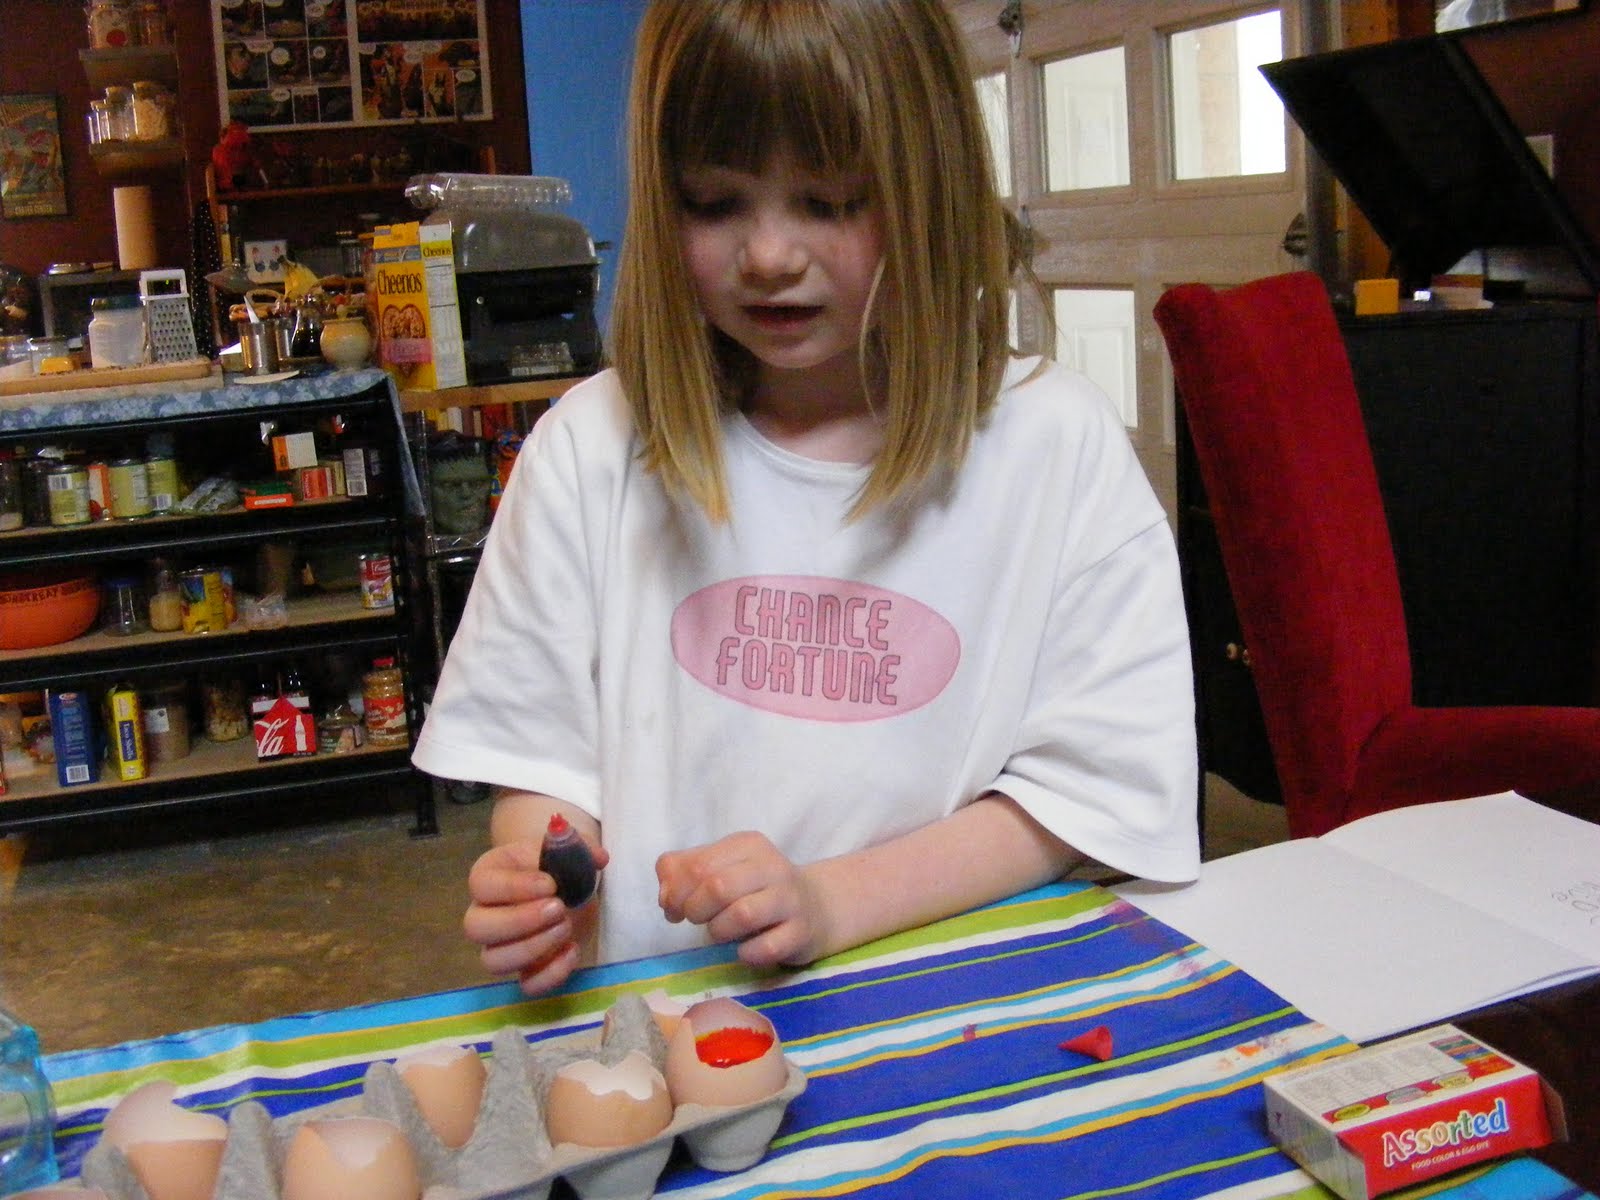
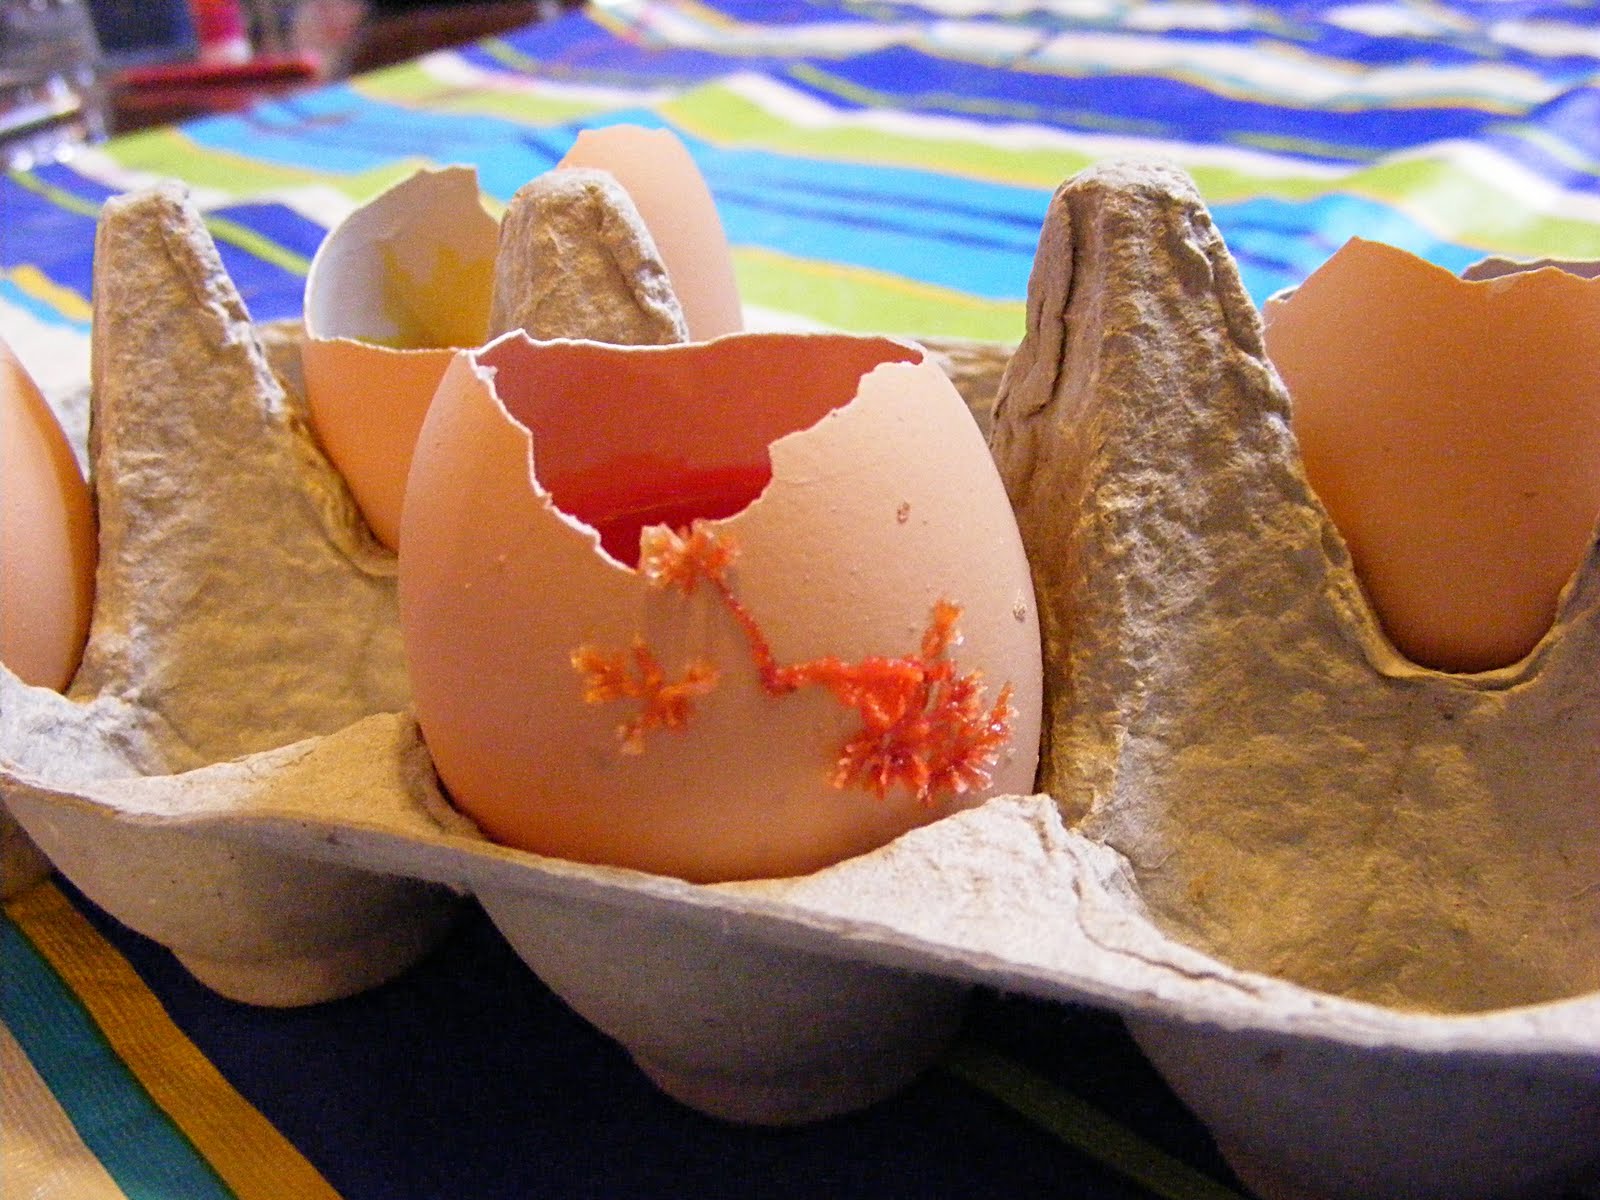
Then we got to play Mad Scientist. I saw
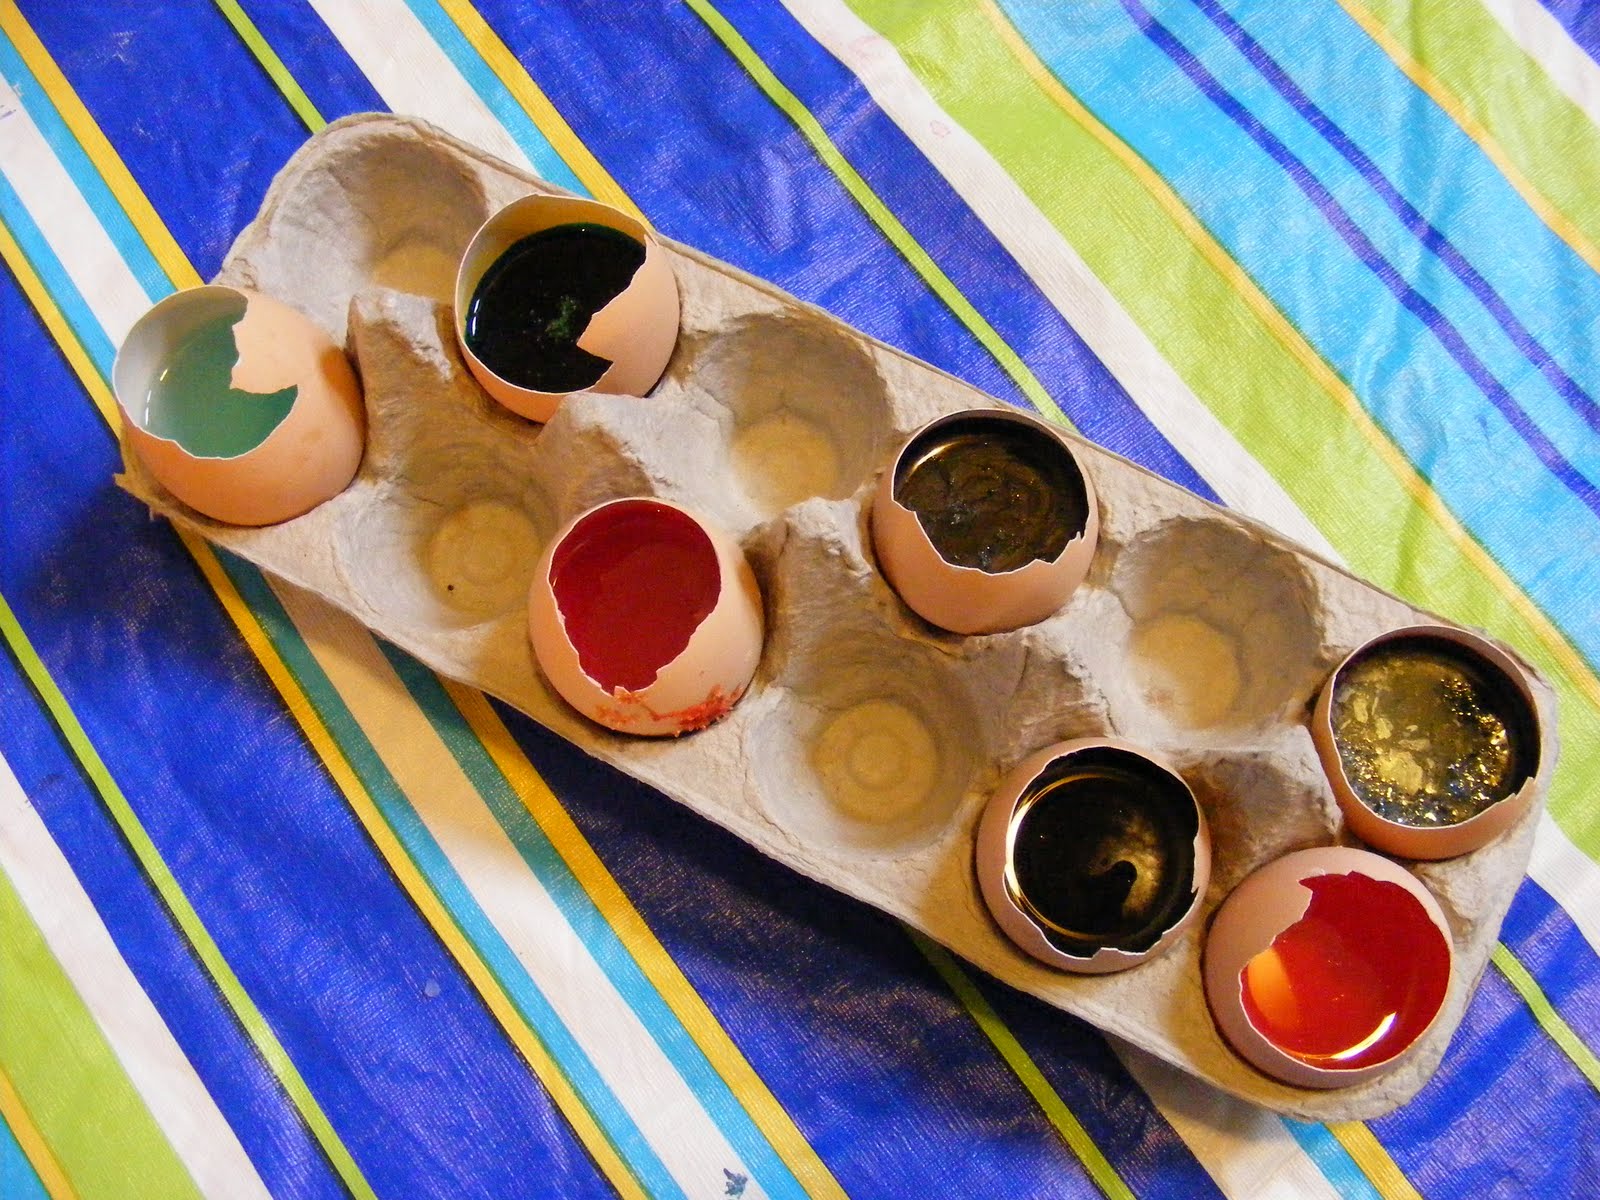
this online last week and knew immediately that Jo would love it. Growing colored crystals inside eggshells - what's not to like?
We made super-saturated solutions of table salt, kosher salt, ice melt, granulated sugar, powdered sugar, baking soda, and kitty litter crystals. Yes - kitty litter crystals. We'll see.
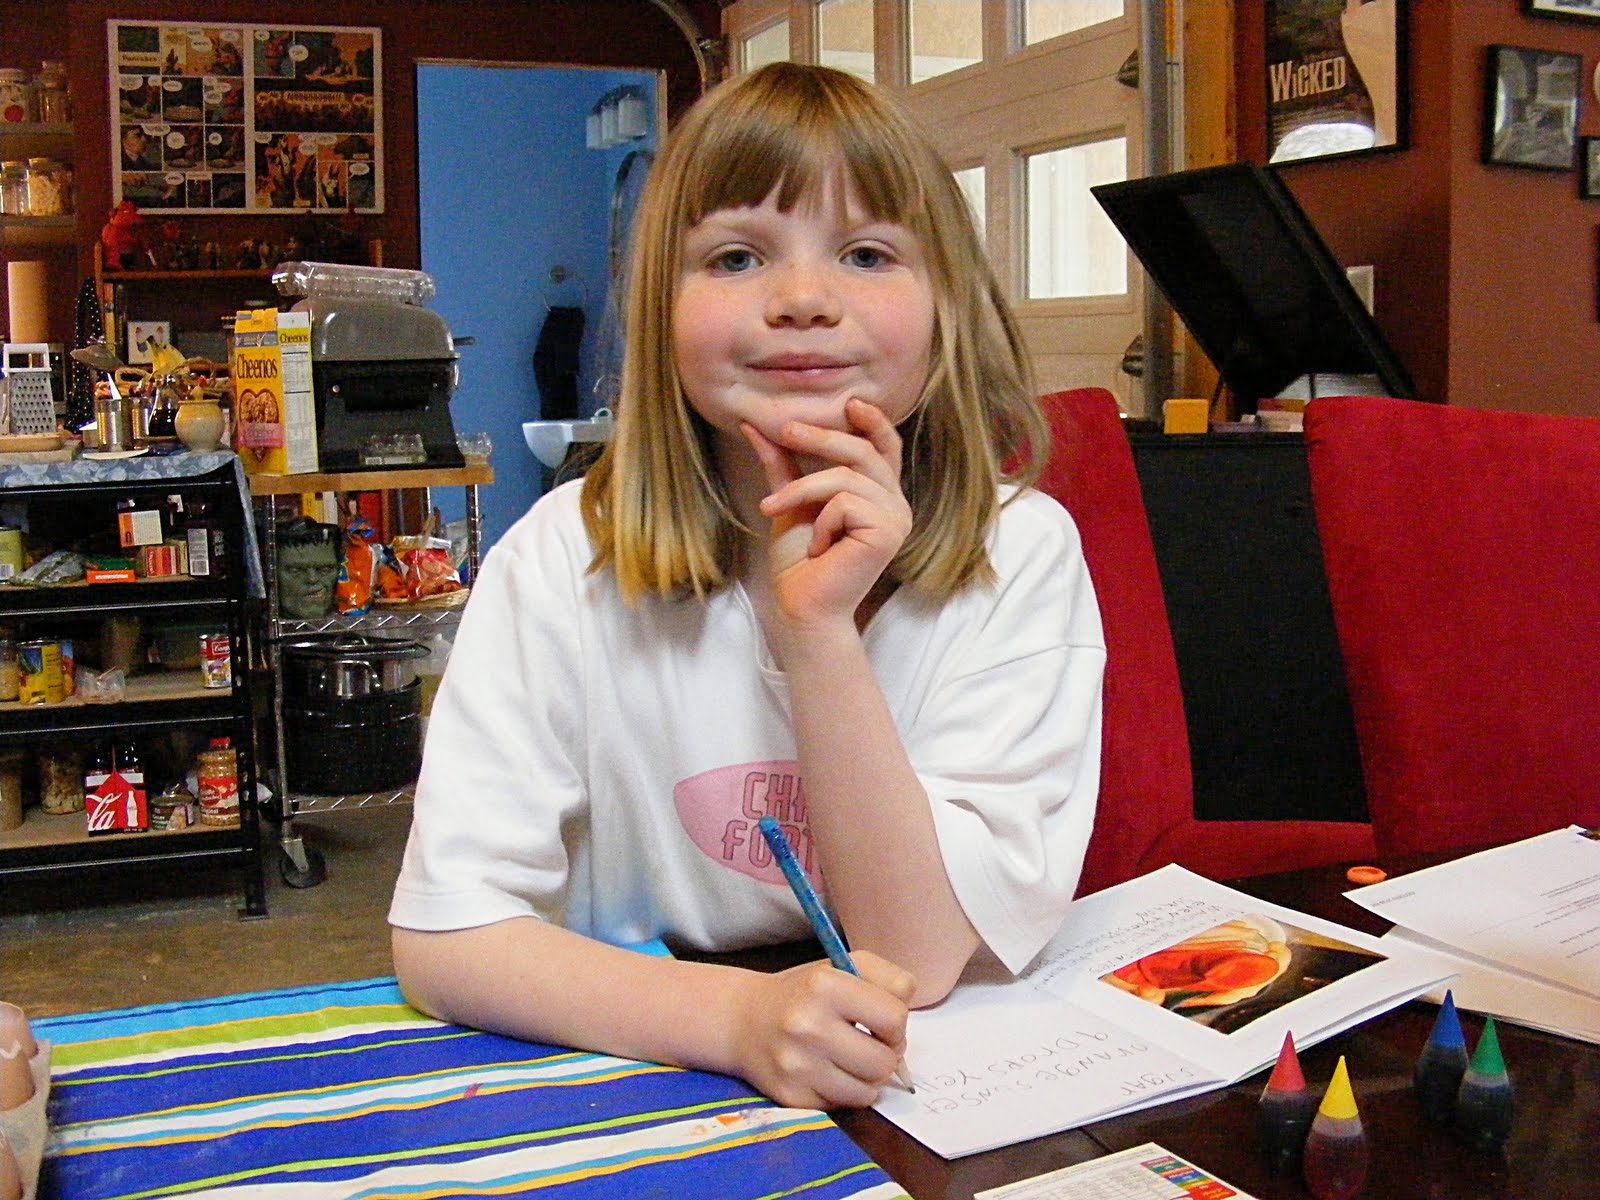
Jo tried out all the different color recipes on the back of the food coloring box. Of course, like a good scientist, she took excellent notes.
She documented what color she made each solution - even noting how many drops of each color she used. She also looked at the original salts under a magnifying glass and predicted what shapes the new crystals would take - drawing a picture of each prediction. We're already seeing some very cool results from the baking soda solution.
Some of it seeped through a hairline crack in the egg and crystals have started forming on the outside of the shell. Ooooh - magic! Now Jo's watching
So Alan leaves for Japan very soon and we've been doing our research and making our plans. One thing we found out is that lots of individuals and businesses (like the owners of inns we'll be staying at) often give little gifts to people. We wanted to be able to reciprocate and we racked our brains to think of something appropriate. We wanted it to be handmade and to say something about us or where we're from. I had just bought some new wool felt in yummy colors for doll hair, and I was in the mood for hand-sewing some of that felt - so we decided to make some little hens. It took an afternoon to develop the pattern - and I thought I'd take you through some of the steps in designing a felt critter.
I started with my standby favorite,
Ed Emberley's Drawing Book of Animals. But something wasn't quite right. Maybe it was the size of the neck and tail? I tried shorter, but that was worse.
I decided to make it curvier - lose some of the sharp angles.
Success! See the graceful swoop of her tail? The proud tilt of her head?
This was one of our hens.
Now - to translate into 3D. I knew I'd be sewing felt with seams on the outside and teeny-tiny seam allowances - so I decided to try it without any additional seam allowances added. I could have cut two pieces of felt and stitched them together for a very flat chicken, but I wanted her to have a wide bottom to allow her to sit upright - like she's sitting on a big pile of eggs. So I needed to add a gusset to the bottom.
I used a cloth measuring tape to measure the distance around the curve of her body from her chest to the base of her tail - that's the length of the gusset. Then I cut two body pieces out of paper, stapled them together at the top, and played with it to figure out how wide I wanted the spread across her belly - that's the width of the gusset. Then I sketched in symmetrical curves - and that's a gusset.
I stitched up the first prototype.
It's been
bunny central around here lately - making me more excited about Easter than I usually am. I wanted to make something quick and easy - something I could make a bunch of and give away at egg hunts this season. I was inspired by
Holly's remake of the classic paratrooper dimestore toy (You haven't seen it? Well go check it out, for goodness's sake! It's fabulous!) and I decided to remake those carrot-shaped cellophane bags you find filled with candy at Easter. My version is made from fabric - thus hiding what kind of candy is inside. Is it M&Ms? Is it jellybeans? Oooh - the suspense! Plus it's reusable and feels so much nicer than the plastic bags. And - it's oh so easy. All you need are some scraps of fabric and a sewing machine - and this
easy peasy tutorial. Enjoy!
Here at Gratz Industries we've decided to start interviewing some of the amazing creative people whom we've previously only
stalked admired from afar. And I'm so thrilled that Holly Keller of
Beeper Bebe has agreed to be my first interviewee! So let's get down to it, shall we?
Where do you find your inspiration?My primary sources of inspiration are vintage toys, nature, fine artists (love Miro, Caulder, and Girard), and my biggest influence is, perhaps, the creative interests of my son.
For a couple of years now he has been coloring everything using every crayon in the box, nothing reflects reality—everything is rainbow-hued in his world (I like to describe it as coloring like a rainbow threw-up on it)—and this has definitely inspired my recent design aesthetic—the color wheel-like effect you see in my Rainbow Sunshine Plushie, as well as My Counting Bean Bags and fabrics I chose for those.
How do you balance your making with your family? I forgo a whole lot of sleep. But aside from that, I have the great fortune of being married to someone who wholly supports what I do and does more than his share around our home so I can have time to design and support my little business. I did recently move to a part-time schedule at work too—cut back from full time to a 3-day work schedule—so I now have more time I can devote to the Beeper Bebe space, as well as to my son. And I have to admit, that has been the most glorious change in my world—I could break into a triumphant song and dance just talking about that change. I mean, Virginia Woolf talks about the need to have a room of one’s own, but you also need to have the dedicated time of one’s own—especially as a mother. While I did plenty of work on Beeper Bebe prior to going part-time, I always felt guilty for it and like I was short-changing everyone in my family (including me). But now that I have this dedicated time every week that is just for me to create—time that was freed up with the explicit intent of allowing me more time to devote to Beeper Bebe, well, I am liberated from my guilt for those hours. And that alone has been inspiring—not to mention crazy-happy–making for me personally.
Can we peek into your work space? Show us where the magic happens!My work space is a work in progress.
View Next 25 Posts


 Library staff see a diverse crowd of students after classes end each school day. There are over-worked students looking for a place to unwind or cram in homework before after-school activities and jobs. There are also wandering bands of restless teens who don't seem to have anything in particular to do but make all the noises that weren't allowed during the day. We don't want to contribute to students' stress by piling on more work, but do want to provide them with a productive outlet for all that pent up energy.


.png.jpg?picon=3640)


