new posts in all blogs
Viewing: Blog Posts Tagged with: decorating, Most Recent at Top [Help]
Results 1 - 25 of 29
How to use this Page
You are viewing the most recent posts tagged with the words: decorating in the JacketFlap blog reader. What is a tag? Think of a tag as a keyword or category label. Tags can both help you find posts on JacketFlap.com as well as provide an easy way for you to "remember" and classify posts for later recall. Try adding a tag yourself by clicking "Add a tag" below a post's header. Scroll down through the list of Recent Posts in the left column and click on a post title that sounds interesting. You can view all posts from a specific blog by clicking the Blog name in the right column, or you can click a 'More Posts from this Blog' link in any individual post.

By: Eleanor Jackson,
on 8/8/2016
Blog:
OUPblog
(
Login to Add to MyJacketFlap)
JacketFlap tags:
Consumption and the Country House,
elite taste,
English country house,
Jon Stobart,
Mark Rothery,
refurbishment,
Stoneleigh Abbey,
Thomas Burnett,
Warwickshire,
Books,
History,
Power,
decorating,
luxury,
British,
wealth,
drapery,
*Featured,
Art & Architecture,
Arts & Humanities,
Add a tag
In February 1764, Samuel Butler, the steward at Stoneleigh Abbey in Warwickshire, wrote to the London upholsterer, Thomas Burnett, that he should wait in sending furniture because ‘our house is now in greater confusion than ever … as we are making great alterations in the middle part of the house’. These changes were being made as a result of the recent coming of age of Edward, fifth Lord Leigh.
The post Making the English country house appeared first on OUPblog.
Just bought a new house, well an old house, new to me. Besides some of the mechanical things that need to be fixed, I am going to decorate it so it becomes mine. This blog is about my experiences while I do that and maybe some recommendations down the road.
You know, these days it is very difficult to even think of decorating your home. I have some great ideas which if you adopt; you will be able to decorate your home within the limit of your budget.
Paint Your Home
Just painting the walls. It is the most inexpensive way of decorating a room or your home. You can get by with just the cost of the paint. If you don't like all that hard work, just ask some friends over to help. Don't forget to serve them lunch or dinner after you are done with the paint though. And wine or a six pack can go a long way in easing the labor.
Look For Secondhand Stores
Put your own stuff, or new-old stuff in the house. There are many online stores as well as real stores in the market which sell secondhand goods. When you are going to buy any furniture, first be satisfied with the quality and construction.
Do It Yourself
Most of all do it yourself. I just search from the internet about decoration ideas and follow the step by step instructions. You will have the inner satisfaction of decorating your home as well as will be amazed in seeing the results. It is the most inexpensive way of decorating. In the end you will have the inner satisfaction of decorating your own home as well as be amazed in the results.
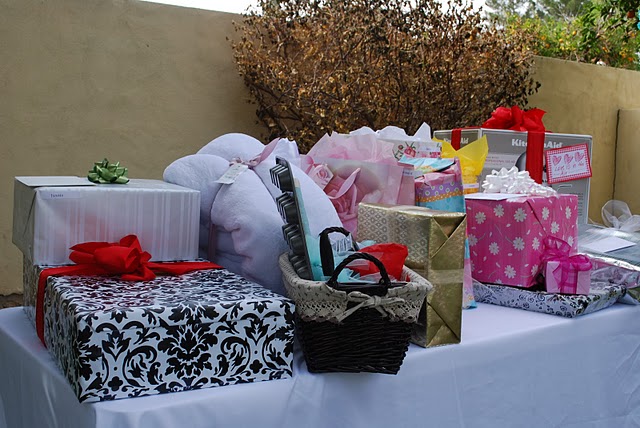
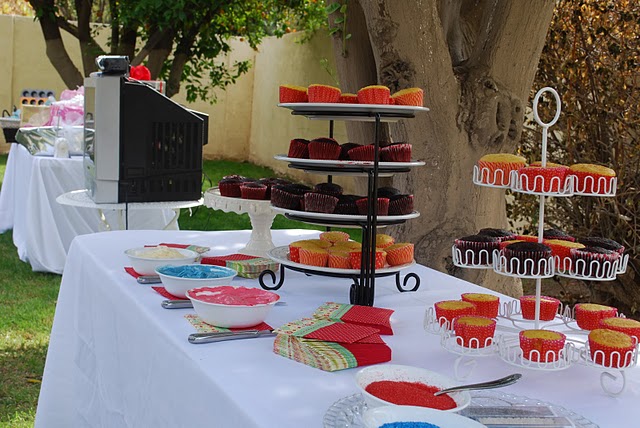
So, where has Mrs. Homespun Emily been?
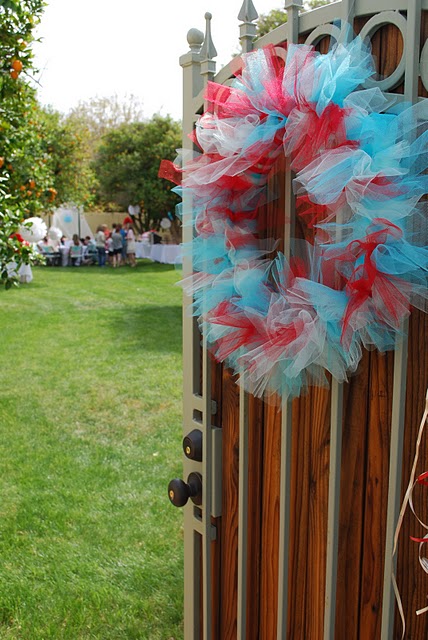
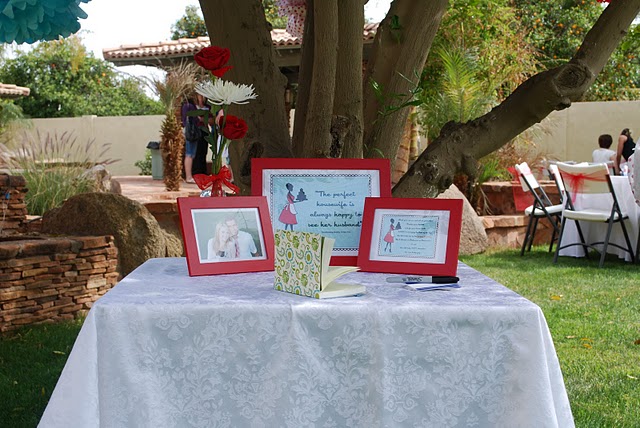
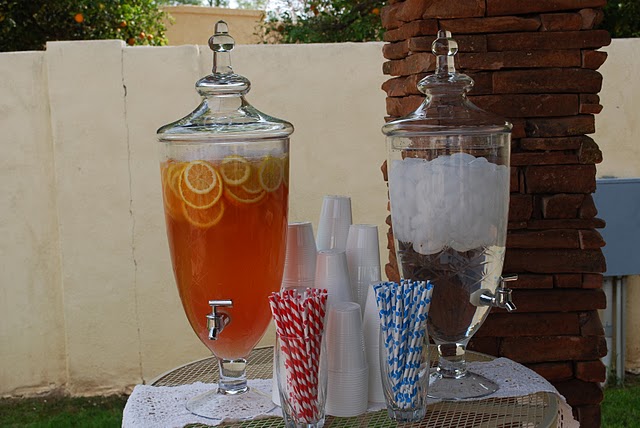
I've been celebrating my beautiful sister, Sarah's, wedding in sunny, AZ.
We celebrated Thanksgiving a day early this year because my oldest decided at the last minute to spend the actual holiday out of town with his girlfriend and her family. That left Wednesday as the only night we'd be all together. It was so nice having our big meal on Wednesday evening that we're thinking about making it our new holiday tradition; we've spent today relaxing and playing games. It feels to me much more like an extra long weekend, since we don't lose Thursday to all-day food prep, eating too much, and cleaning up. I simplified the menu a bit because Wednesday's busier and I hadn't even baked pies or anything. But I also benefitted from having two of the kids already home from college and work to help out yesterday, so it wasn't too bad getting everything together.
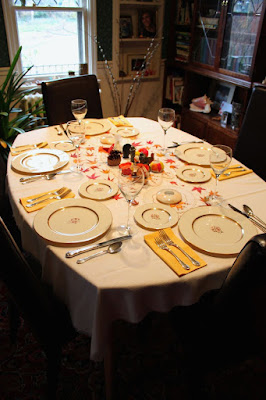
My daughter decorated the table, using Japanese maple leaves she'd pressed and an odd assortment of ornaments and candles from family childhoods, like the Thanksgiving candles my husband has used as long as he can remember and the funny little clay pots all three kids made for their kindergarten Thanksgiving feasts.
We had a turkey breast rather than a whole turkey again this year; I finally realized that since no one in our family especially likes dark meat, it was silly to wrestle with gizzards and trying to get the dark meat cooked adequately without drying out the white meat when we could just buy and cook (much more quickly) the part we all like best. Doh!
For a couple of years, I bought breasts from Costco that came packaged with a really delicious glaze. Costco stopped carrying that brand and I was feeling sad about the glaze again last night when it suddenly occurred to me to just look up a recipe for a similar one. Doh! again. I found a recipe that seemed promising
here, but I was missing some of the ingredients. The recipe that follows is my improvised version. I also added extra liquid to the leftovers to make a sauce that could substitute for gravy (I have one kid who eats gluten-free, which makes things like gravy challenging.) Anyway, it was so good, I actually wrote it down at the urging of the whole family so I'll be able to recreate it again.
 I am always changing things around, cleaning up, redoing, shifting, repainting, reorganizing, stacking and filing. In the last two years I have made an addition to these behaviors. I am now getting RID of things. My husband’s remark?
“She is giving away everything that’s not nailed down!
Of course this is not completely true. I have not gotten rid of HIS things yet. HA!
For some reason it feels like everything in my house looks as OLD as the hills, the paintings, furniture, dishes, towels, lamps… EVERYTHING!
Perhaps it is because all of our kids have moved out and we have more time to stare at the stuff in our house?
Well, the stuff is GOING! I can almost hear my belongings shaking in fear, thinking to themselves, “Am I next?”
Ha ha ha heee hee heee (evil laugh), YES!
Filed under:
Kicking Around Thoughts 


Our living room is relatively spacious but we don’t have a ton of seating. This is fine for the most part since it’s just the two of us (excuse me, 3, if you count Spoo). But it’s nice to have some casual seating around, just in case. My friend Angela has a couple of Moroccan leather poufs at her place and I always thought they were a fun addition to the space and feel a lot less committal than big, heavy pieces of furniture. So I figured I could make something similar.
I started to look online for some DIY instructions. I’d google “how to make an ottoman” and such and couldn’t find what I was looking for. After a few different attempts I stumbled upon this DIY Pouf tutorial. (Oh, a pouf - that’s what that thing is called!) It seemed relatively easy (Samantha provides pattern instructions which is great since I didn’t want to figure that part out myself). I already had the perfect fabric picked out from my vintage sheet stash. I love vintage sheets because they are usually very colorful and cheery, plus there’s a lot of fabric in one piece.
I followed the instructions as written except for #2 - Instead of creating a hole on the center of the pouf by folding under the pointed ends, I stitched each piece end to end and left an opening in one of the seams.

I flat-lined the pieces with a plain white sheet. The stuffing is everything you can think of: unwanted clothing, fabric, sewing projects gone sadly awry (and that I felt too guilty about tossing)…even with everything stuffed in there I still couldn’t make it completely full; this pouf is almost 2′ wide and it’s mind-boggling how much can fit inside it! I also added an over-sized doily in the middle which I really like.

It’s very squishy. Not annoying “I’m stuck in this flippin’ beanbag” squishy, but just enough. Doesn’t it look summery? I’m already thinking about making another one. This next pouf would be smaller and perhaps I’ll round off the corners a bit so the top (and bottom) will have a flatter appearance.
Are you working on any DIY projects for summer? Do tell!
Quick reminder, now is the time to bring in some branches to force! These are pear branches, I haven't tried those yet so we'll see if they blossom
This little makeover is about as simple as you can get. I'll explain how I did it just in case anyone else has an old stereo that they'd like to change.
So, I'd like to get a lovely wooden Tivoli system someday when the budget allows. But until then I was getting tired of my stereo's blue speaker screens (that I had managed to spill paint on at some point.)
When I finally decided to update them, I realized it was actually really easy. I wish I had done it sooner. The screens are made up of fabric stretched over a plastic grill and the hole thing pops off. I wish I had noticed that when I was trying to clean off the paint! Anyway it can get dusty back there so it's a good opportunity to tidy that up.
Then just rip off the old fabric. Punch a hole with your scissors in the centre and pull the fabric away around the edges. It's basically just glued down and if you tug the whole piece of fabric will come off.
After that cut a new piece of fabric to fit. Just trace around the screen and leave a little extra to tuck around the back. I used one of my favourite linen prints, grey fish and waves on white. If you use a patterned fabric you can decide exactly where you'd like the pattern to be placed and which way is facing up. Also the patterns could match or be symmetrical to each other.
Then apply double sided tape around the edges of the plastic screen just on the inside.
It doesn't have to be perfect!
Place the screen in the centre of your fabric (wrong side of fabric facing up, front side of screen facing down), pull the edges of the fabric over and press onto the tape. It's like upholstering a chair seat, attach the centres first, then work your way around and gently press the edges of the fabric down on the tape while tugging very gently so that the fabric is snug but not stretched out of shape.
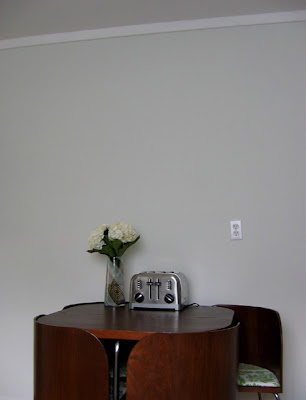
Now that the house is sunnier I've been feeling more motivated to do lots of little decorating projects. My decorating budget is still non-existent, so stay posted for lots of easy changes you can do that cost next to nothing. Most of these involved things I had lying around already, so it helps if you already have things like leftover paint from other projects etc.
The first thing I've done is add more shelving in our kitchen. The
wall over our table was completely bare. When we moved into our house there was some wood left behind in the garage and I had found three more planks just like the ones I used to make shelves in the
studio.
All I did was a quick sand before priming and painting. So they are still a little bumpy but I like that look. These were installed with some inexpensive brackets from IKEA.
Originally I had planned to just put a bunch of stuff that was cluttering up our countertops on the shelves, but after I'd added a couple of ceramic pieces, I ended up gathering up the ones I had in the studio as well to have them all gathered in one place.
The bottom shelf is the more utilitarian shelf, with the regularly used salt and pepper, butter dish, napkins and coasters. We do use the ceramic planters to store things like garlic cloves but really I just think they look pretty..
Then at the bottom I added hooks for my collection of tea cups. What can I say I love granny decor whether it's chic or not!
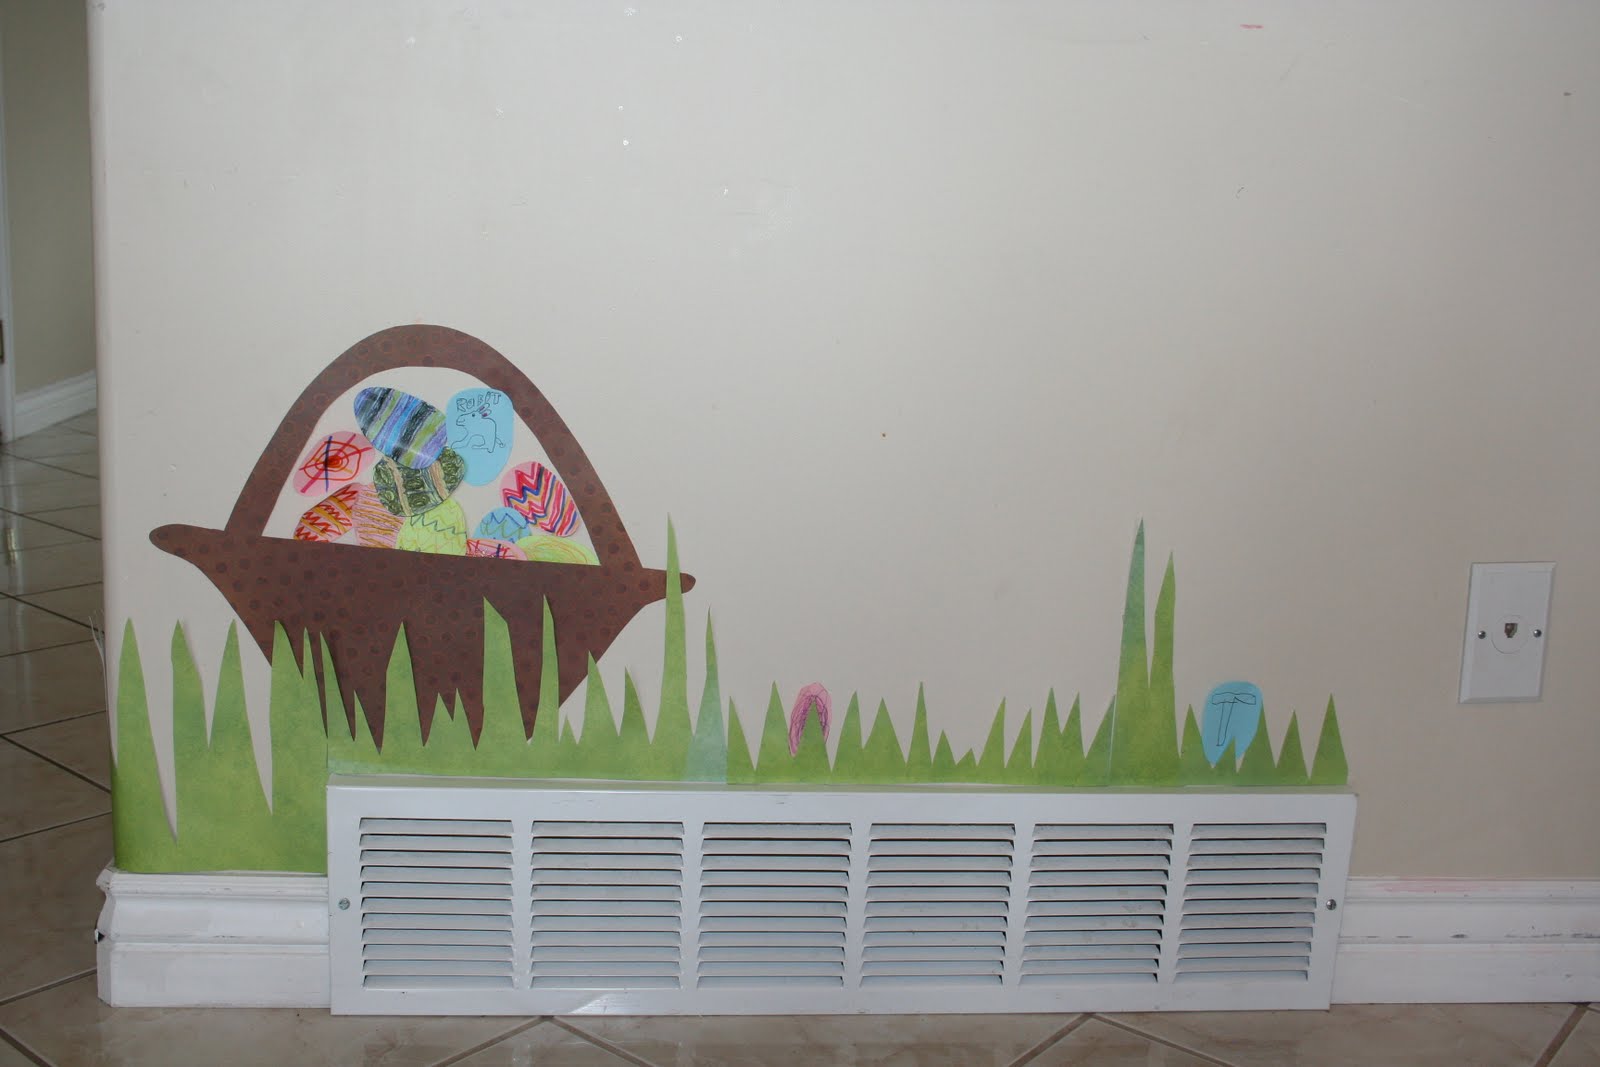
We decorated easter eggs...on Post-its, that is.
...and placed them in a basket on the wall.
What do you think?

By:
Shari Lyle-Soffe ,
on 1/25/2010
Blog:
Shari Lyle-Soffe
(
Login to Add to MyJacketFlap)
JacketFlap tags:
cleaning,
sharing,
decorating,
colorful,
attitude,
storage,
bedroom,
children,
books,
organizing,
Add a tag
How many times did I say that to my kids? More times than I can count. I hope I can offer some suggestions and tips that will make it easier for parents and kids to get the bedroom clean with minimal friction.Parents: Make your child's room an atmosphere they will want to keep clean. Sometimes we decorate our kid's rooms as we would want them. Be sure the decor is pleasing to the child, not just to you. Ask them what they would like, and let them make color choices, ( within reason. Our son wanted to paint his room black. I put my foot down on that one.) Allow your children to browse through magazines and look for rooms or features they would like to have. "A place for everything and everything in it's place" is a valuable reminder of how to keep order. I sometimes come across items when I am cleaning house that just don't seem to have "a place". You can waste a lot of time trying to figure out what to do with that item. Adding it to a designated place where it doesn't belong can throw your order out of whack and can become a slippery slope to chaos.Children need colorful baskets and bins that are designated for specific items. They may need labels to remind them what goes where. Make it easy for children to keep things in order. Put things at your child's level so they don't have to throw things up high where they can't reach. They need convenient hooks for handing up jackets, caps, mittens, backpacks and they should be within their reach. Rooms need to be set up with designated areas for specific purposes. If your child plays in his/her room you will need to arrange for areas for art, puzzles and games, clothes, school work and supplies, collections, etc. Children need different things at different ages. Keep that in mind when planning the room. Make sure furniture is the right size for the age of the child. Give them adequate light for working on homework or puzzles, etc. Organization is more important than cutesy themes, although they can sometimes go together, but keep in mind that you want the kids to learn to clean up after themselves so make it fun and easy for them. Make sure the space or container is large enough and the right shape to hold the things that are supposed to go in it. A round basket is not a good holder for rectangular coloring books. Re-evaluate the plan periodically. Remember children grow, needs and interes
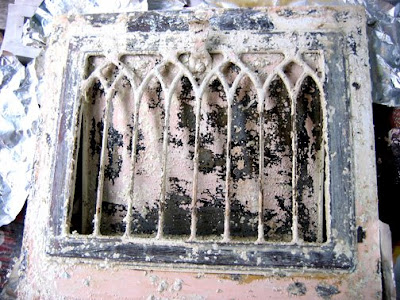 So today I've been doing the messy jobs that come before decorating. We have nice old grates that cover our vents, but the one in the bedroom had peeling paint and looked a bit grim. So I decided to strip it so I could repaint it and make it look nice and smooth.
I always regretting stripping anything. It always looks much much worse after you start stripping. And of course the bottle (this kind is meant to be environmentally friendly) confidently tells you that this stripper can take away layers of paint and it will do all the work for you. But in truth it's usually a smelly, messy, tedious job.
Afterwards I'm usually very happy with the results and feel it was worth it. Sort of. But in this case after a few rounds of gooey paint scraping I decided to call it a day and clean up, do a little sanding and leave it at that.
 In this case the results weren't great. Probably not much better than a bit of scraping and sanding would have been, but I'm done and have remembered why I probably won't do this again.
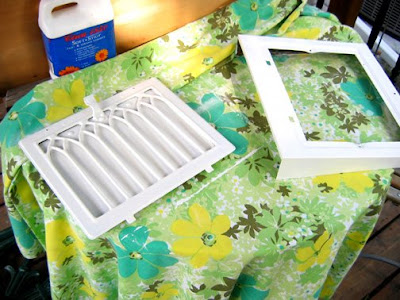
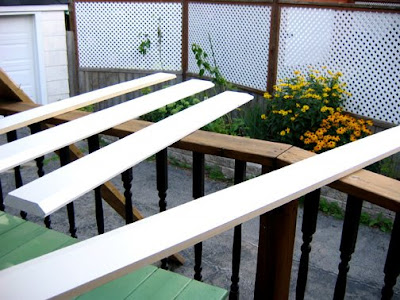 We've also made new baseboards, since we removed the wainscotting. I primed those earlier this week, and today they got their 1st coat of paint. The nice old style of baseboards in our house are plain with a bevelled edge at the top. We couldn't find them pre-made so we (ie. Bradley) made our own with planks of wood cut with a matching bevelled edge.
This grate will tidy up our bedroom, along with the baseboards. Taking out the wainscotting turned out to create a whole lot of work. Also, as I just discovered, my post was used on Apartment Therapy.
This time I didn't get asked and they really hated this one! In my defense I think it's one of those cases where a photo is a bit misleading. The wainscotting really wasn't nice, and everyone who visited the house agreed. The room still has nice character with the old trim and aforementioned pretty old grate. And you guys know I do appreciate old things...
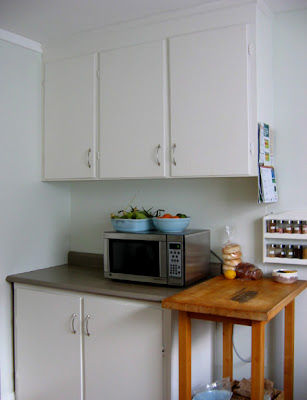
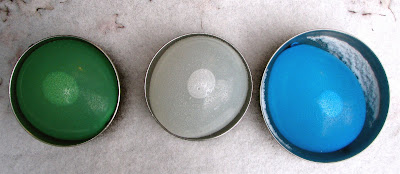
 So lately we've been doing lots of work on the house, mainly painting, and I've been trying out some new colours. When it came to the kitchen I wanted something very light. Our old kitchen had sliding doors out to the garden, as well as a large window and it was very bright. The new kitchen has a large window but only a single back door with a small window in it.
 you can see the colour here, pretty subtle...
I liked the grey we used for the old kitchen, Benjamin Moore
Titanium, but I wanted something that would work well with the blue in our living room. So I picked a very pale, bluish/greenish Benjamin Moore colour called
Dewdrop. It has a sort of beach glass colour to it, but it's so pale it almost looks white. If you compare it to the trim you can see the colour. In the end I'm happy with it, it's subtle but my second choice was just a classic white kitchen so this has the same effect while having a hint of pretty colour.
 Before and After
I wasn't planning to paint at all, the previous colour was a pale sandy-beige that was fine, but after doing the electrical work the walls were full of holes that we had to patch. Now I'm happy I did paint it as I love the way the kitchen feels now - more bright and airy, and it also feels more like ours. As you can see above, it's not much of a change but I like it!
When it does come time to renovate I'm not sure if we'll keep the original cabinets, probably we will but update the doors. I like the way they extend right up to the ceiling. The kitchen has a sort of 50s charm, but we could use more drawers and general storage. We would like to update the counter top, faucet, sink and add a tile backsplash. I do like the wood floor and it's larger than the galley kitchen we had before. Do I miss the renovated kitchen in our last house? I certainly do, but I still love our new house so it's ok!
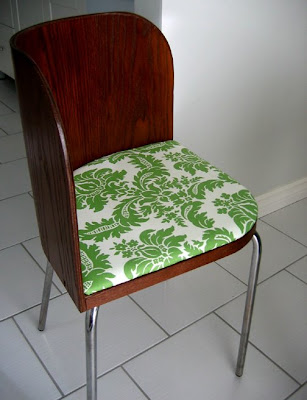 Sometimes I post something and then I think it needs a little follow-up. In this case it's the IKEA Fusion dining set. I loved it when we bought it and it did fit perfectly into our kitchen eat-in area. But I was never really happy with the cushions.
The set comes with the seats covered in a black matte vinyl? fabric. I really didn't like it. So I used an aqua and white striped fabric I had on hand to recover them. But I made some mistakes. First of all I didn't pre-wash the fabric and I had bought it 2nd hand so it turns out that there were dusty marks on it. I didn't notice until later.
Also I didn't remove the black fabric that was already there since it was attached with about 1000 staples. This isn't a good idea because it doesn't feel right and there was a subtle dark shadow from having the black underneath the white and blue striped fabric.
 So this time I was determined to do it right. (if something is worth doing, etc...) For some reason I was picturing a green and white print and finally found the perfect one at a fabric store on Queen West. The best part is that it was a fabric that was usually $19/yard but I found an end piece that was around 1.5 yards for only $10! The green colour was exactly what I was looking for, and it was a nice upholstery weight with a lovely smooth feel to it.
Bradley helped remove the 1000 staples and I attached the new fabric and now I re-love the IKEA dining set. Yay!
 Hallway "After"
Today's reveal is the finished hallway. Doesn't seem like a big thing but it really has made a huge difference. Our house is fairly long with rooms in a row down the left, and all the closets to the right. We have two double closets, then a linen closet, then the pantry in the kitchen.
 Hallway "Before"
When we moved in, the hall was a bit of a mess. It was painted a dark caramel colour, with a large box flourescent fixture. The doors on the closets were plain slab doors, but one of them only went halfway down, with a curtain tacked on at the bottom. The floors were peeling (and generally aged) vinyl tiles in a faux-marble pattern.
The first thing we did is change the light fixture which has 3 bulbs that create a soft diffused light. We painted the walls in
Chalk (which matches the living room walls).

We changed the doors to bifold wooden slat doors painted
Cloud White. We also changed the slab bedroom doors to freshly-painted new panel doors. Finally the floors were updated when we re-did the flooring in the kitchen and bathroom. Which meant also updating the baseboard trim.
I put in a little white bookshelf which creates a little vignette right in the middle - just a spot to put a lamp and plant and make the space cheerful.

Never underestimate the hallway - you do spend a lot of time there!
 So our big news is that we've just put the house up for sale. AND given that it's up for sale I can say that we're pretty much done renovating! So coming up soon I'll be showing all the final before and afters for the house.
If you've ever sold your place before you know it involves a bit of staging. In our case it meant moving a few things out to make things as spacious-looking as possible. I don't think it's very misleading in our case as most people probably don't have a couple of china cabinets filled with yarn and fabric respectively.
So now the house is very clean and tidy and the lack of clutter is a bit weird. But I'm finding it very relaxing now that most of the work is done. There's been a lot of finishing loose ends, such as finally putting in the finishing panels in our kitchen. I'll be posting that and doing a final assessment of puttting in an IKEA kitchen.. thanks for asking James!
 Um, I know, I'm falling a bit behind with the daily advent stuff. Well, maybe I'll catch up with some double posts soon...
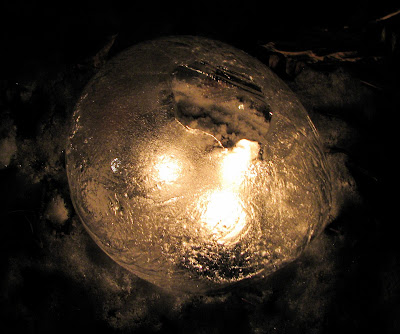
Anyway, today's idea is a cheaper, greener - and I think more beautiful - alternative to running up your electric bill with a zillion strands of outdoor lights. Ice luminaria. They do work best in cold weather, but we've largely had that in spades this year in Pittsburgh (not today though - 50 degrees! And all my lanterns melted shortly after I took the photo below. Oh well, I can make them again. Back to snow tomorrow.)

You can find even more details about these in this month's issue of
Nick Jr Magazine - I wrote up a bunch of the activities in the parenting pull-out, and there's lots more to like there (like a recipe for figgy pudding, plus the customs that go with it. Yes, that figgy pudding from the song. Turns out it's tasty, and even kind of good for you. Who knew?). As usual with Nick Jr, all the activities are super easy, super good, mostly "green" and fun to do with kids.
Okay, so not only are ice lanterns pretty to look at, they're a blast to make - kind of a cross between a water balloon adventure and a science experiment. All you do is fill up heavy duty latex balloons with water, let them freeze outdoors or in your freezer (but if you have room in your freezer for a bunch of BIG water balloons I am mega impressed), crack a hole in the top, pour out the unfrozen water, put a candle in the middle and light it. Voila!
More details:
Step One I used 9" heavy duty helium balloons and filled them medium full. Kids with water balloon fight experience are good helpers for this step. You want a little air space left - the water will expand as it freezes, and the space creates a little indentation to chip away for the opening.
Step Two Put the balloons some place really, really cold and wait for the water to freeze. I put the balloons inside roundish bowls to help them keep their shape and to keep them from making my deck an icy mess if they popped, but it's not really essential.
Waiting may sound easy, but this is really the hardest part of all. I am impatient, and it simply does take hours. Sometimes many, many hours, especially if you put them on the deck right above the vent for the dryer and then proceed to do several loads of laundry. In my freezer, it usually takes about 6 hours; outside it took overnight (at about 25 degrees). You and your child will learn (if you didn't already know) that a container of ice freezes from the outside in. This is good, at least for this project. Wait until the ice shell is at least an inch thick - but do not wait until the whole thing is frozen solid or you will have to start over. You should be able to see and feel the water sloshing about inside, but it should be kind of hard to see it, if you've gotten it frozen enough.
Step Three Don gloves to keep your fingers warm. Put the balloon in the sink (or leave it outside somewhere that can get wet) and pop the balloon with a knife or pair of scissors. The latex will pull away; make sure to discard it carefully because it's a choking hazard for kids and animals. At this point, if you decide the lantern is not adequately frozen after all, no problem - just stick it outside or in the freezer again. But if it's ready, you'll need to chip away the ice in the indentation part. This is a grown-up's job but the kids can watch and make "helpful" suggestions. I just use a slotted screwdriver and hammer; an ice pick works well too. If it has gotten too thick, you can try drizzling hot water strategically where you want the opening; I've rescued several over-frozen lanterns/ice balls this way in the past.
When you've got a nice hole opened up, tip the ball and pour out the remaining water.
Carry the lantern outside, drop in a tealight or two or short pillar candle (I use tongs to position the candles) and light them. Use a lighter with a long handle or a piece of dried spaghetti as a long match substitute (Martha Stewart tip - and a good one).
These look beautiful lining a path or even just individually by the front door, sort of jack o' lantern style.
I got lots of nice tips from Jennifer Shea Hedberg at this
site when I was writing the piece for Nick Jr. And
here's an idea for a slightly different ice lanterns from Better Homes and Gardens that uses buckets instead of balloons and adds pretty things like greens and fruit slices to the ice. Finally, these sites
here and
here have some interesting history on the use of ice lanterns in China and pictures of the super cool and breathtaking ice festival in the northern China city of Harbin.

Is this cat waiting for a huge spider?

Mums, lots and lots of beautiful mums!

The colors of this front porch are just delicious, don't you agree?

This home is a favorite for both my husband and I. Unfortunately I didn't get the photo I wanted but will try again when the lighting is better.

Some ghoulish twists...freakish!

More posts later on in the week, feel free to check back...
Enjoy more fun Fall Drive By's at Melissa's
The Inspired Room.

This bird thought he'd join his friends in the birdbath....


With the hardwood floors almost completed, it's just about time to paint the walls. The color is one I have never gravitated towards before however we are looking for something that will enhance the richness of the wood cabinets and hardwood floors. Currently the walls are white. We are looking for a
golden shade with a hint of Tuscany flavor, not too bright, not too yellow, not too orange-muted, yet rich in tone. Ok, so what's left you say? Here are two color swatches. We tried the Laura Ashley Gold 3 but against these colors and the walls it actually looked like it fell more into the tan family. Our kitchen and dining area are small and both colors look suitable, even in a smaller area.
The cabinets and flooring are golden oak in color. The other color we thought of was a pale blue shade with a hint of turquoise (enhances the rich golden oak) however it might clash with our great room which is in a midtone muted evergreen shade.
What do you think? Your suggestions would be most helpful!
Melissa from
The Inspired Room posted a list of
"20 Little Things" that inspired her in Autumn. Since autumn is my favorite time of year, hear are my list of 20 little things:
1. Painting the kitchen and renovating (always autum projects)
2. Family gatherings
3. Crock pots of bubbly beef stew and fresh baked loaves of bread
4. Riding in an open topped convertible through Breads Hills, Michigan
5. Thick and cozy handmade sweaters
6. Teracott pots over flowing with Chrysanthemums
7. Paint chipped chairs and furniture
8. Hot Pumpkin pie
9. Candles scents of cinammon and berries
10. Thick warm blankets on a cold night
11. Gourds, squash and pumpkins
12. Fall festivals
13. A hot latte with a warm berry Stella
14. Flannel jackets and duck boots
15. Early morning mist
16. Apple cider
17. Bike rides around the lake, through the leaves
18. Knee high boots and skirts
19. Fresh fruit scones with marmalade
20. Fresh breezes through open windows!
 The weekend before last I finally did a whole bunch of craiglisting and swapped all kinds of furniture. I sold two storage ottomans(men?) and threw in the cushions I'd made for the top because the person who came for them seemed to like them so much. I sold an IKEA bureau that just had camping gear - all that went into the shed. I sold a sideboard and a bedside table, also from IKEA, neither of which had a place to go anymore. And finally our very tall IKEA hutch. Oh, and my old camping backpack. I can't tell you how good it was to clear all those things out!!
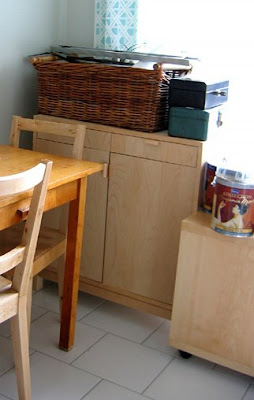 Before: this corner of the kitchen used to be a workshop, with all the tools and supplies for the renovation.
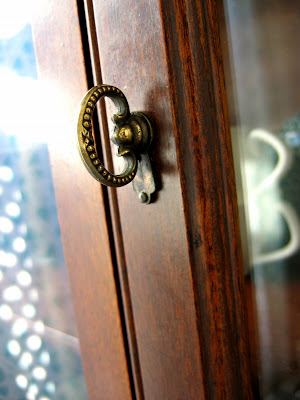
Then we bought a new hutch in a vintage style I like so much better, and a glass door bookcase that now holds all my yarn and some spillover fabric. I'll probably post that later once it's sorted out. The new hutch is similar in style to our china cabinet that holds all my fabric, I would guess 1930s, which seems to be my favourite decade for design.
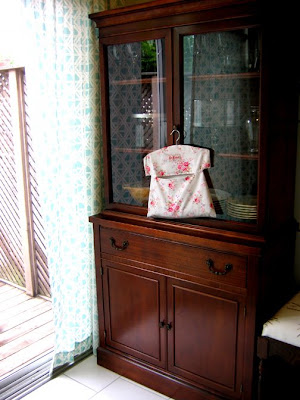
It's nice little details like this handle that I like so much:
Then we bought the new IKEA Fusion table and chair set, which luckily matches the hutch since the wood finish on the hutch is very nice and I wouldn't want to paint it. So now our kitchen nook is almost done!
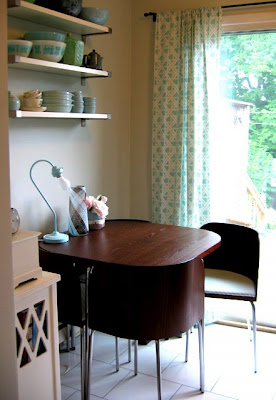
The lamp on the table was a family yard sale find, there's a pair of them and I just need to find glass lampshades for them.
It's basically done, but someday we'd like to replace the sliding doors (that don't slide very well), the ceiling fan and the dusty old stucco on the ceiling. The Fusion set is great because the chairs curve around the table and it doesn't take up much room. I didn't care for the black seat covers, so I replaced those with a striped aqua and white fabric that I bought at the Textile Museum Yardage sale.
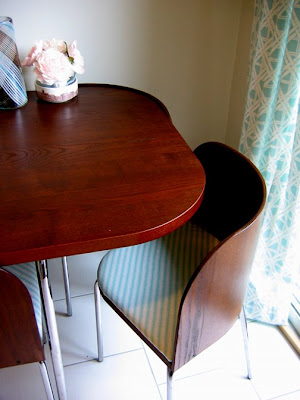 I was trying to pick a fabric then noticed this one matches the curtains perfectly, hurray!
Speaking of which, I can't tell you how much great stuff I found at the Yardage sale, but to paint a picture, I looked like a bag lady who lives on a bicycle on the way home. I had huge tote bags sort of wedged and tied to the baskets at the back. Most of it is in the new bookcase so you'll see it then...
Read the rest of this post
 Thank you for the shelf comments, they really cheered me up! This weekend we finally put up the fan back up over the stove, and I can't tell you how happy I am about it. When I say "we" I mean Bradley because I did very little aside from finding screws and washers, picking them up when they fell, and holding the fan for a few minutes. Also saying things like "wow, it looks so good", "do you want me to leave you alone now?" and "I can't believe you finished that bit already". The latter because it was much more difficult than expected.
The problem in the first place is that given the height of the cabinets and the hole in the wall where the fan used to be, there was a new gap between the two. Otherwise the cabinets would have been too low on the wall and too close to the countertop. This is the kind of thing that makes installing your IKEA kitchen tricky.
So first Bradley used finishing panels to construct a box that would be the shelf. Finishing panels are just big flat pieces from IKEA that have the same finish as the door fronts so that you can attach them to the sides of your cupboards so that they match. So dad-in-law helped cut pieces to size with his table saw. That was a few weeks ago.
Then after assembling the box, Bradley had to move the entire row of cabinets (they hang on a rail) a tiny bit to the left to fit the box in, then back again so that it was snug. This involved taking everything out of all the cabinets. Then finally an extra hole was needed in the wall for the fan to fit in place and then the fan was attached onto the new shelf.
This is sort of what it looked like before (I took this picture before the countertop was installed). The fan was sitting between the stove and countertop since it was still attached by a power cord. It was in the way, was accidentally scorched when I turned the wrong burner on one day, and was generally driving me nuts.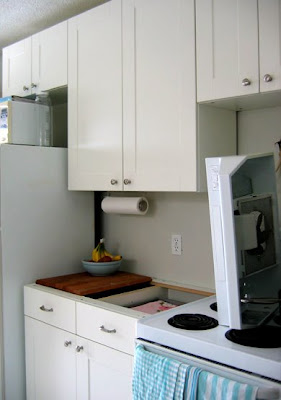 And this is the fan finally back in place! With an extra little shelf that I've decided to put our Denby Blue Linen baking dishes on. I just need to do a little caulking and paint touch-ups.
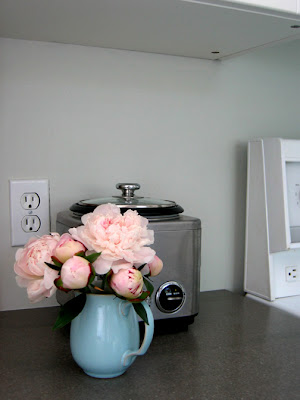
 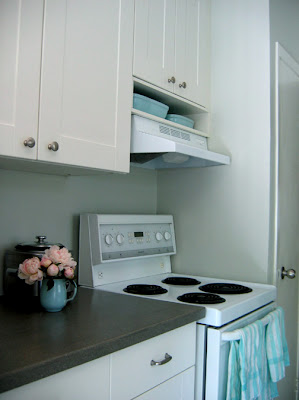 And in case you're wondering we don't usually have a blue jug of peonies on the countertop, I went out and picked them specially for the photo shoot. ( I guess without the fan there the countertop was looking kind of bare). I love peonies and was thrilled to see two bushes grow up this spring, one in our front and one in the backyard. Such a luxury after condo living.
View Next 3 Posts


.jpeg?picon=3304)

.jpeg?picon=2420)


That is possibly the coolest shower I've ever seen. I wish I knew you and your sister so I could have gone.