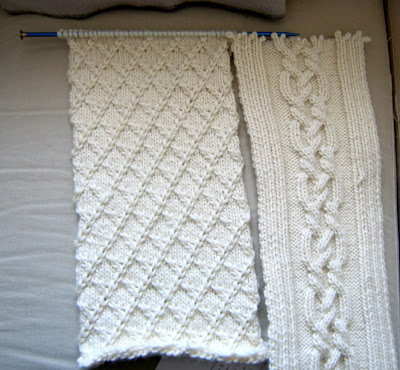
 I was inspired recently by some lovely (men's) wool scarves I saw at Banana Republic made from thick yarn and so big you feel like you're wearing a blanket. I wanted a very very cosy warm scarf for the coldest days this winter. Bradley put a skein of this gorgeous yarn (Sultra, 60% Merino wool, 20% Alpaca, 20% Silk) in my Christmas stocking, so I went to Romni and bought a few more skeins to make the scarf.
I started with a cable knit (pictured on the right), but I don't really like how it turned out. So I rummaged through my knitting books and found another stitch. I love a lattice (as in mullioned windows, patterns for paper and fabric etc), and I think this stitch is perfect. The scarf curls a bit at the sides but I'm hoping I can block it flat.
I recommend occasionally learning a new knitting stitch as it can keep you from being bored with knitting and you never know when you might use it. So here's the stitch:
Cross-Stitch Diamond/Lattice pattern
Multiple of 6 sts plus 2
All even-numbered Rows: purl all sts
Row 1: K3, *Cross R, K4* (repeat between the stars until the last 3 stitches), K3
Row 3: *K2, Cross R, Cross L* (repeat between the stars until the last 2 stitches), K2
Row 5: K1, *Cross R, K2, Cross L* (repeat between the stars until the last stitch), K1
Row 7: *Cross R, K4* (repeat between the stars until the last 2 stitches), Cross R
Row 9: K1, *Cross L, K2, Cross R* (repeat between the stars until the last stitch), K1
Row 11: *K2, Cross L, Cross R* (repeat between the stars until the last 2 stitches), K2
Cross R: Put the right needle through the 2nd stitch on the left, K the stitch but don't slip it off, K the 1st stitch on the left needle and slip both stitches off
Cross L: Put the right needle through the 2nd stitch on the left from around the back, K the stitch but don't slip it off, K the 1st stitch on the left needle
And while you're at it, I recommend trying cables too if you haven't yet. It really is much easier than it looks. Really.
Viewing: Blog Posts Tagged with: knit, Most Recent at Top [Help]
Results 1 - 2 of 2
Blog: Needle Book (Login to Add to MyJacketFlap)
JacketFlap tags: knitting, knit, stitch, stitch, knit, Add a tag
Blog: Needle Book (Login to Add to MyJacketFlap)
JacketFlap tags: sewing, knitting, crafts, blue, lattice, purse, board, knit, felting, bamboo, embroidery, cork, Add a tag
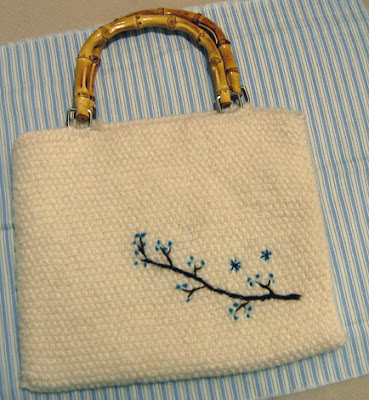 This is my current WIP - a white wool felted purse knitted up with moss stitch. The fabric in the picture is going to be the lining.
The other project I just finished is for the sewing corner - a lattice covered cork board. I see these in magazines all the time and decided to finally make one after finding a cork board at Goodwill for $0.99.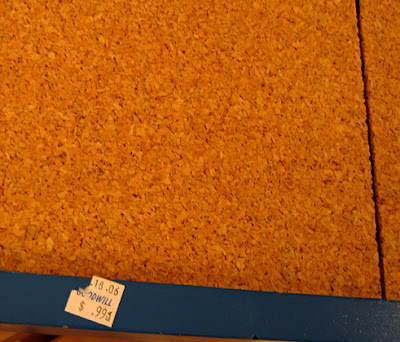 The first stage was to cover it with fabric. The frame was too securely attached to remove, so I had to find a way to attach the fabric and still have it look tidy. I used a light blue cotton cut to the same size as the frame. Then I used a pencil to mark the dimensions of the cork part.
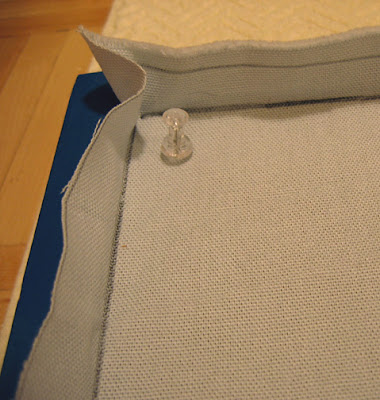 The pencil line marks the hem allowance which you fold over. Then you pin the fabric in place and make sure it's tidy and even all the way around. I used a staple gun to attach the fabric to the cork.
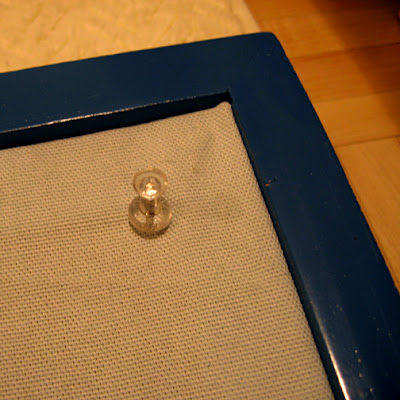 The last part is the lattice. (I wonder why I love lattices so much?) The little white bookshelf has a lattice inset too, so it's kind of a theme in that corner. I made the cork board lattice by marking off even intervals then pinning bias tape in place with silver tacks.
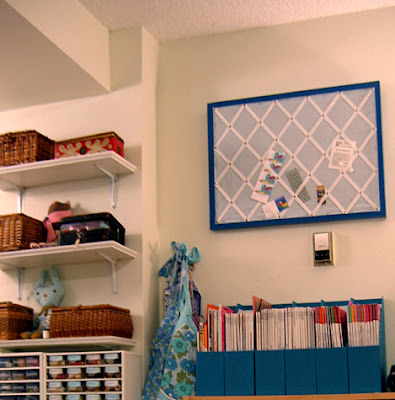
The bias tape is single fold, which works best. (I just found out the difference myself - previously I'd only bought double fold which wouldn't have looked quite right for this project.) Also, the tape is cut on the bias of course, which means it has a little bit of stretch, so after pinning it snugly in place, it will hold your odds and ends without the need of extra pins.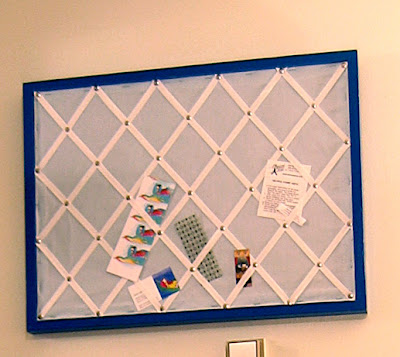 Here it is in the sewing corner - I also added a hook to the wall for my aprons. I think I'm finally done now! Thank you all so much for all the comments on my crafts corner, I'm happy to have inspired so many people, because I think every crafter should have their own little corner to work in.


Hello, I think your work is wonderful! I love the wool purse, and the flower is gorgeous. I also wish my craft room looked half as neat as yours! Several bombs have gone off in mine, and I've yet to clear through the debris!!
Like the previous comment, my little craft corner is a disaster right now and I am so envious of your beautiful space. It gives me some inspiration, though!
You have done a super job, I have a few of these cork boards lying around and if you don't mind I think I will take a lesson from you and do the same!
The bag is great and the lining fabric you chose is perfect for it. Love the corkboard idea, too!
lovely corkboard, claire!
i'd love to make one of these for our living area. i have a feeling it would help me be more organised if i posted little reminders to myself on one of these.
happy easter!
I'm getting ready to make a couple of lattice boards out of old corkboards--thanks for your instructions! You helped clarify my mind as to how to go about it!
Like the notice board... It is such a good spot for inspirational pictures!
I am madly in love with your new desk! and I love your blog, and your work is wonderful! Well done! :o)
Love your beautifully organised craft supplies! The cork board is great, and the collection of wicker and other storage boxes is lovely on display on the shelves.