new posts in all blogs
Viewing Blog: What are we doing today Mom?, Most Recent at Top
Results 1 - 25 of 349

Children's activities, including book reviews
Statistics for What are we doing today Mom?
Number of Readers that added this blog to their MyJacketFlap: 2
Now that Thanksgiving is over, it's time to get your Christmas cards out. These are the cards we made last year, it is an easy fun way to make your own Christmas cards your kids can do it themselves. My cool cousin Jamie made these a couple of years ago, but I couldn't find the exact link, but you can check out
her blog, Confessions of a Narcoleptic, here.
Supplies:
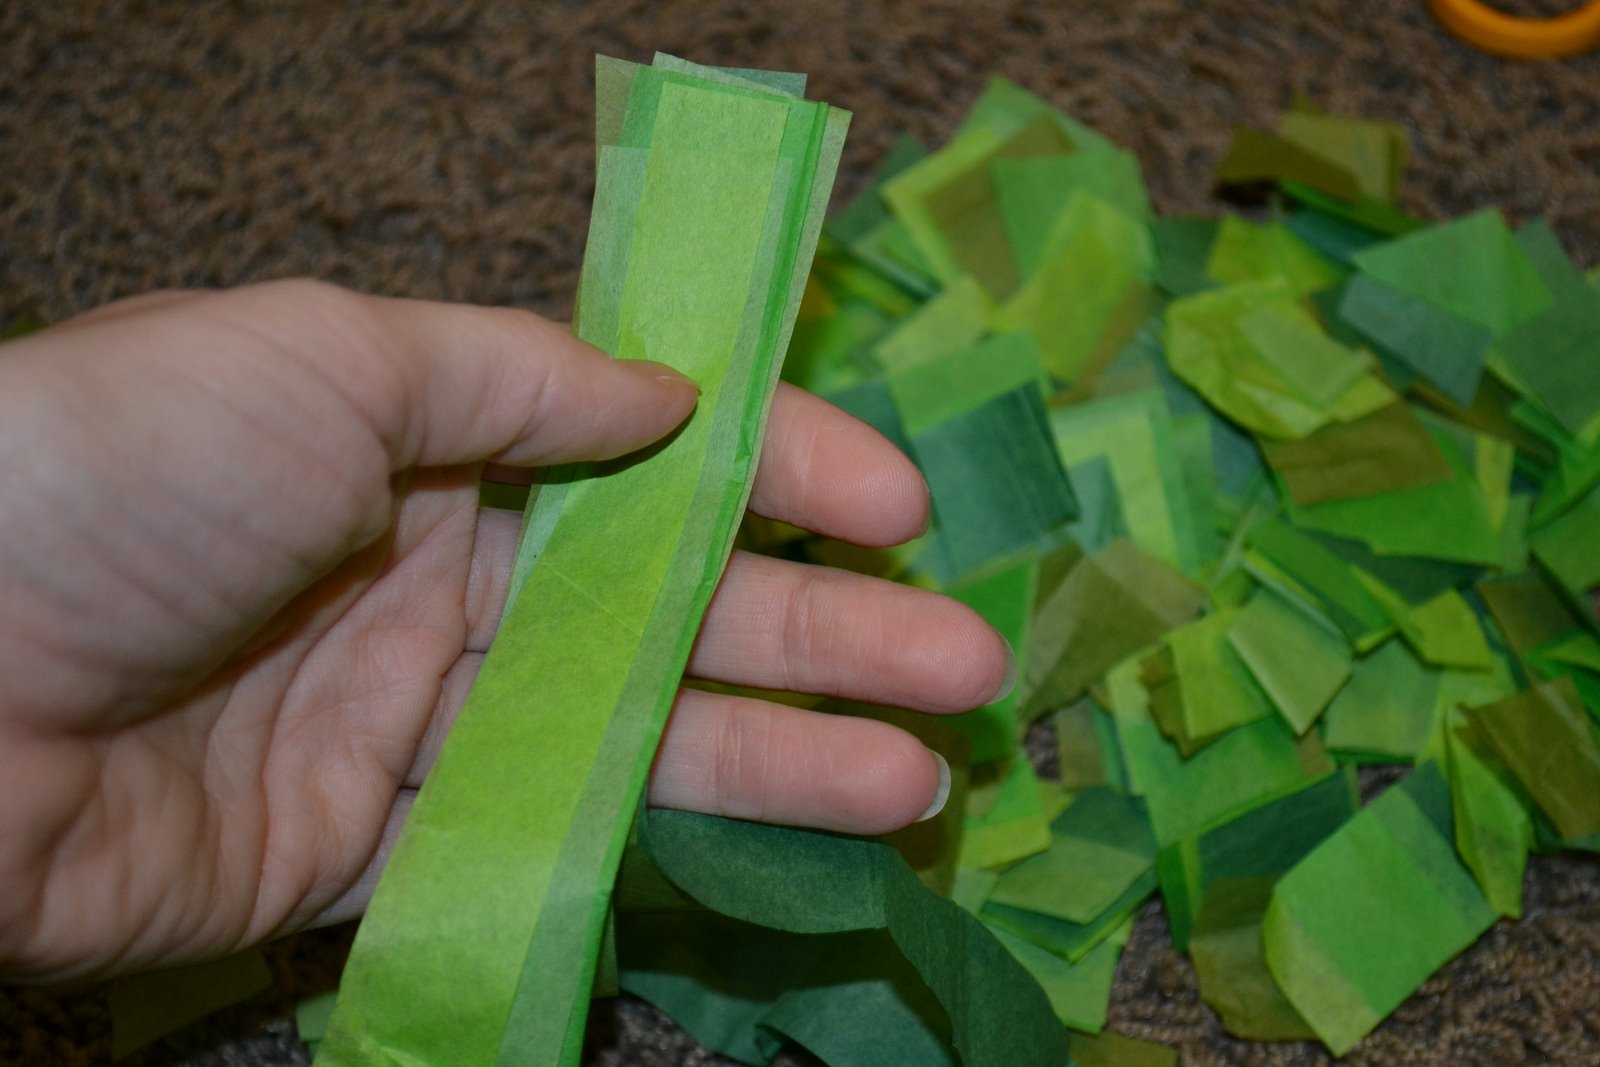
1. Green tissue paper, we used several shades because I had some in a stash, but you could keep it simple with a light and dark.
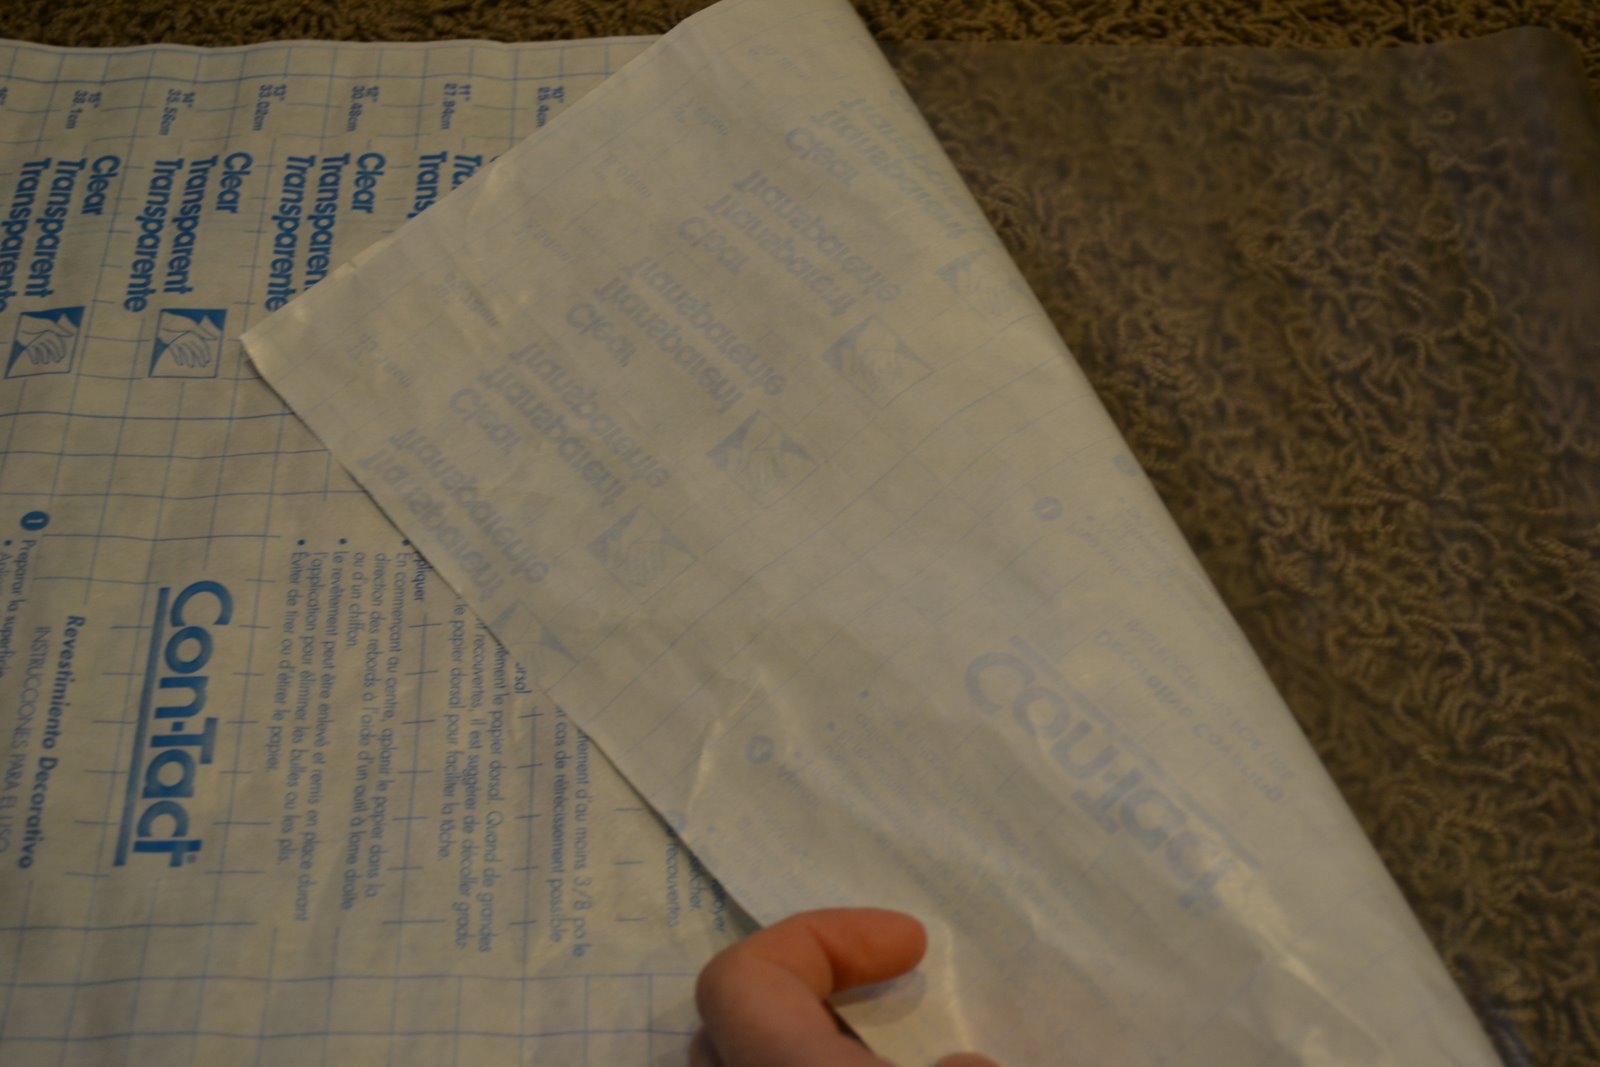
2. Clear contact paper
3. Scissors
4. White pre-folded cards, or white cardstock to fold into cards
5. Anything you want to decorate your trees with. I used a simple star stamp and silver ink (and a "Merry Christmas" Stamp too so I would have to hand write it), but other things would be fun - glitter glue, sequins, jewels for ornaments, etc.
STEP 1: Flatten and stack your tissue paper.

STEP 2: Cut tissue paper into strips, then squares/rectangles. The pieces don't need to be uniform.
STEP 3: Peel back a section of contact paper, sticky side up - give each child a section
STEP 4: Sprinkle tissue squares onto the sticky side of the contact paper, this contributes to the randomness of the placement and the layered effect. Be forewarned, if a square sticks it cannot be moved. If you wanted you could also take the time to place each square individually.
STEP 5: Fill in any blank spaces with tissue squares
STEP 6: Measure against the cards you have to decide how tall you want your trees. Cut your contact paper into rows that are that height, Mine are about 4" tall. Cut rows into tall triangles by simply angling your scissors. It doesn't have to be perfect, trees come in all shapes and sizes.
STEP 7: Attach the tree onto the card. I used double sided tape at the top and the bottom.
STEP 8: Decorate your trees and add your greeting.
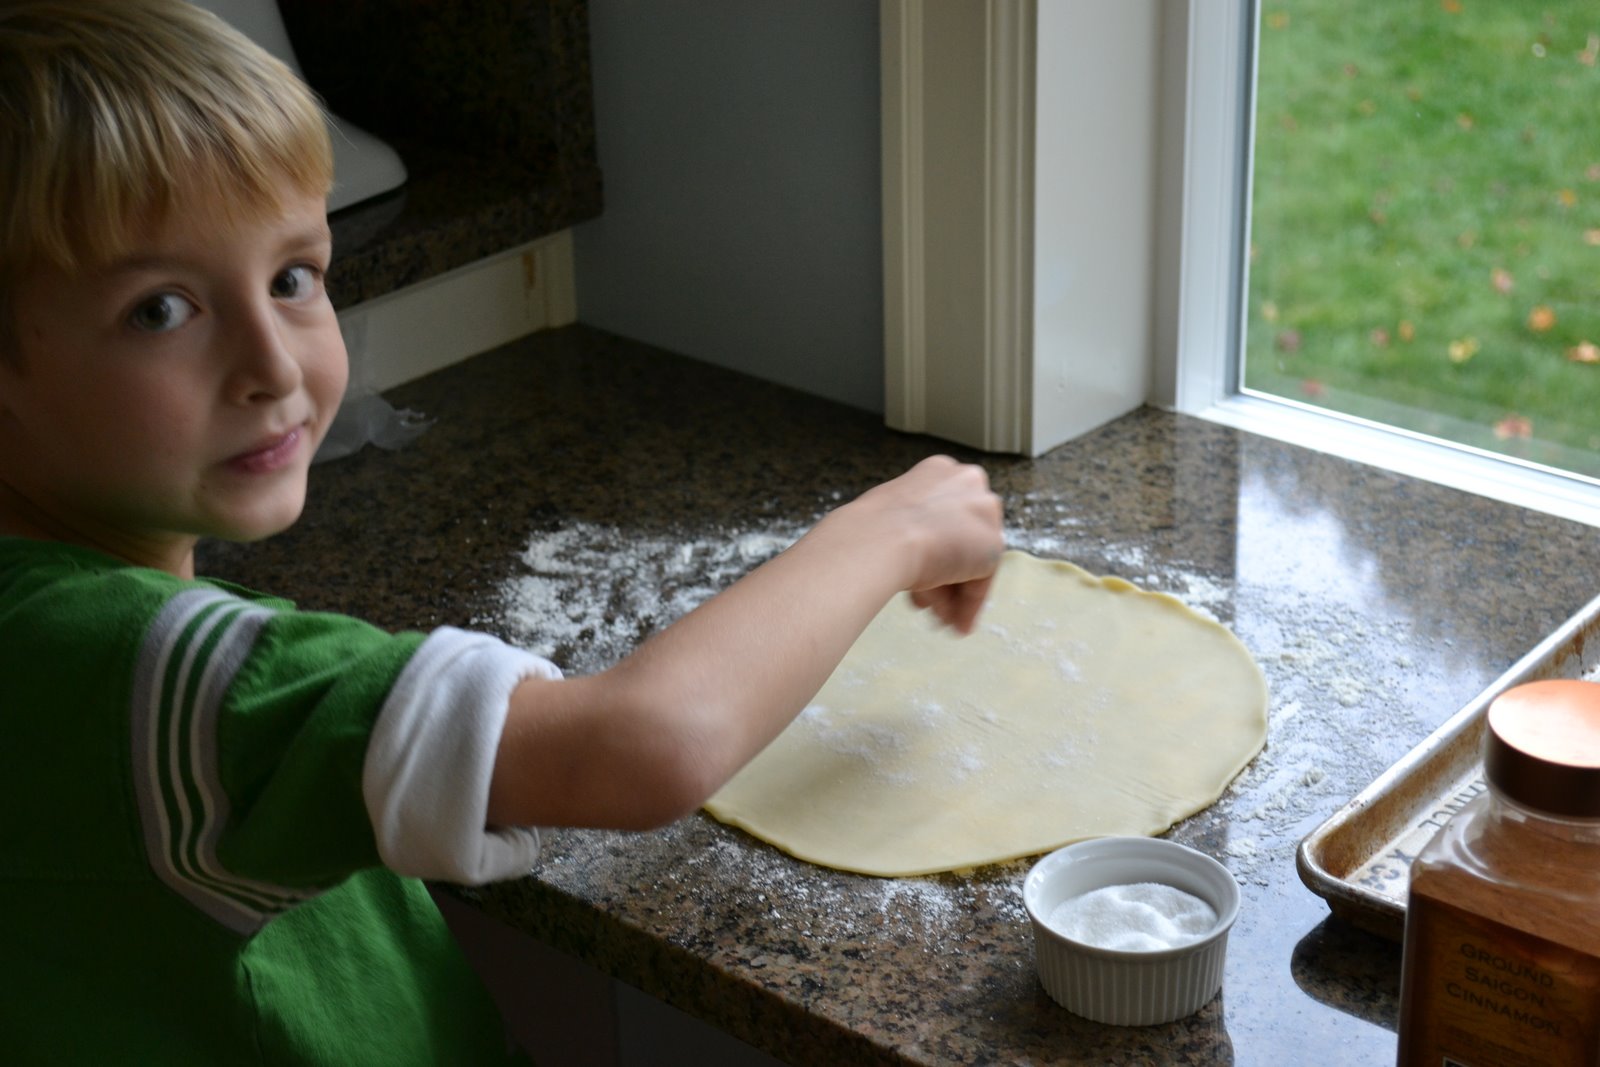
I remember my mother making pies in large batches when I was little. All kinds of fruit pies and it seemed like all day. I can't remember what my mom used to call the scraps of pie dough she let us have to sprinkle with cinnamon and sugar and bake, but they were such a treat. For something different than sugar cookies.
For a couple of dollars each kid gets a ready made round of dough :) Cheating short cut I know.

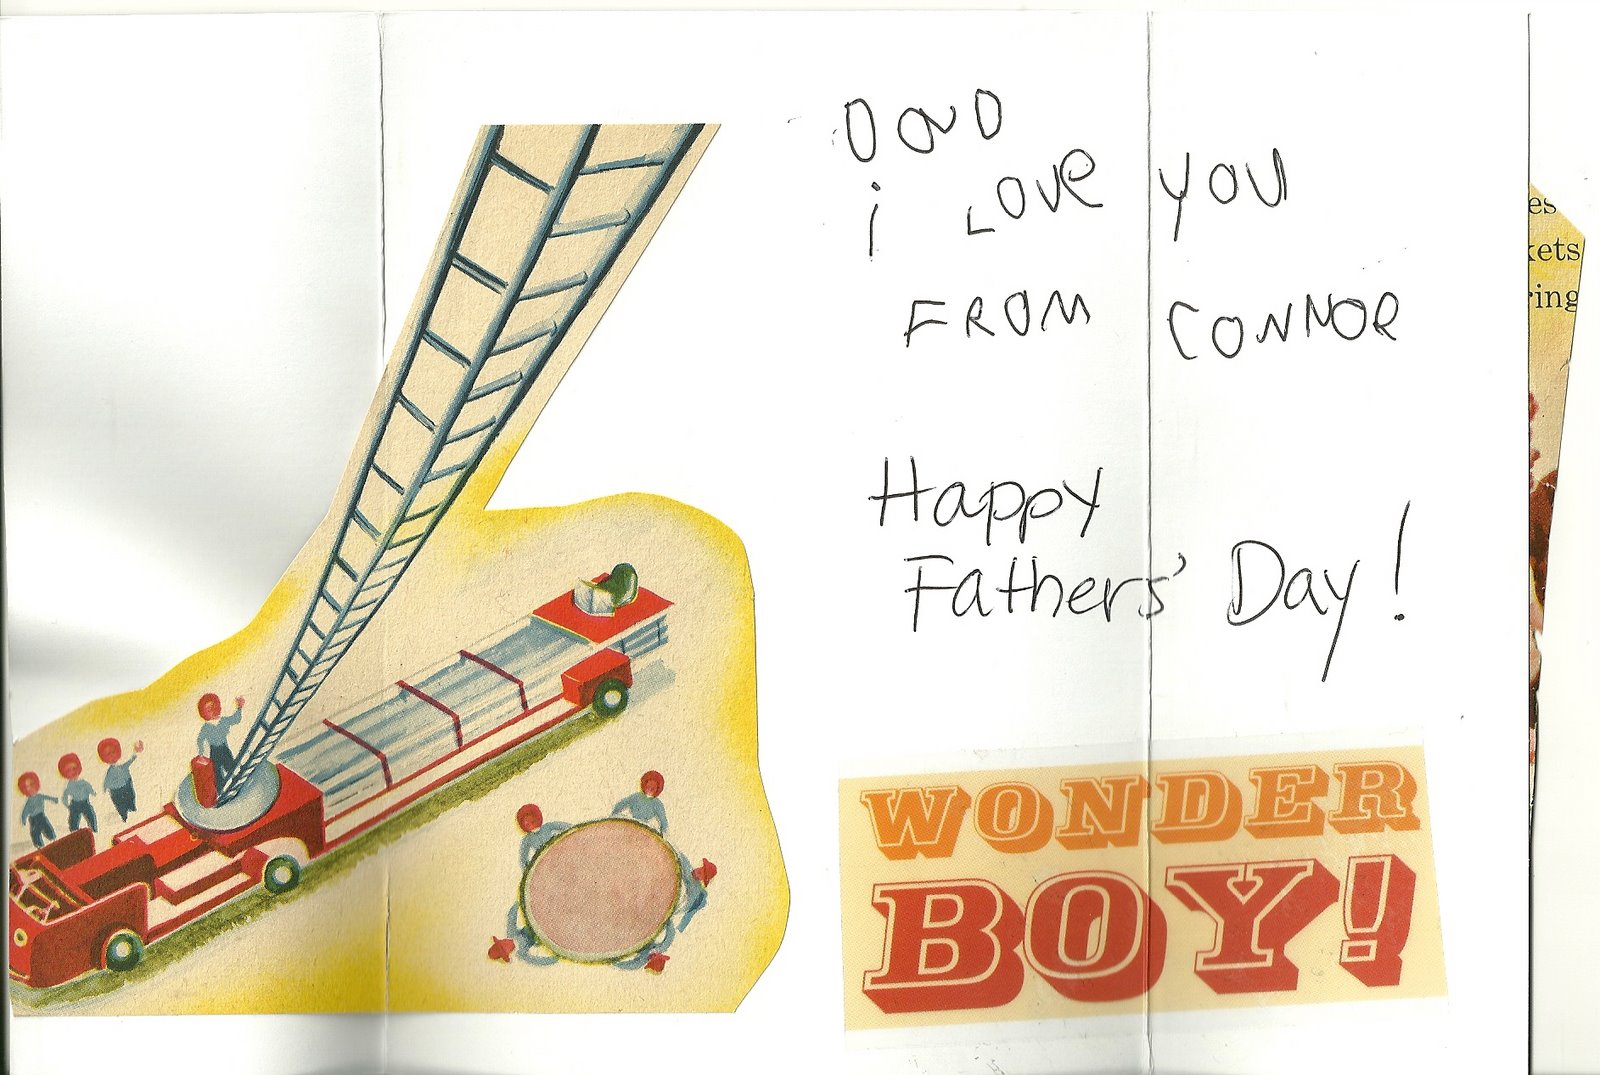
Cut from the pages of a falling apart, vintage children's book about a fire engine. See the great things to be had in a "Free" pile? The boys cut out what they wanted with the Hero theme and I helped adding fire to the building with coloured paper.

"Dad you are the best hero" pretty much sums it up!
Luke made homemade angel food cake that was delicious. I tried my hand at Hot Cross Buns, They looked pretty but were not as good as my mother's. I've got some improvements to make. We celebrated with great friends, the sun shone on Seattle and even the flowers were blooming. Hope you had a happy Easter too!
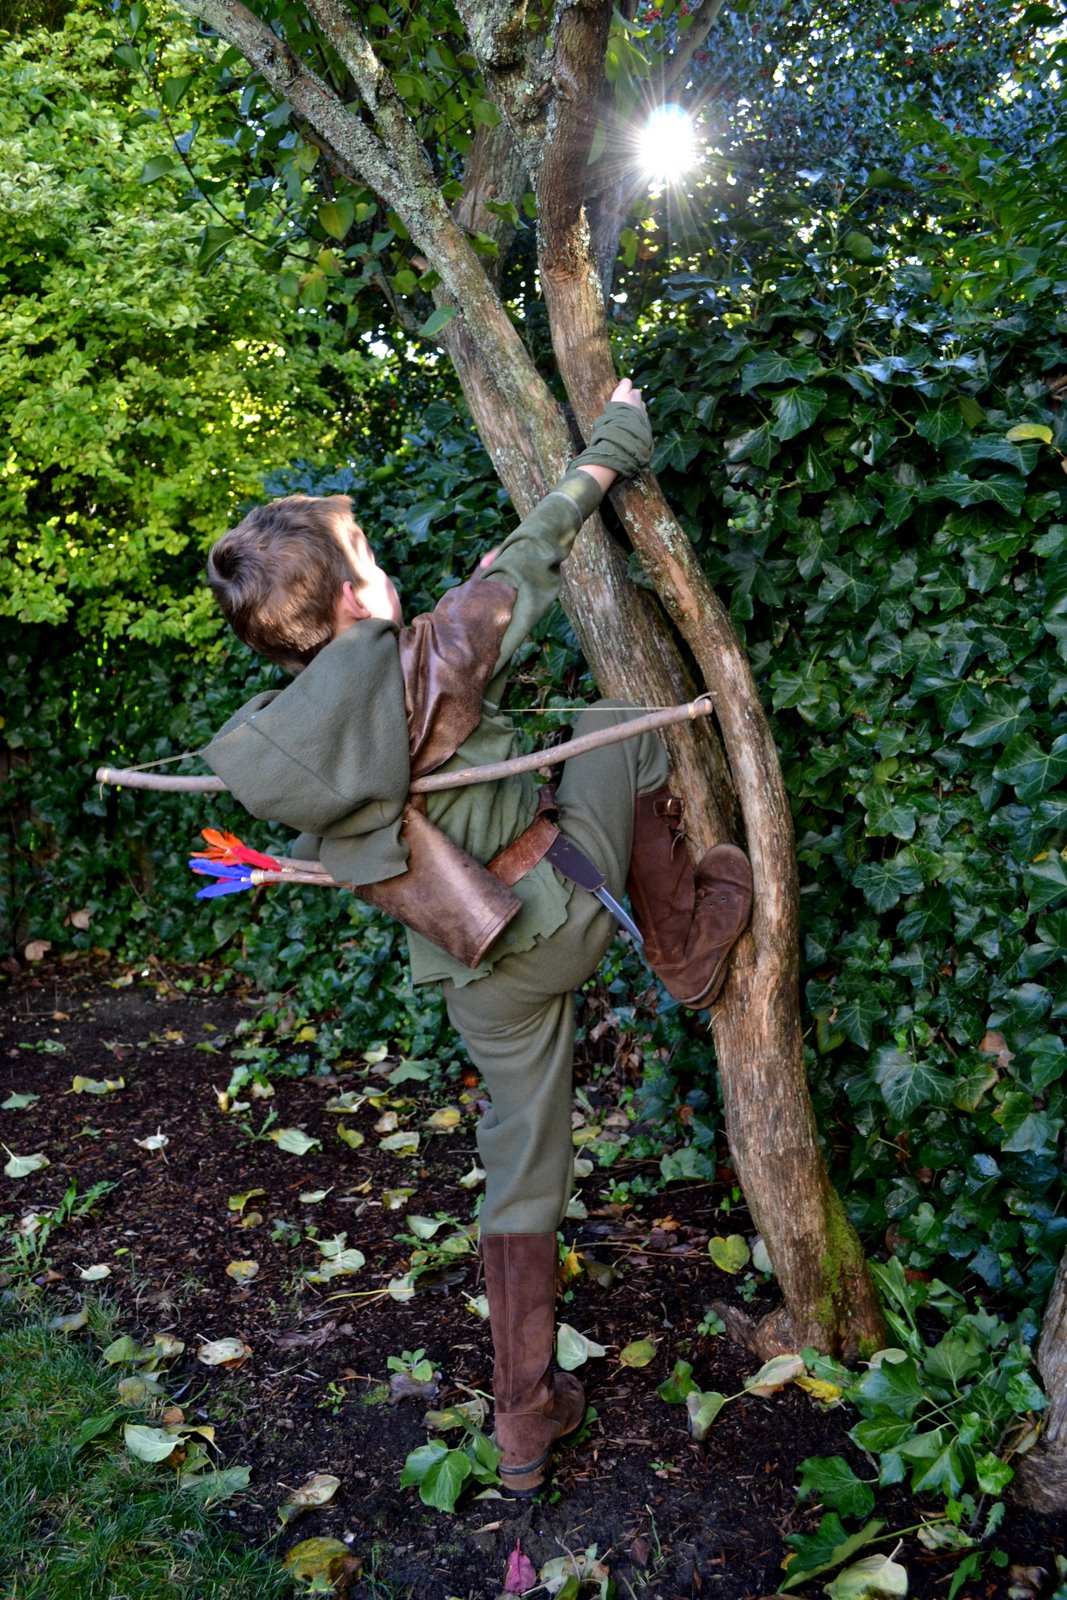
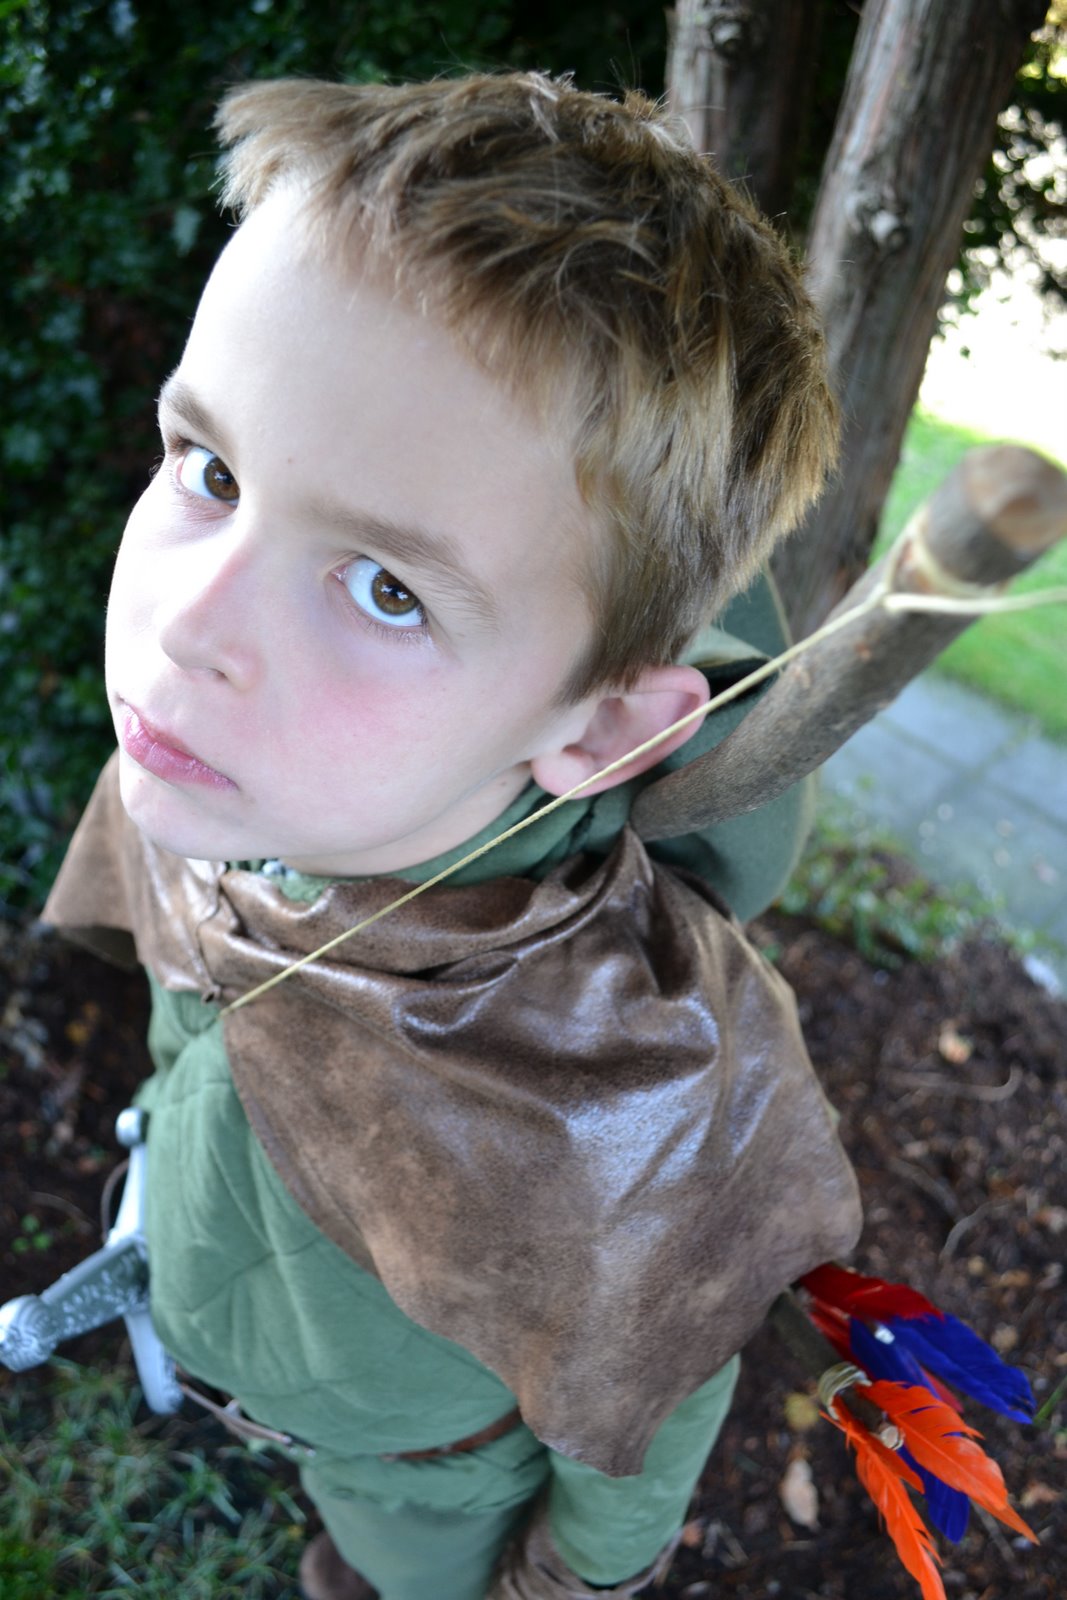
C was pretty excited about his hat. He came up with the idea himself and I happened to have a green plastic plate for a sturdy base. He happily wore it to school and I was surprised it survived the day!

The brim holds paper airplanes.
there is a pocket on one side that has a hole to an inside pocket to hold snacks.
Who wouldn't want to kiss that little Irish (mixed with a few other things) face?
Other years we've tried to set some Leprechaun traps hoping to catch a little guy and strike it rich with a pot of gold. We are still waiting. Fun info
here about how to catch a leprechaun. This year the boys are trying a new approach - make a lovely, welcoming space that a leprechaun would like to stay. The theory is then he will be so happy with his new home he will reward you.

This is C's house: several rooms, a poem he wrote for the leprechaun, jewels, shamrocks, coins, a rainbow -
What more could a leprechaun want?
E's is simpler with a rainbow arched doorway and sprinkled gold everywhere.
Update: after several nights of vacancy hotel Leprechaun is closed.
"I guess Leprechauns only live in Ireland and don't like to travel much," C
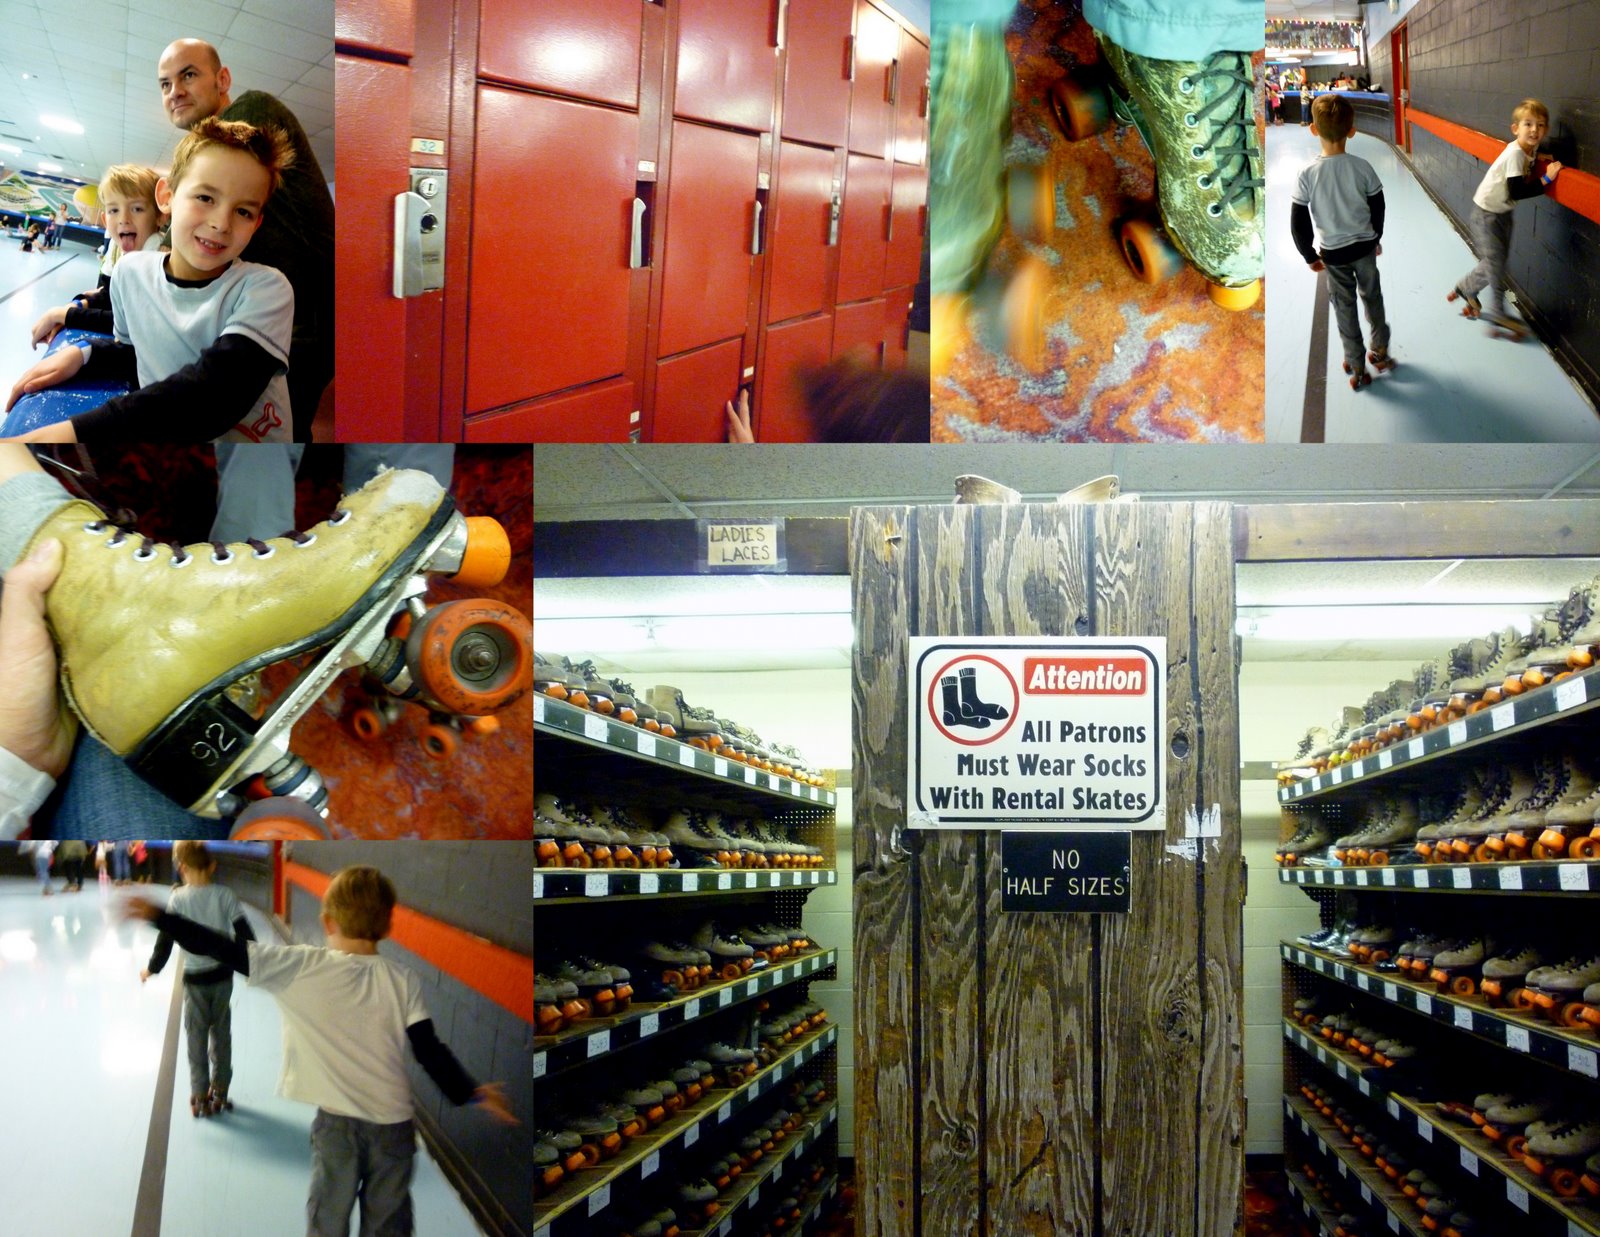
Do you sometimes you wish you could back in time? You can't really change anything ,but for a few hours you can re-live some fun. Try a roller rink. And yep, they might even have the exact same skates!
My sister and I each had a pair of skates that you would use the key to tighten them onto your shoes. Then we wore the key around our necks on brightly coloured ribbons as we skated the street. How cool were we? Anyone else having flashbacks?

One night I came home from book club and found this. It's nice to know you are loved and thought of when you are not there. I hope you all had a lovely valentine's day! Thanks for reading my blog.
How cute are these "wild west" valentines with lollipops that my mum sent the boys?
Let's face it the way to an 8 year old's heart is through his funny bone...Here are a few groan-worthy knock knock jokes for your valentine...
Knock, Knock
Who's there?Howard!
Howard, who?Howard you like to be my valentine?
Knock, Knock
Who's there?Daryl!
Daryl who?Daryl never be another valentine like you!
Knock, Knock
Who's there?Gladys
! Gladys who?Gladys can be to wish you a Happy Valentine's Day
!
Knock, Knock
Who's there?Sadie!
Sadie who?Sadie word and I'll be your valentine!
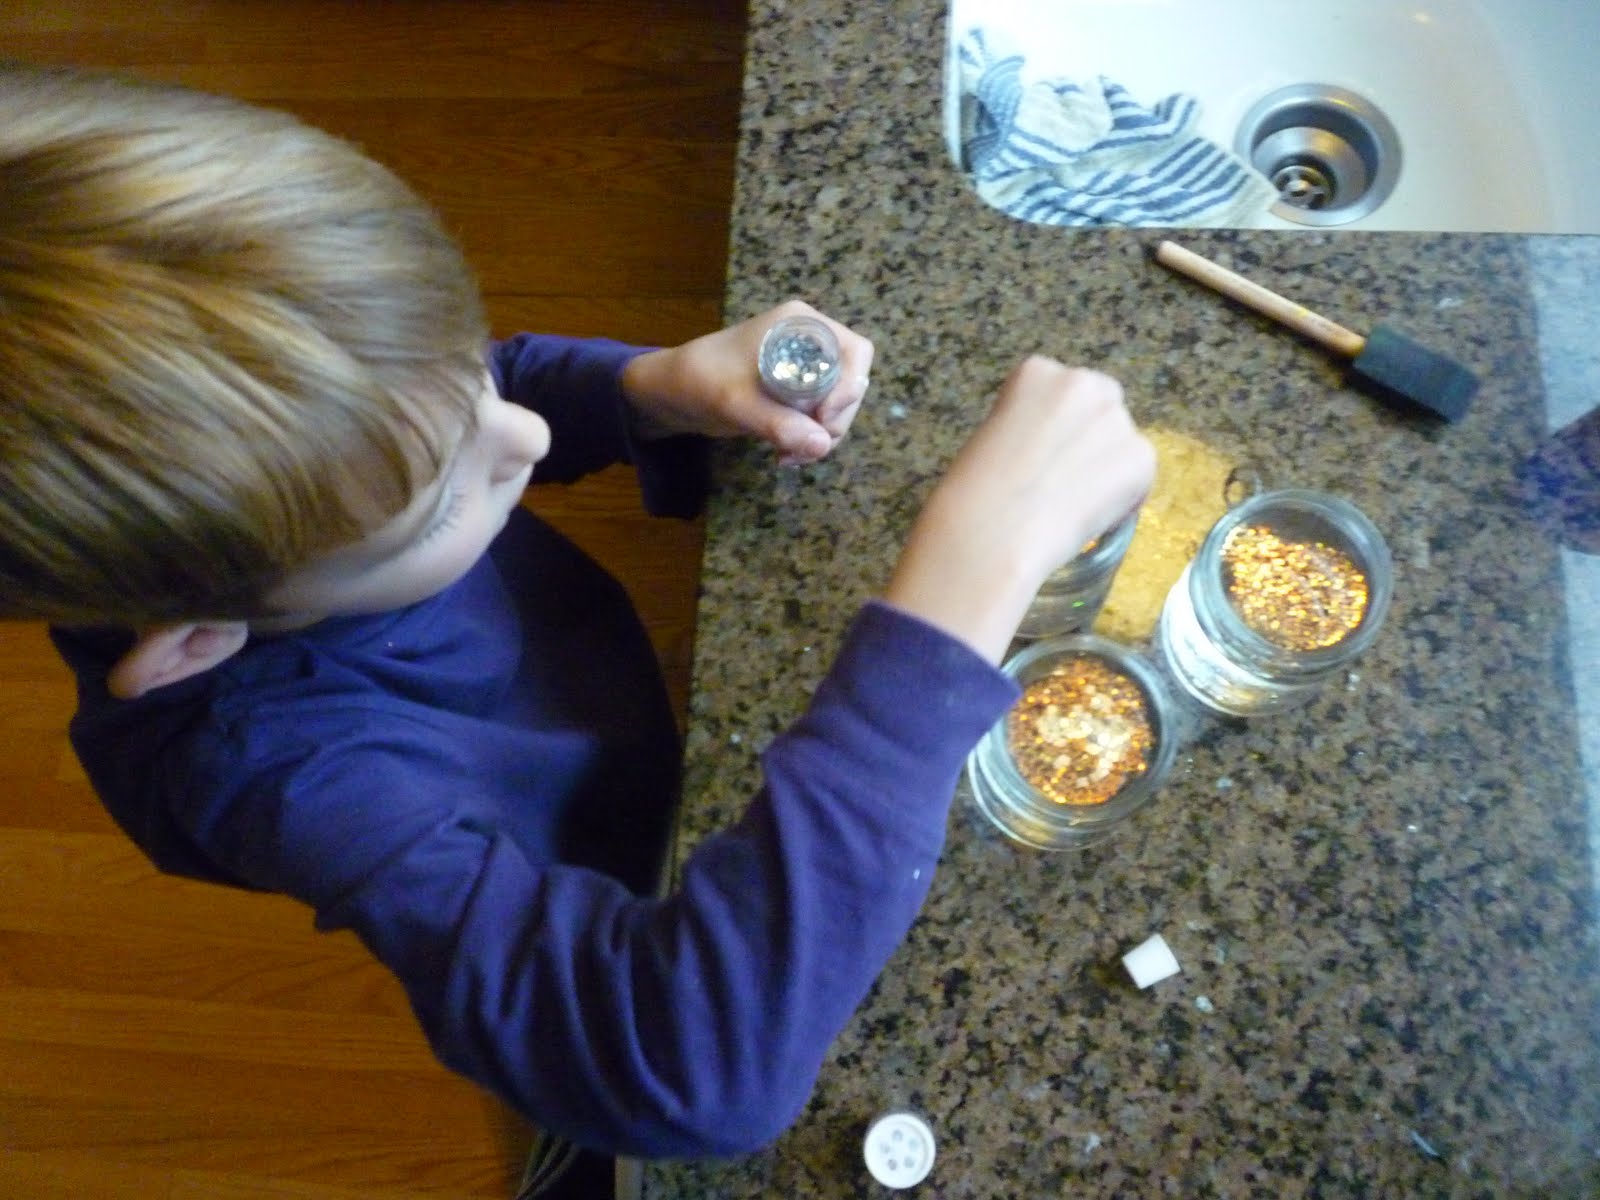
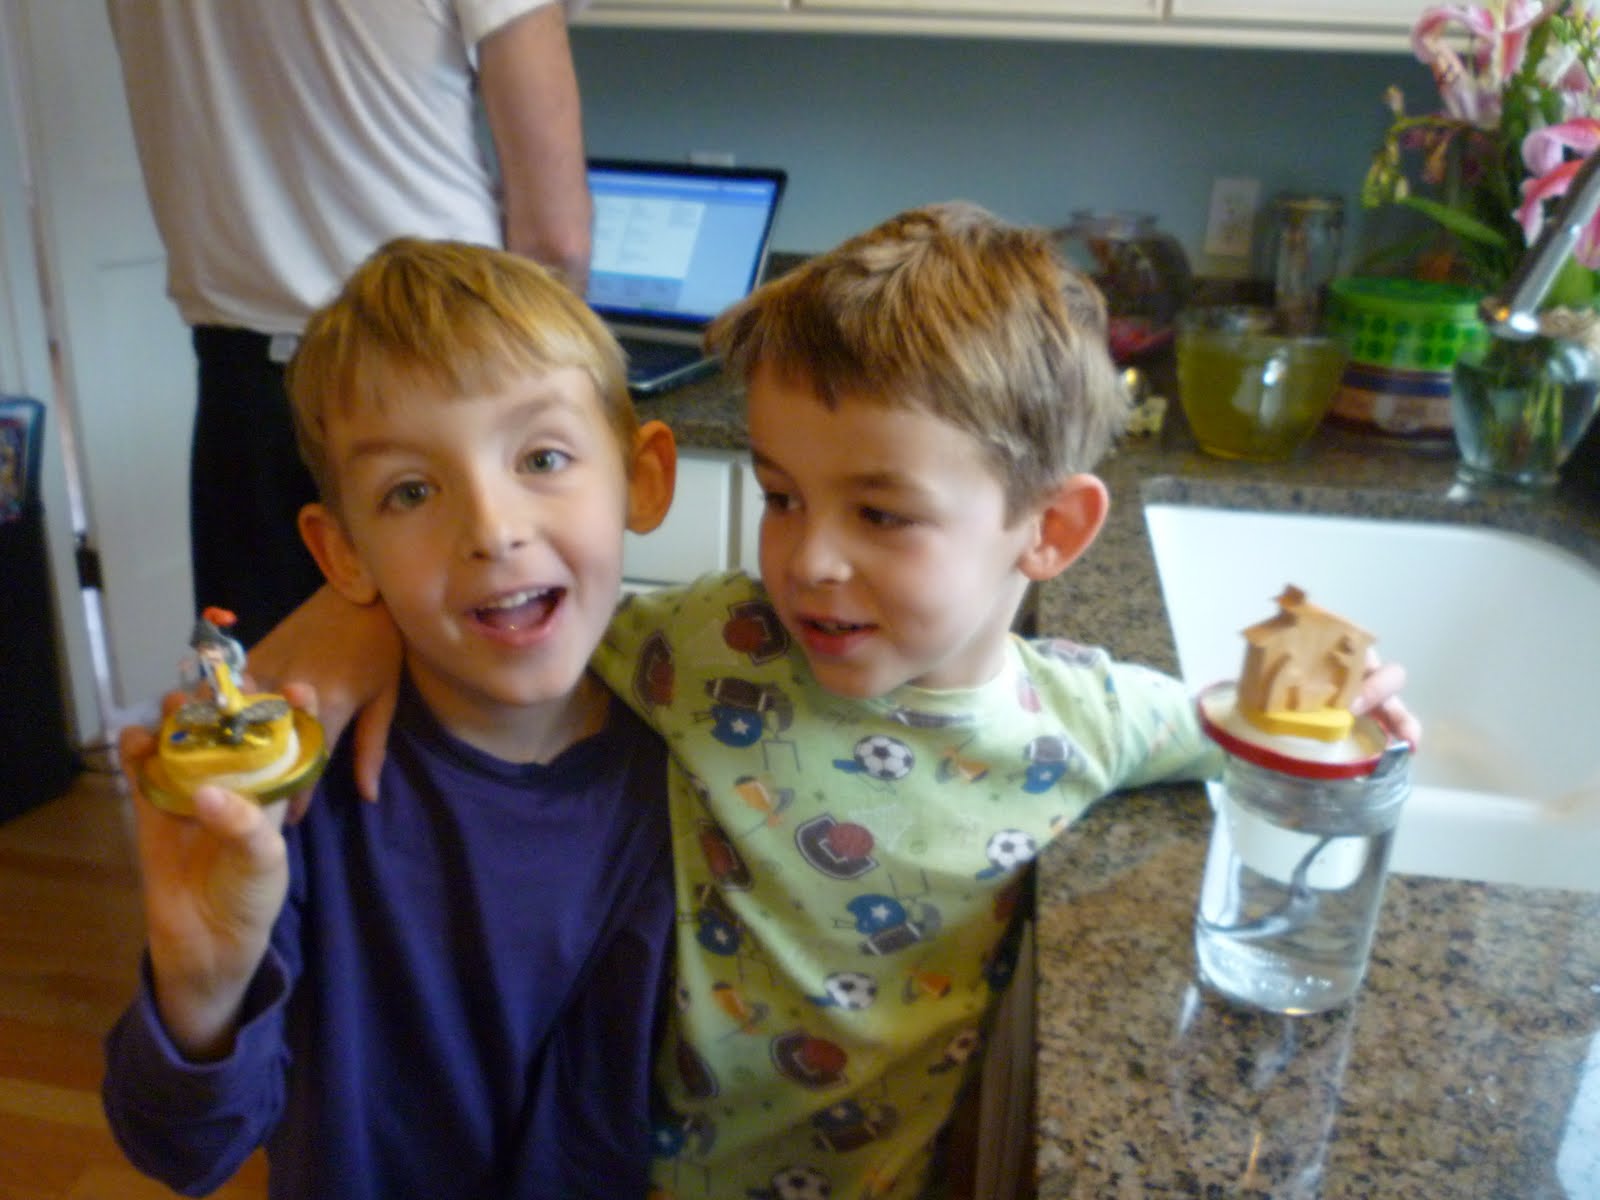
With all our snow last week outside we were inspired for an indoor snow craft...
Supplies:
- A strong, waterproof glue to create the inside/base of your snow globe (we used E6000 and let it dry overnight)
- A glass jar with a tight fitting lid
- Sparkles or glitter + spoon to stir
- Liquid Glycerin
- Hot glue and glue gun - or caulking would work to seal the globe and prevent leaking
DAY 1: The first thing to do to make a snow globe is decide on what should go inside. Play around with different figures, toys, ornaments, mini trees or whatever. The ones that turned out to be my favourites were the least conventional. You will want to create a bit of a raised base for any figurines you use so they will be visible inside the glass, You can use anything that is not water soluble - pebbles, glass marbles, etc. Flip the lid over and glue items to the underside of the lid, checking as you glue that the lid will still screw onto the jar. Definitely use your strongest glue to position the items. You can also glue something directly to the inside of the clean, dry jar if you would like it a bit more suspended. (Below we did this with the little girl on the horse ornament to give more of an appearance of flying.) Allow the glue to dry overnight.

DAY 2: Next you want to mix water + glitter (not too much or the glitter clumps together) + a tablespoon of liquid glycerin. Stir together.

Take your figurines and dunk them upside down and screw the lid on. Turn upside down and see how you like the results. If there is any changes to make there is still time...when you are sure its good, seal it shut with hot glue.
We have been celebrating today - Seattle was given a beautifully heavy snowfall overnight, and the boys were given a day off school (and tomorrow too). First thing at 8am, with snow still coming down, we hit the slopes. Well, at least tried out the park hill near our house. Besides a few picnic tables at the bottom to dodge (this park was not designed with sledding in mind) we had a lot of fun.
We actually had our first real snowfall of the year today it snowed for only about 10 minutes and nothing stuck, .now the sky is blue. With a long weekend snow sounds really fun and it reminded me of these...
I had to share these
awesome snowflake patterns that my thoughtful sister-in-law Lindsey sent to us. Clone troopers, Darth Vader and Bobba Fett are represented. Luke and I started cutting one night and hung them in the window the boys look out while they eat breakfast - they were a pretty fun surprise. Happy cutting!
Since we are on the Pacific Coast we get to celebrate two New Year countdowns. At 10 seconds to 9PM PST, the children party like its really midnight. Sometimes we watch the apple drop in New York, this year they just ran outside and shouted as loud as they could (which was pretty loud for this crew). Quickly after, the party (for them) is over. It's PJ time and they are all tucked in for the night and the adults continue the party, it works well for everyone, especially the next day when they've had a good night's rest.
Happy 2012 to you whenever you live.
If you live on the East Coast and heard some extra shouts, that was us. Thank you so much for celebrating New Years with a reasonable bedtime.
We are lucky enough to have real holly in our yard - berries and all :) Sometimes a simple centerpiece is my favourite and I like this one extra because the height is so low, it is great for visiting over. The lit candles are so cosy reflected in the thrifted silver tray.
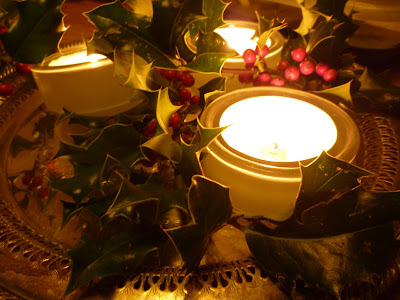
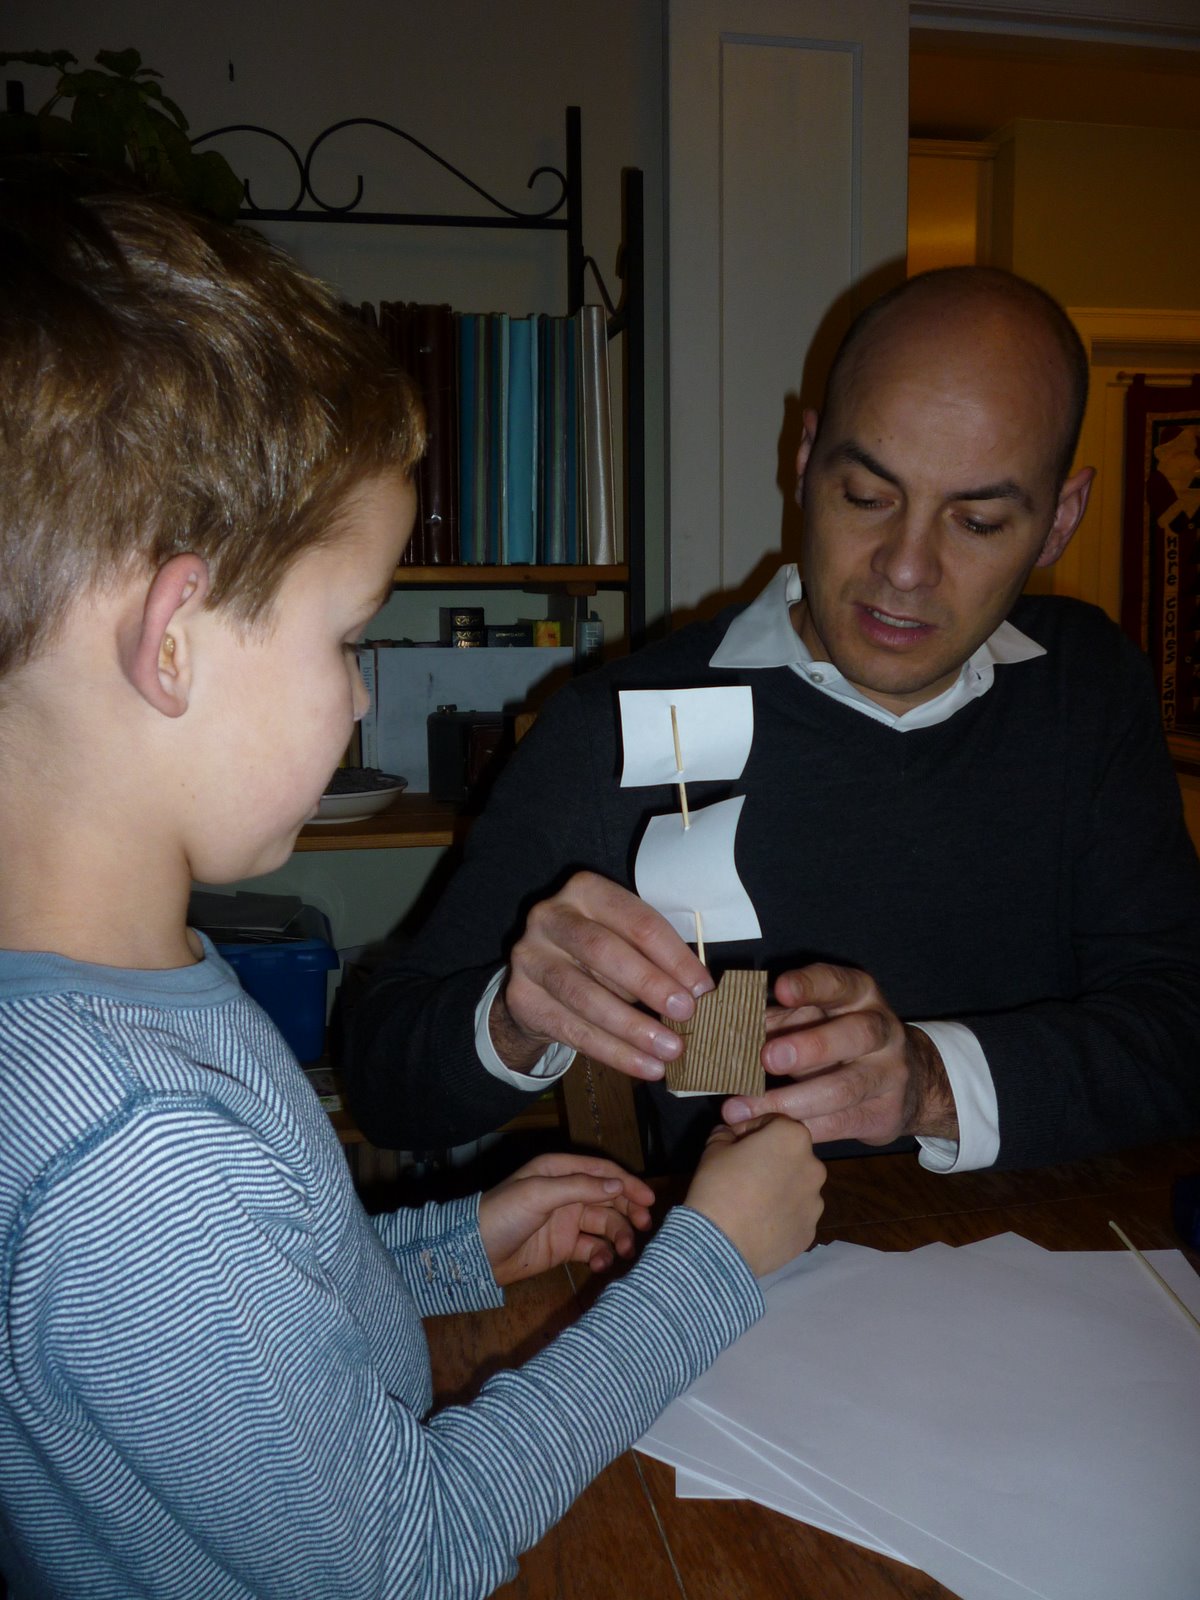
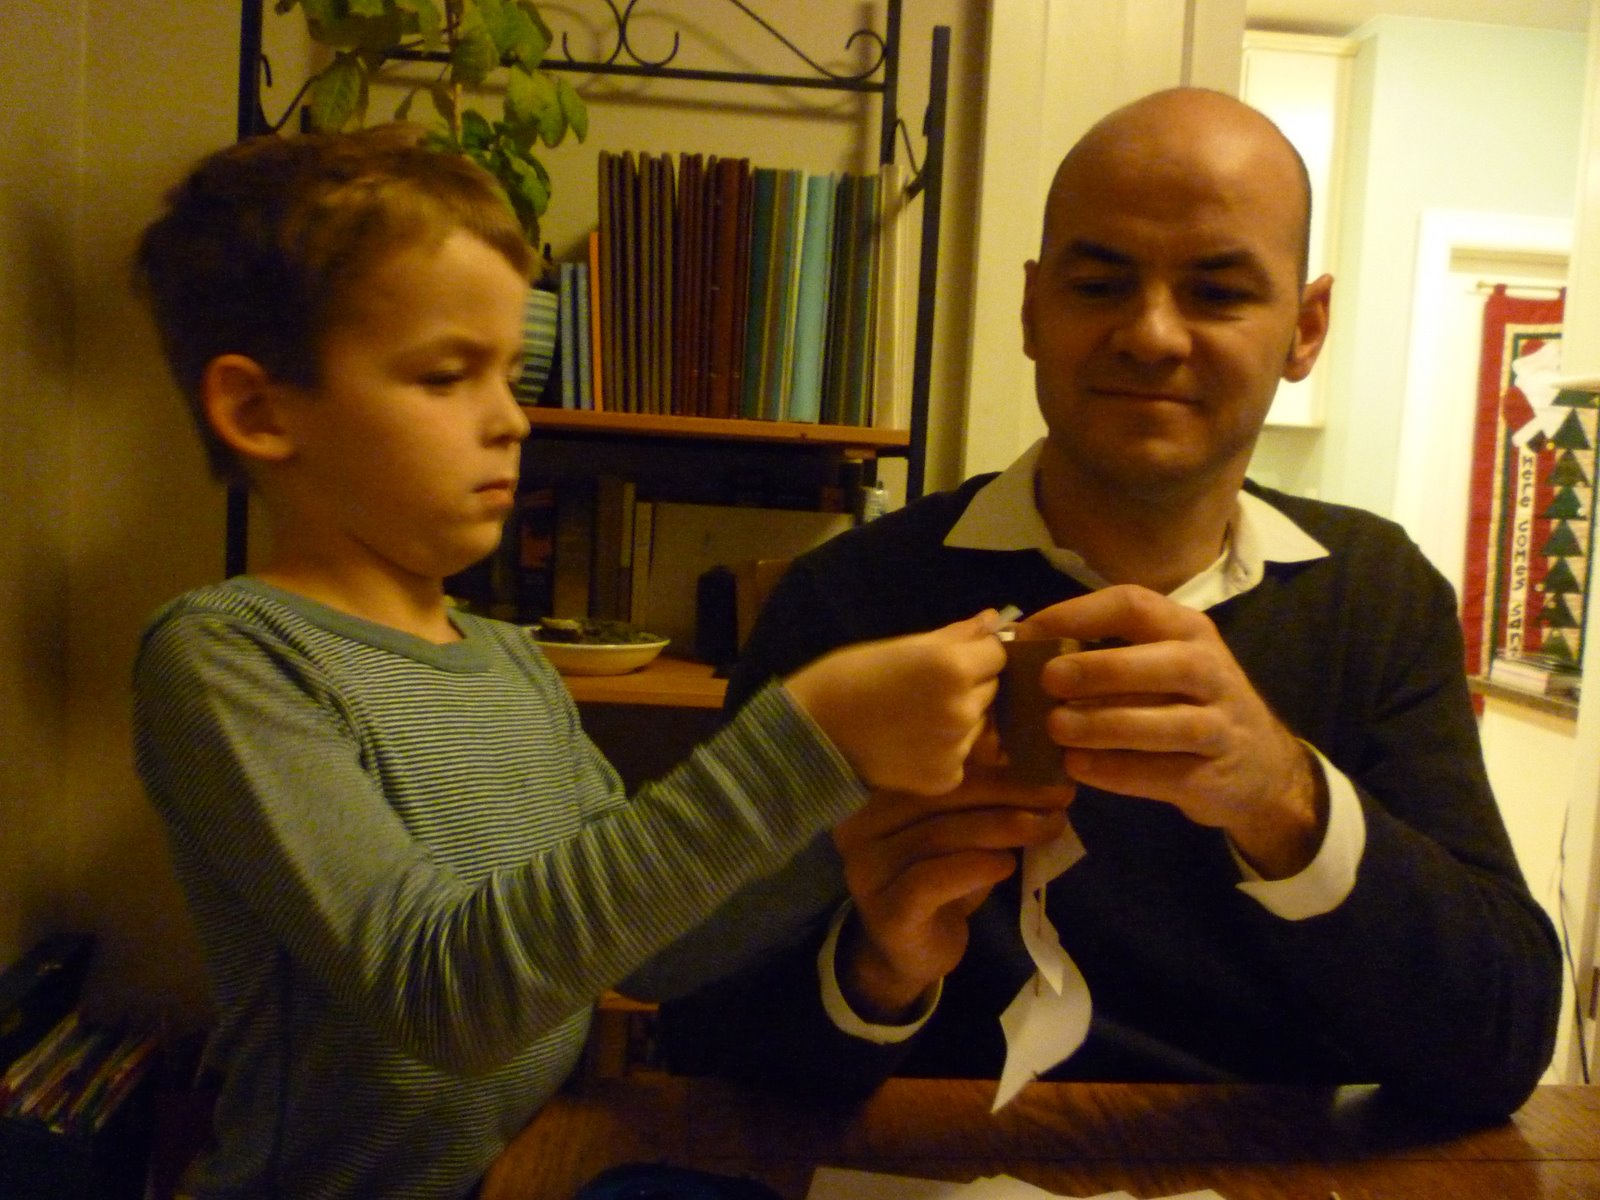
I forgot to pick up coffee stirrers so we used bamboo skewers I had on hand. Oh and I just ran in and asked Starbucks for a stack of sleeves and they were super happy to hand some over. We were also impatient with gluing (but hot glue would have worked nicely) so we used a tape/stapler combo. The nice thing about skewers is they poked right through the masts and no adhesive was needed for that part.
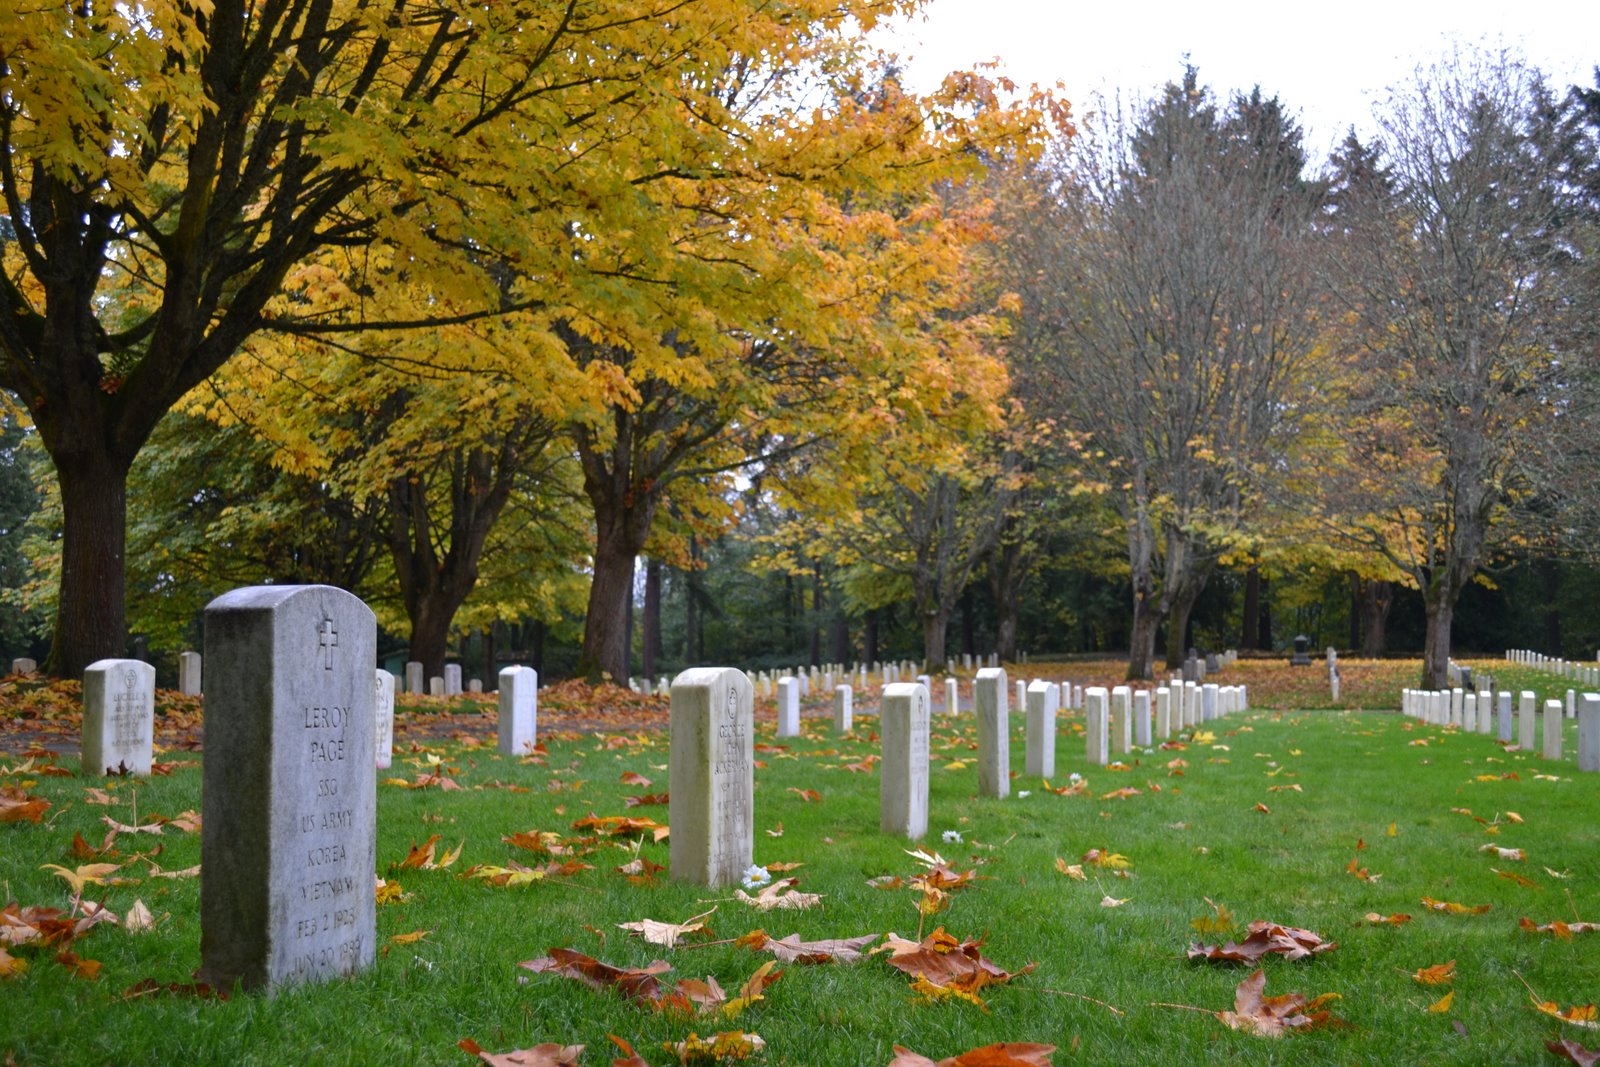
Growing up in Canada it is traditional to wear a red poppy on your lapel in November to remember those who have fought (including current soldiers) for our freedoms. We also walked from a church service on Remembrance Day (Nov 11) to lay wreaths of poppies on the war memorials on main street. I liked to see red poppies in crowds of people, knowing they too are thankful for this sacrifice.
During the First World War, red poppies were seen on the war-torn battlefields of northern France and Belgium. The story among soldiers was the crimson red of the poppy came from the blood of their comrades soaking the ground. The sight of poppies on the battlefield at Ypres in 1915 moved Lieutenant Colonel John McCrae to write the poem
In Flanders fields.
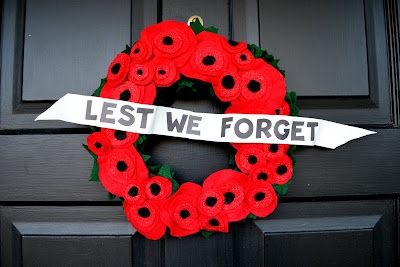
This is a simple wreath, I used a small foam core ring and hot glue. I used green felt in the back ground around the inside and outside of the ring. Here is how it looked in progress.
I didn't take any pictures making the red poppies because they are so easy, I used plain red and glitter red to give it some dimension, layers different size circles and finally added a black center. The ribbon is cream grosgrain with letter stickers. A small reminder when we enter our home of all we have to be grateful for.
One of my favourite things about Fall is the flavours. Try this together - pumpkin ice cream, sandwiched in ginger snaps. (I recommend Trader Joe's brand - Yum!) I'm a fan.

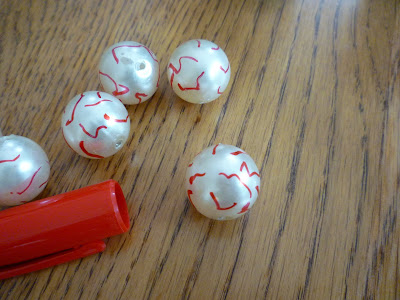
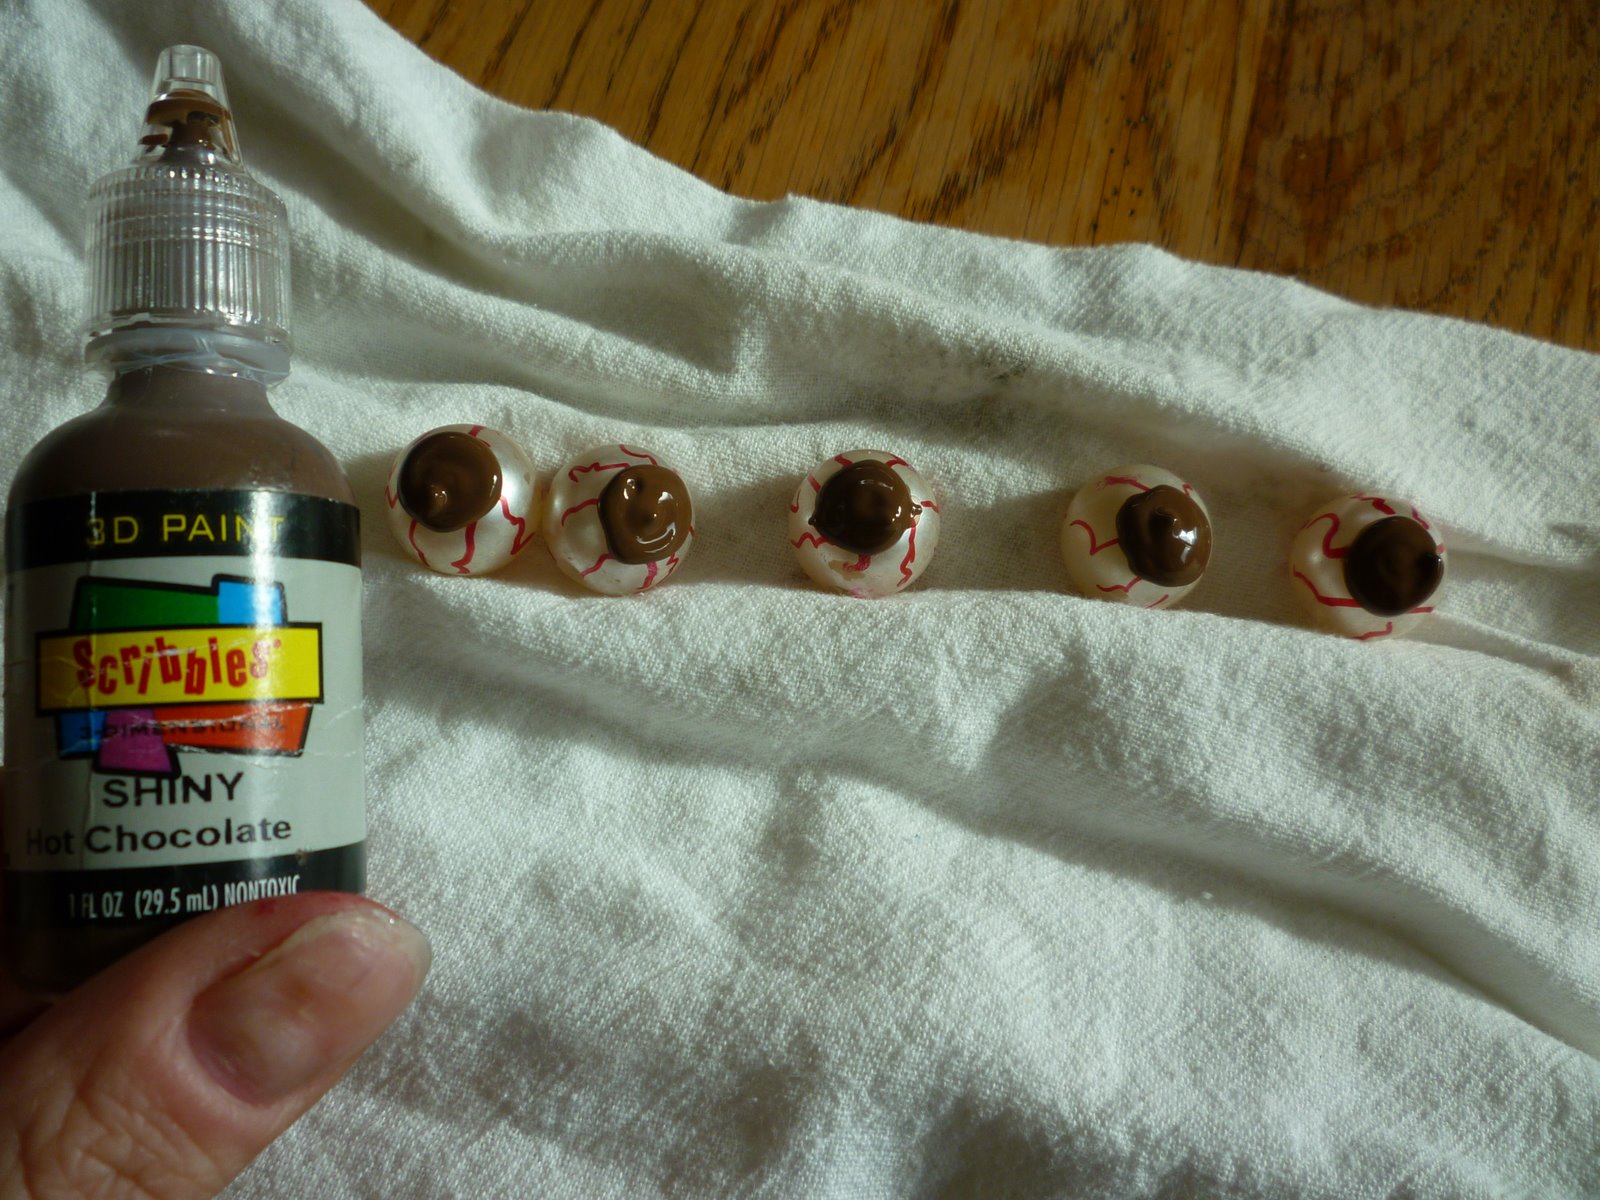
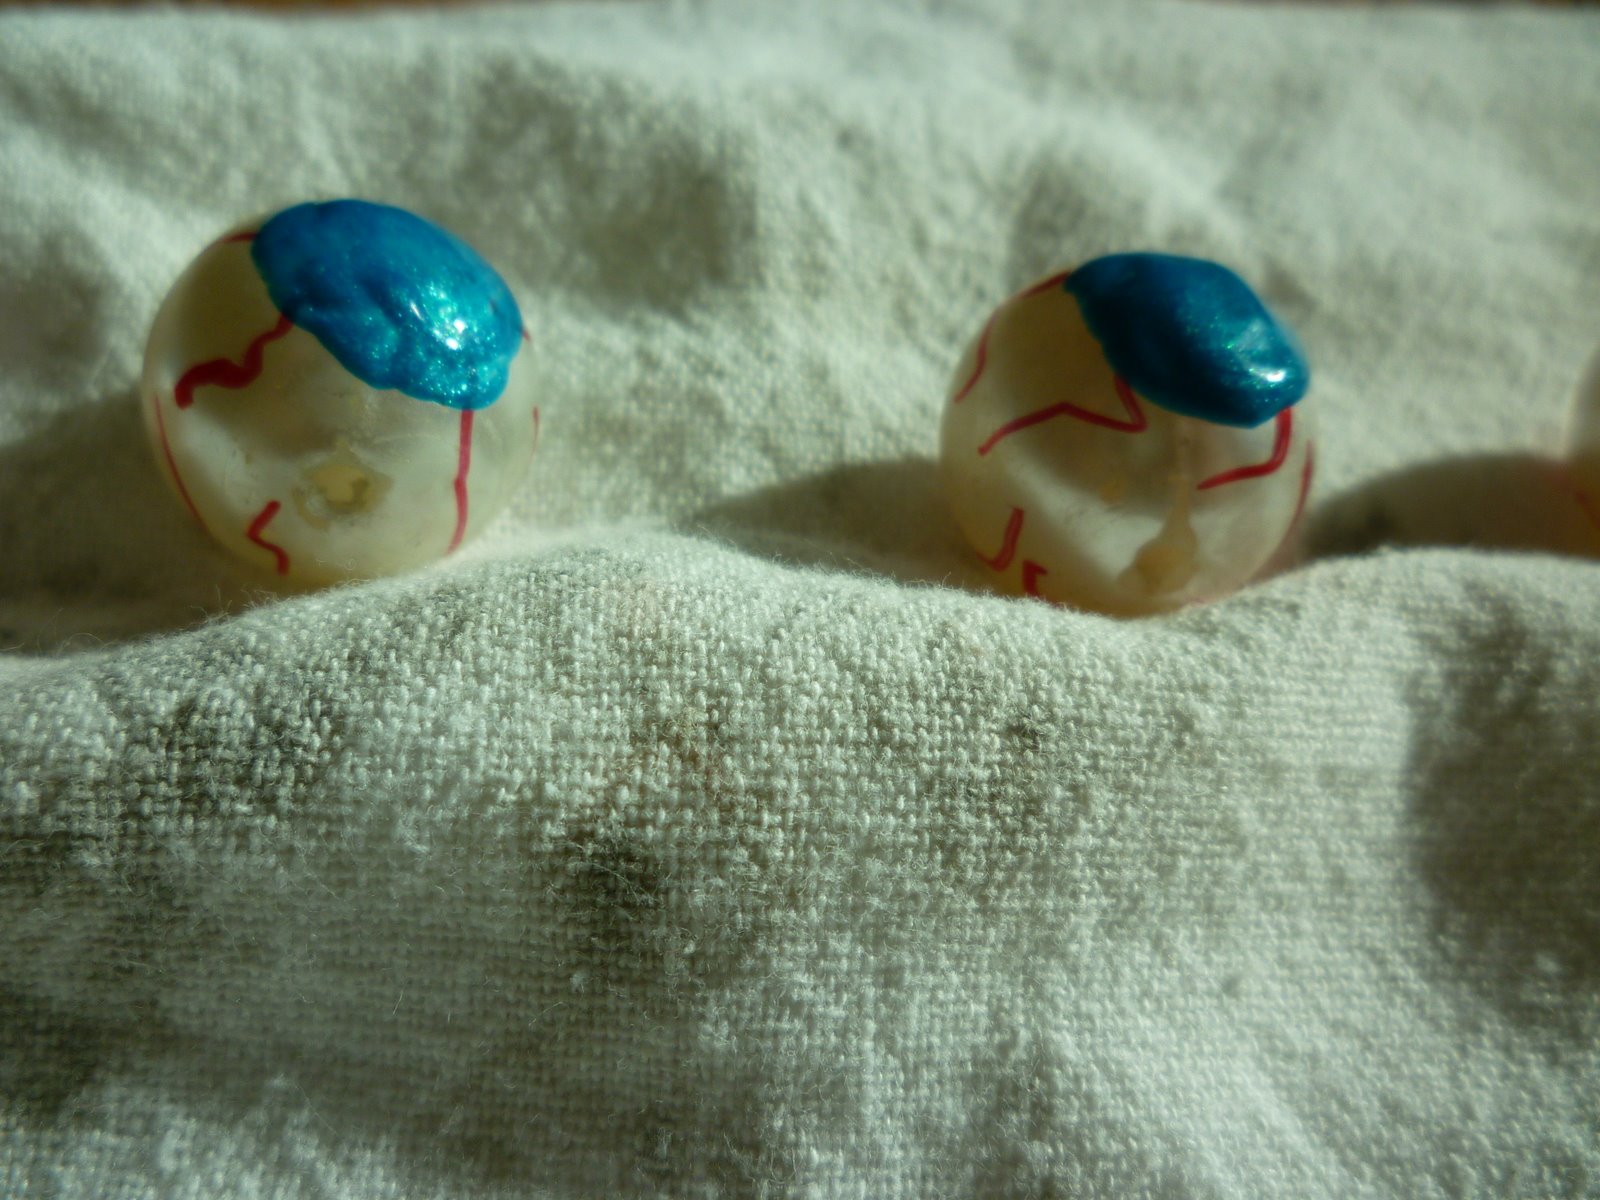
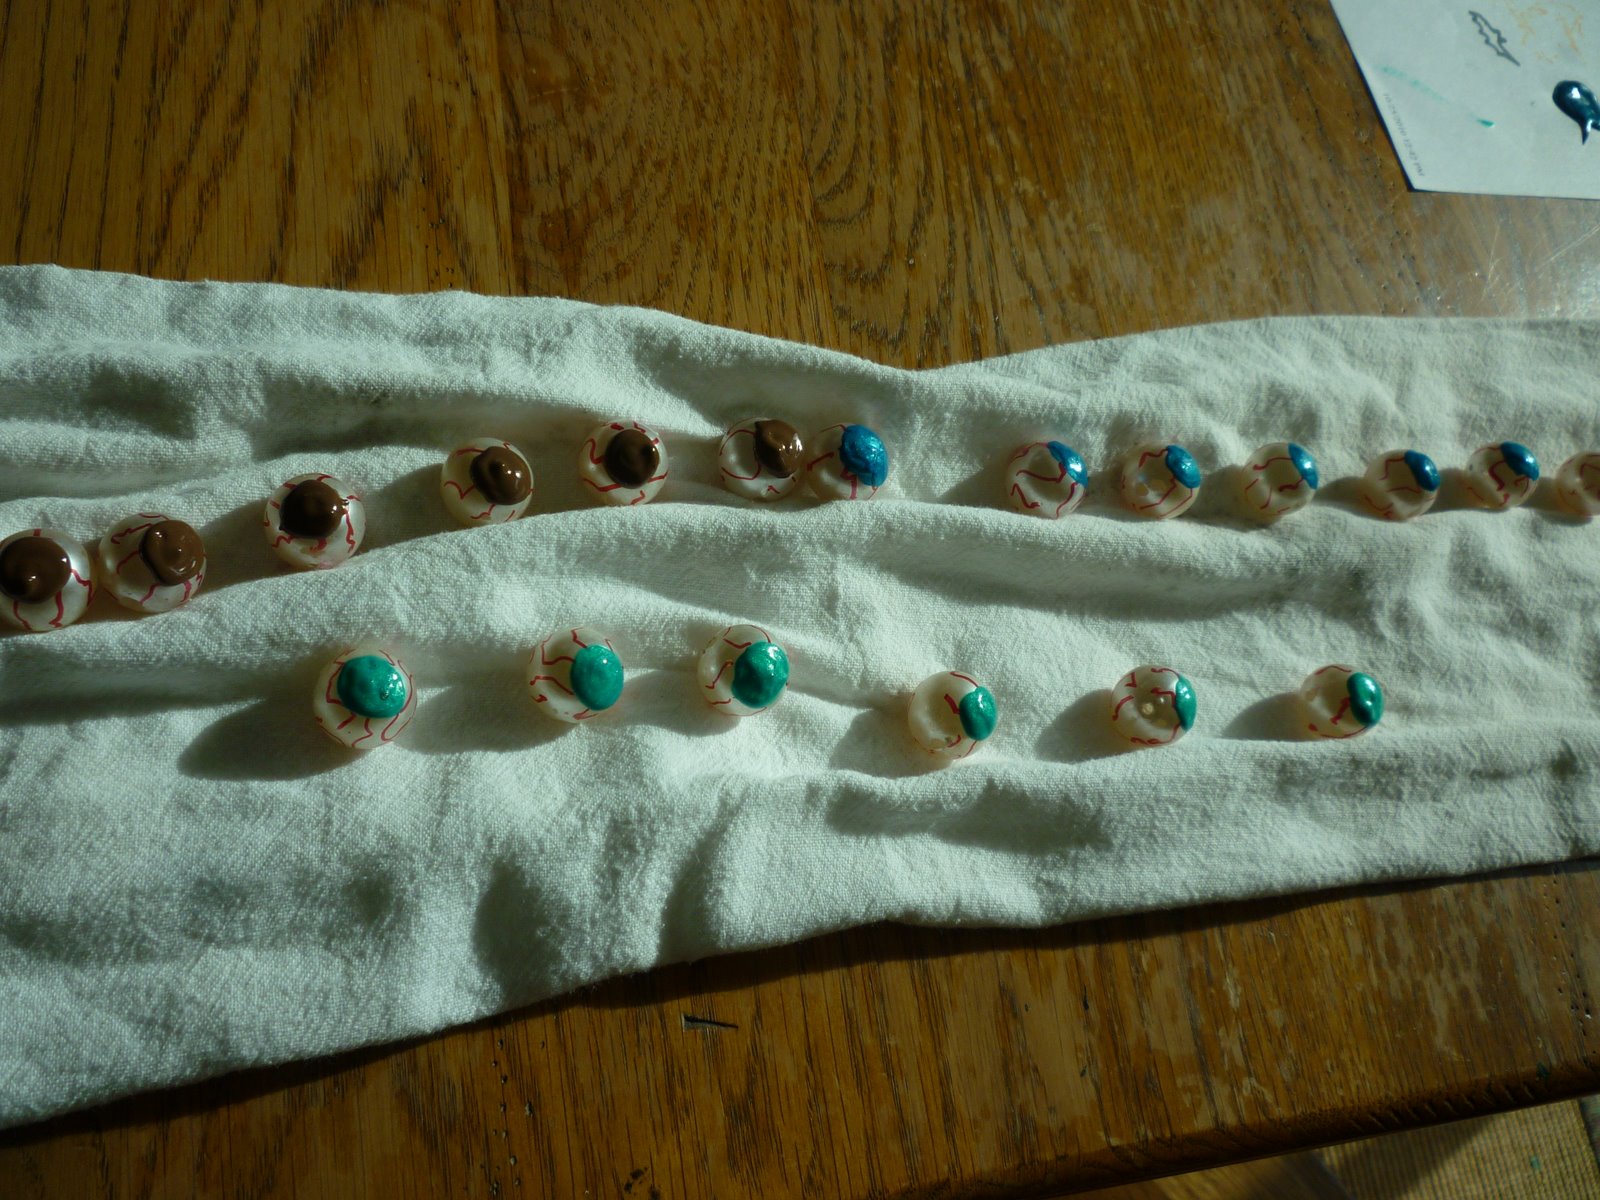
Instead of felt I used puff paint, let it dry then coloured the pupil with permanent felt pen.
No one messes with a mom zombie with a beautiful necklace of eyeballs. (2010 costume)

Apple Picking by Raymond A. Foss
Crisp air
Ripe fruit
Heavy on the bough.
Cool in the hand.
Filling my bag.
Snap of a McIntosh
Tart on my tongue
Shared with you
Sweet on your lips.
Holding hands
Kisses behind a branch
Warm smiles
On blushed cheeks.
Cherished moments
Memories formed
Traditions started
For us.
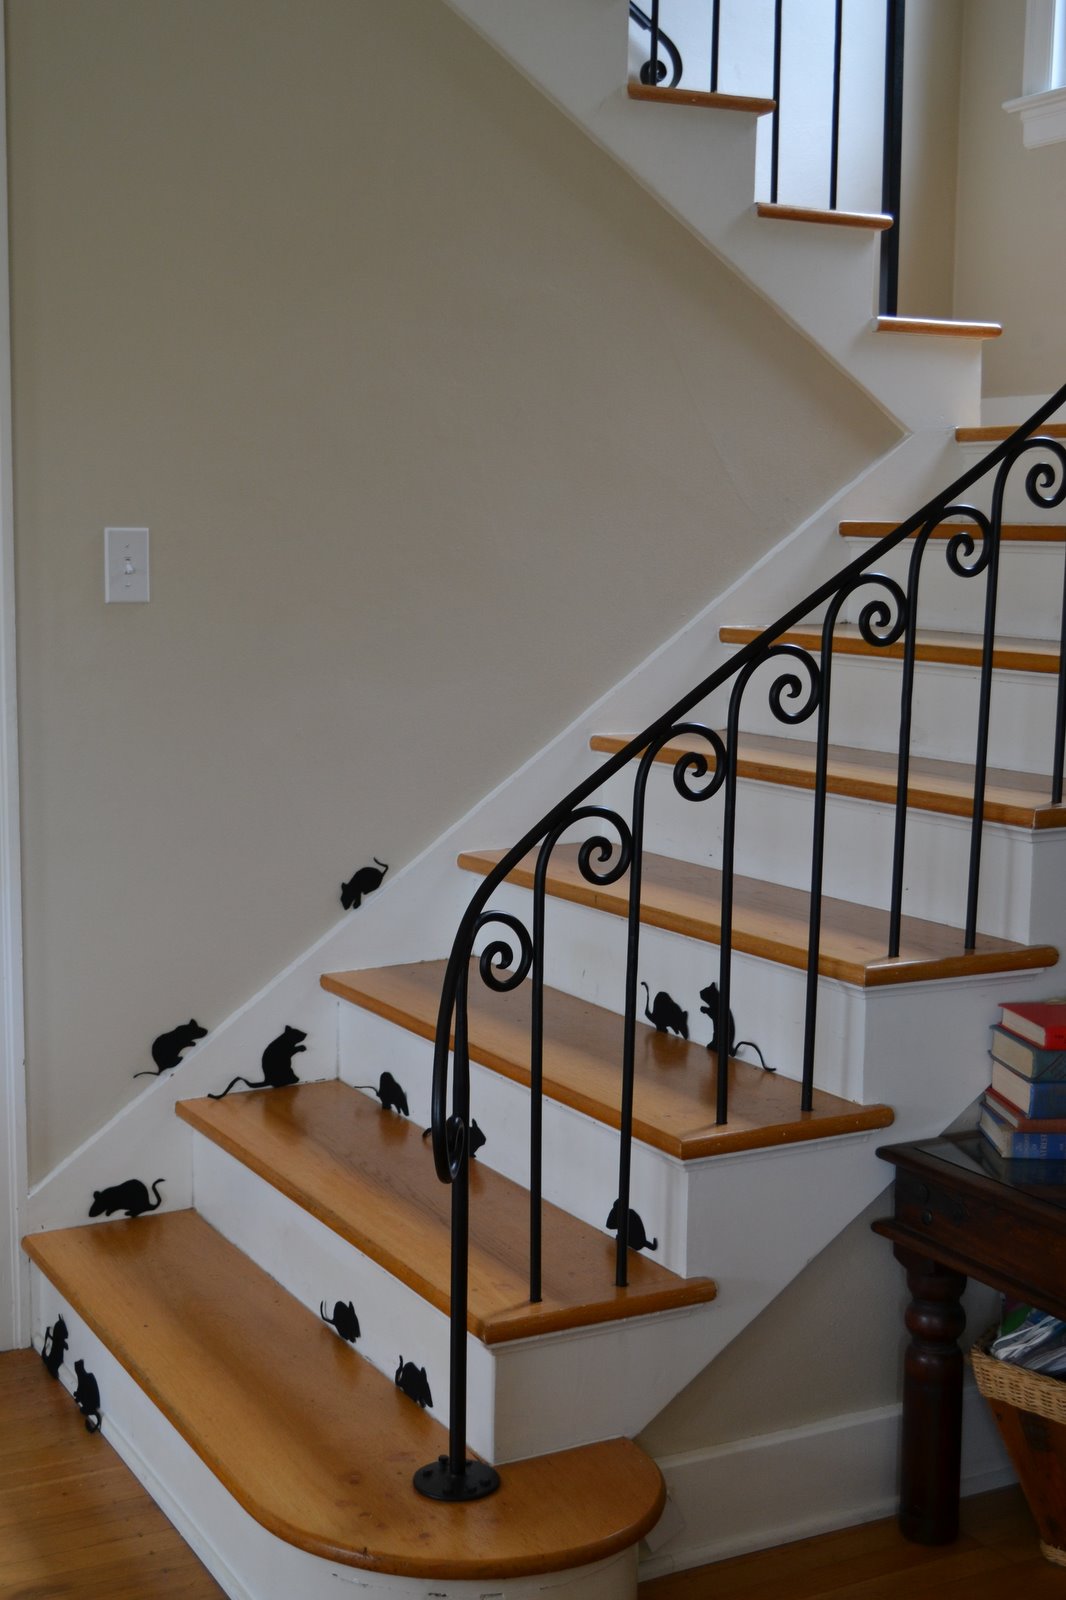
So my children have been so excited to get out the Halloween decorations, we realized we were a little "preschool" and less "cool". We are adding a couple things...after a lot of cutting here is our first addition...

Kind of creepy, kind of cute...but mostly creepy. Thank you Martha for the idea. Thank you Mom for the idea to cut the mice from felt instead of paper, they are sturdier and reusable. I hot-glued some paper on the back so we could stick the felt to the stairs with painters tape). Surprisingly enough I've had several people (kids) touch them, "Wow, they even feel like mice!!"
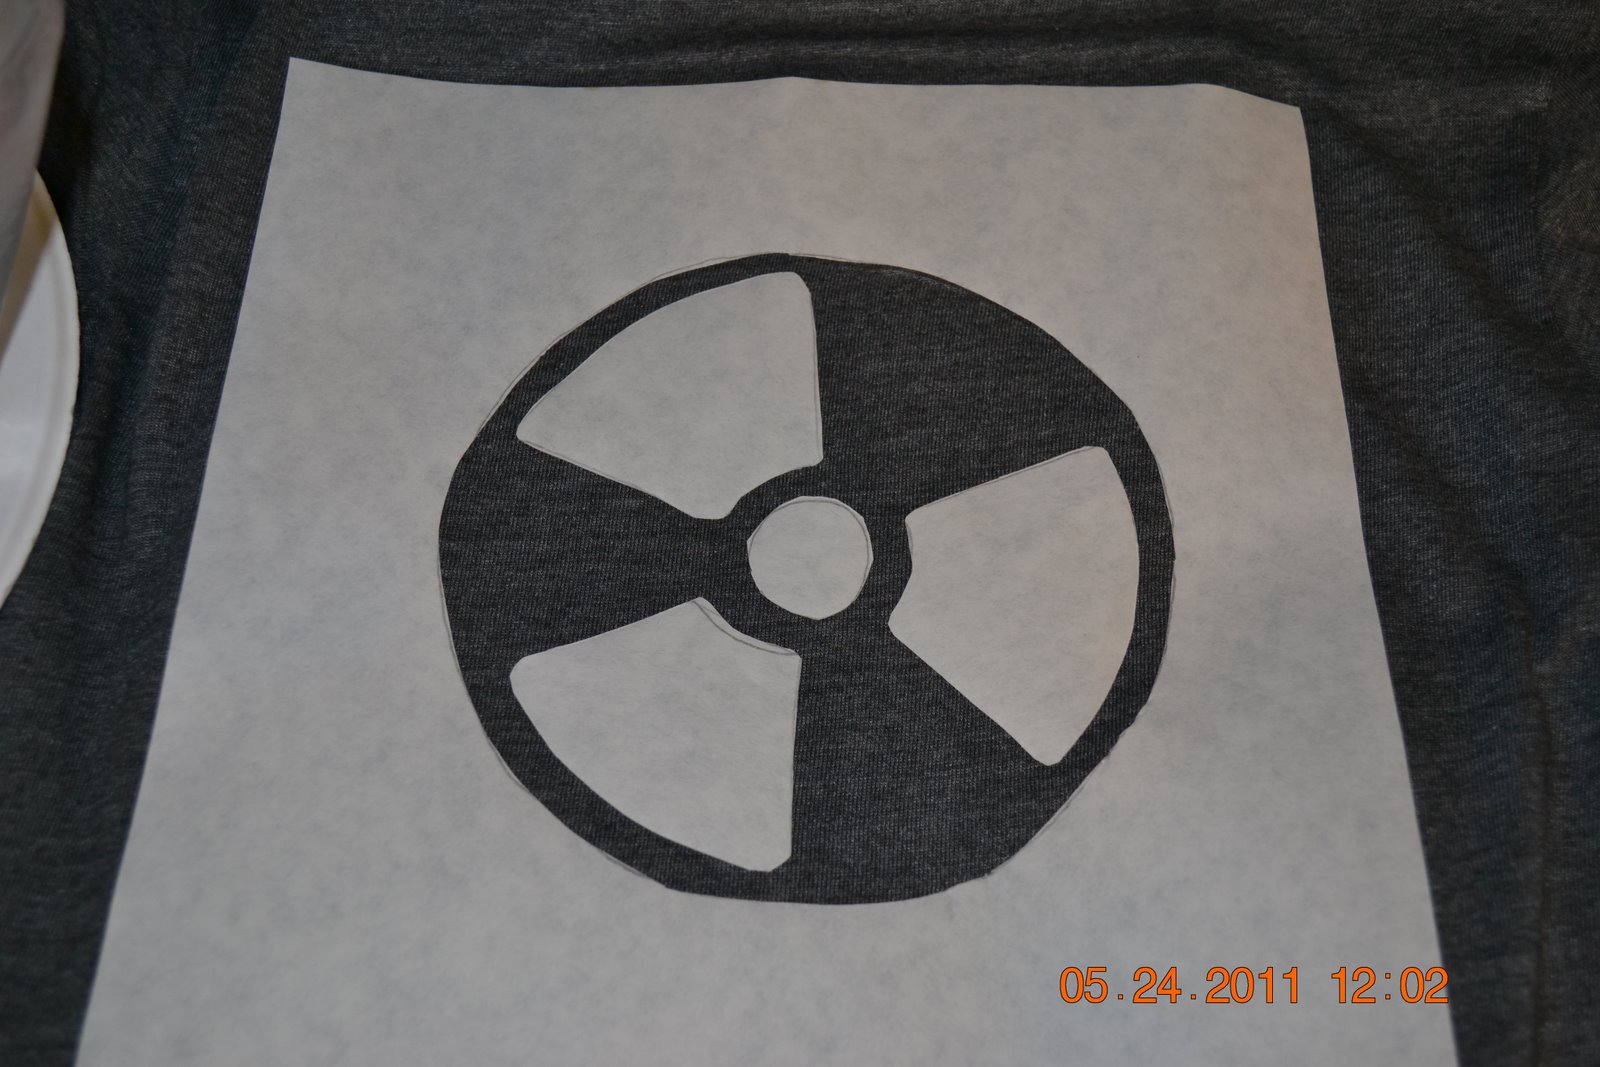
So I don't say things like this very often "easier than it looks", often I end up cursing new projects. I thought it was super easy with pretty instant results. It took me too long to try this I wanted to give anyone who was thinking about a little push. I actually did these shirts in May but finally took the "after" shots the other day to post them. By the way great gift idea for Christmas....watch for shirts on sale now.
There are lots of great tutorials to read if you search, so I won't go into too many details. My basic tips are:
1. Keep the design simple and easy to cut out - here I did the sign for fish ladder (are these signs anywhere else but near Seattle? Go salmon!) and a simplified radioactive symbol.
2. Print then trace design onto the freezer paper, use a craft knife to cut out the area where you want the paint to show.

3. Lay t-shirt flat, put a piece of cardboard or thick paper inside the shirt to prevent paint seeping through (see red shirt collar?). Put freezer paper shiny side down and iron onto the shirt.
4. I dumped the paint onto a plate then used a sponge brush to dab paint on the shirt. Don't rub the brush that will pull the material.
My kids love these shirts (oh the basic shirt is from Old Navy - ringer tees I think they were 2/$10). It fun to have a shirt that no one else has and I like the simple designs.
If you have even thought about this, definitely try it, it would be easy on totes, aprons and
dishtowels. So I have to thank Melanie from
the Cain Family, who left me a comment in Feb 2009 and told me to try this and how fun it was. That was the first I'd heard of it and I can't believe it took me until this year to try it! Silly me.
2 Comments on Freezer Paper stenciling is easier than it looks..., last added: 10/12/2011
View Next 25 Posts


I like the contemporary look they have. Very pretty too.
Very cool! :)