Viewing: Blog Posts Tagged with: decorating, Most Recent at Top [Help]
Results 1 - 5 of 5
Blog: Watercolor Wednesdays (Login to Add to MyJacketFlap)
JacketFlap tags: berkeley, jose luis ocana, children, san francisco, art., Add a tag
Blog: Needle Book (Login to Add to MyJacketFlap)
JacketFlap tags: decorating, decor, bathroom, kitchen, renovating, kitchen, decor, decorating, bathroom, renovating, home, Add a tag
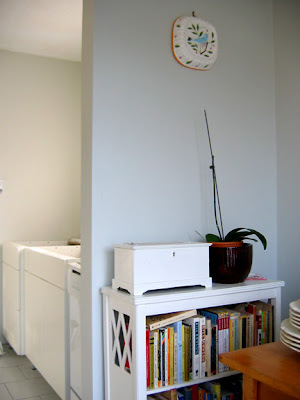 I can't believe what we got done this weekend. Friday I painted the eat-in area and moved in a small white shelf that fit perfectly in the spot the hutch used to have. Having books beside the kitchen table has made it feel so homey, it invites tea drinking and reading. It's so sunny in that spot, we just needed our small table back in place to make it a popular corner of the house again.
If you look just beyond that you can see that all the lower cabinets are now assembled, thanks to Bradley who has recovered from his cold and was behaving like a superhero all weekend. The cabinets even have their feet on now.
And he shortened the closet doors so they're now all back in place. Phew! We kept knocking them over while moving things around. I also finally added the second coat of paint in the hallway. The walls had been a bit scuffed up from the flooring work as well.
Friday I added curtains to cover the sliding doors. As much as I like to make my own, ready made curtains can be a real bargain considering how much fabric they have. I found these at Urban Outfitters, they're nice and sheer and soft. They came with an extra strip of fabric each, I sewed buttonholes and buttons on those to make ties. The rod is from the new Umbra store on John St.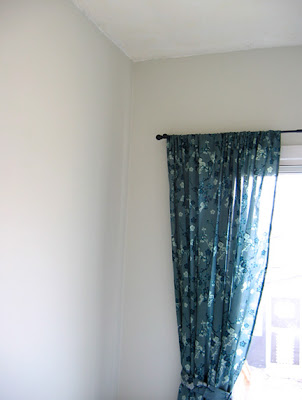 Although not kitchen related, I'd like to mention that we also finally assembled the shower for our clawfoot tub and I can't tell you how thrilled we were to be able to have a shower again.
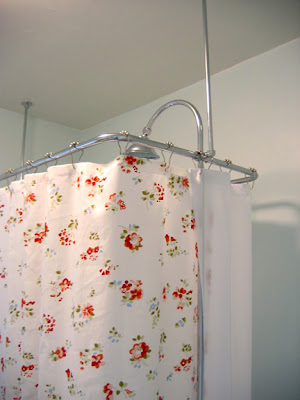
 I also managed to get one of the shelves up. I'd like to get more of the white wicker baskets from IKEA to go on the shelves. As you can see I've painted the Ocean Air on the walls.
 Realizing it was time to order our countertop we went to Home Depot on Sunday. I had been hemming and hawing for ages about that choice. It was hard to decide what would work with our flooring, cabinets, sink and walls, and what we should spend and which material would be most practical. As I've mentioned before we hadn't planned on gutting the kitchen in the first place so we've been making decisions as we go along. I wouldn't recommend this method but so far we're very happy with the results. So anyway we ordered a countertop but I'll save which one for the reveal!
But before they can measure for the countertop we need to wrap things up, which means installing baseboards (while we can move the cabinets and get back there), setting up the wiring for the new dishwasher, having the plumber over to set up the plumbing and finally attaching the lower cabinets in place. Usually you're supposed to install the uppers first but this won't be the first time we've done something backwards. I guess the main reason was to try to keep the kitchen liveable as we did the work.
These are the old uppers: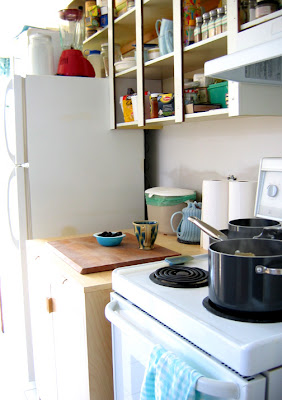 Until yesterday we were using these old upper cabinets for storage. But last night we finally emptied and took down the last of the old cabinets (well I moved some things but Bradley did the real work) and the wall now looks like this:
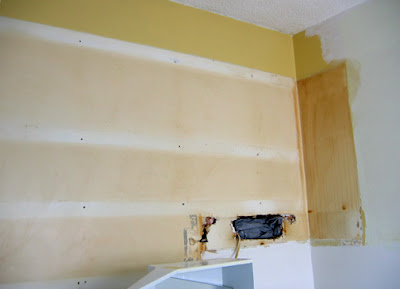 So cleaning, patching, sanding, priming and painting these last two walls is my job for today. Along with some illustration work in case you were wondering if I still have a job...
Read the rest of this post
Blog: Needle Book (Login to Add to MyJacketFlap)
JacketFlap tags: renovation, decorating, decor, kitchen, kitchen, renovation, decor, decorating, Add a tag
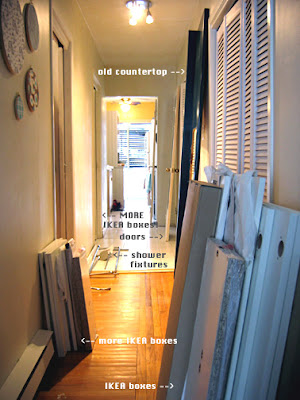 A few friends have asked us if our kitchen cabinets are installed and the short answer to that is "no!". I think we're a little tired out from all the renovating and we've definitely slowed down. So today I decided to post the state of things to answer that question, but I also thought that possibly the embarrassment of showing the sad state of our house will push me to get cracking.
The picture of our hallway really tells the whole story. Most of the IKEA cabinets are in boxes - and when I say most I mean all but the one that we've assembled so far. Just past that we have the shower fixture that we can finally install onto our clawfoot tub now that the plumbing has been fixed. The new flooring has raised the floor height of the entire area by around 1/2". So we had to wait a few weeks for new supply lines for the tub to arrive.
Across from that you can see our old countertop propped against the wall which we are getting rid of. Also the doors to various closets that are all around 1/2 an inch too tall now to fit back in place. Then on to the kitchen with more IKEA boxes.
It's partly that everything seems to take more time and trouble than expected. Just finding this wooden reducer to bridge the tile to the hardwood took weeks. But we were thrilled when we found one at Home Depot that was the right wood, the right stain, the right length, with a shallow overlapping bit for the tile side and a 3/4" step down to the hardwood floor side. Then it was just a small matter of borrowing a power saw to cut it, after cutting the adjacent new baseboards to make sure it would be the right length. Then finding the right glue to attach it and then going back for the caulking gun that was needed to apply the glue. Phew! So more trouble than we expected but it's finally done and it looks finished now. Now we just need to do the gap between the hall and bathroom...
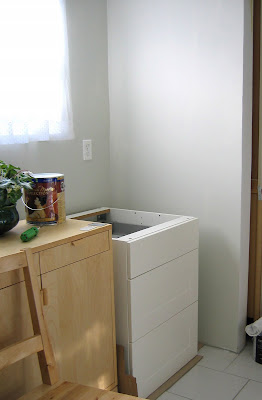 This is the one cabinet we've put together so far - now it just needs soft shutting mechanisms on the drawers, handles, legs and a countertop!
Which brings me to today's goal. I've painted the left side of the kitchen in the alcove area with our new colour. Choosing the perfect grey took a looong time but I'm happy with it now that it's on the walls. It's Benjamin Moore's Titanium, and it's a very soft pale grey that actually seems to look grey rather than a bit green, or blue, or beige as grey's often do. It also works nicely with the cabinets and the new floor which has tiny pale grey stripes in it.
But the walls on the other side still look like this:
And last but not least, the mechanized shutters that go over the back doors are broken and stuck halfway up. Or halfway down depending on how you want to look at it. So someone is supposed to be coming by today to repair those. So that's the state of things, now I'll surely be motivated to post some "after pictures" as soon as possible!
Blog: Needle Book (Login to Add to MyJacketFlap)
JacketFlap tags: design, sewing, crafts, studio, light, decorating, decor, dining, schoolhouse, living, home, fixture, Add a tag
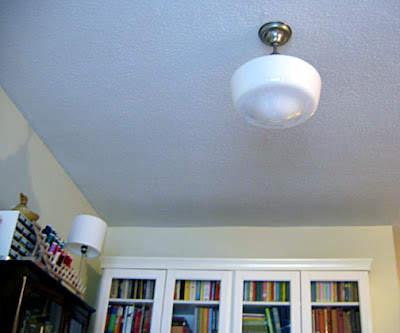 I mentioned to a couple of people that we got a new light for the front room and said it was a "schoolhouse" light and got blank looks. So I thought I'd show some pictures. This is a very traditional style of milk glass light fixture, in this case a semi-flushmount with a brushed nickel base. I thought everyone knew what a schoolhouse light was, but realize now that years of reading Canadian House & Home, Country Living, Domino, Canadian Home & Country, Elle Decor and Style at Home has possibly taught me things not everyone knows.
When did I become so home decor obsessed? I'm not sure. It had some practical applications when we were fixing up our condo in order to sell it, and of course we need to fix up our new home to make it comfortable, but I think you can tell it's gone beyond that. Luckily my girlfriends also seem to be a bit home decor obsessed themselves lately so I don't have to feel too sheepish for wanting to talk about tiles, paint colours and light fixtures all the time. (speaking of tiles we found some white 1" hexagonal floor tiles for our bathroom - I can't wait to install those!!)
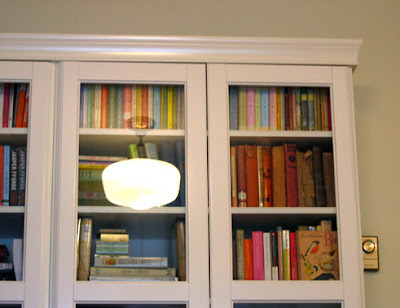 (That and my new vintage golden book Birds)
 Speaking of which, are you wondering why all the posts all of a sudden? Well it's an extra-posts-for-the-week-before-your-birthday treat for Bradley. And tomorrow is the big day! That's when I'll show you what I made for him.
p.s.
This is the old light fixture... just didn't really work with the decor and made the ceilings seem lower than they are, plus Bradley kept bumping his head. Plus environmentally speaking it was using a whopping 480 watts!
Blog: Needle Book (Login to Add to MyJacketFlap)
JacketFlap tags: home, painting, house, home decorating, decorating, decor, reveal, small, kitchen, hutch, Add a tag
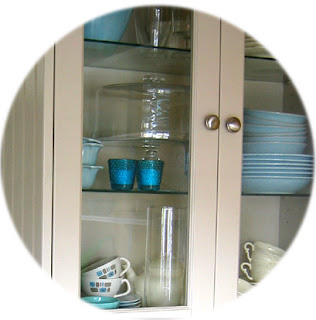 I was so happy with how painting the cabinets has transformed our kitchen I'm going to show some "before" and "after"s, but there are still more changes to come. For those of you with something similar going on in your kitchen, I can tell you that this was our most affordable makeover yet at under $150. We had some leftover 1-2-3 primer, the cabinet paint (Debbie Travis, "cloudy white", semi-gloss latex) was around $40, new white hinges were around $40, new brushed nickel knobs and handles were around $60. Stores often sell these items in packs of ten as well, so you can really save there.
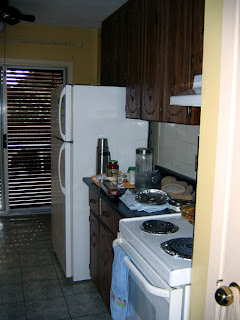
Here's the left side "before", I took this picture in the middle of unpacking. The old knobs were in the middle of the doors. And as I mentioned before the cupboards were made of fake wood laminate. Yuck!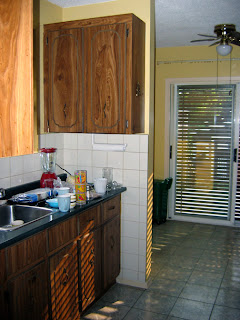 Here's the "after" of the left side. I don't even mind the green countertop so much anymore:
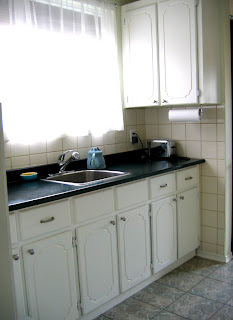 Here's the "before" of the right side. Somehow it was even worse - the whole kitchen felt gloomy:
 Here's the "after" of the right side. It's so much more cheerful now:
 And this third view is from the eat-in area of the kitchen (not renovated yet) looking back into the galley kitchen area. This shows the wall where we took down a cabinet. Unfortunately the thermostat and an outlet were wedged underneath and cut into the tiling. But later on we plan to redo the tiles in any case. Once you change one thing you realize you need to change other things too. My friend Jaimie inspired me talking about apple green tiles, and Katie Muth's tiles are so pretty.
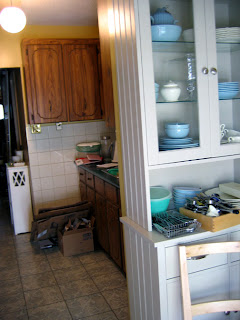 Here's the "after", the pale green wall paint (Debbie Travis, "chiffon", eggshell latex) needs a second coat but you can't really tell that from the photo!
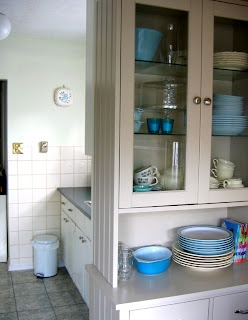 We've ordered a new faucet online, the current one is leaky and specializes in going from cold to burning hot and rather than getting it fixed we're going to just replace it with something nicer. And someday we may replace those vinyl floor tiles. It's a constant dilemma deciding how much to spend on the house. I used to think that it was so small we'd definitely need to move soon and shouldn't put too much work into it, but that tiny house in my last post really inspired me. I mean, ours is more than twice as big! I thought we had the smallest house in Toronto but now I see I was quite wrong.
Living in a small space is a fun challenge, making things work on a small scale can be very satisfying. I really believe it's a good thing, you know, environmentally and all that. Too many possessions can weigh you down, I'm always trying to pare down but it's hard because I can be a bit sentimental about things. I'm working on it though.


fun piece! nice colors & enjoy seeing your work
Thanks so much Linda!! very kind.