


First of all, please don't be afraid to start your kit! The best tip is to just start with the first step rather than overwhelming yourself trying to figure out the whole thing. And once it's done, go on to the next one. There are so many details in the instructions you will have lots of help.
Take your time, I did make mistakes myself and slowing down allowed me to fix them before it was too late. For example, I traced the body pattern pieces onto the fabric then realized when I got to the last pattern piece that I didn't have enough room. You really need to snug the pieces up to the edges of the piece of fabric (assuming you bought the kit with provided fabric) to fit them all in. The solution? I just turned over the folded piece of fabric and retraced them onto that side. No harm done.

Glue just a little bit at a time and make sure it's going where you want it to. The exact position of the hair kind of changes the shape of her face. If you glue it a bit high she will have a high forehead, etc.


 By: Rita,
on 2/15/2008
By: Rita,
on 2/15/2008
Blog: rhcrayon: The Blog! (Login to Add to MyJacketFlap)
JacketFlap tags: quiss, remembrances of things past, art, how this blog rolls, quiss, how this blog rolls, Add a tag
I have an idea.
A couple friends recently told me their favorite post in this blog was when I illustrated that "Fortunately, Unfortunately" story. (Haha, thanks!! That was really fun.) So, during weeks where I haven't posted anything by Friday, I'm going to share art (either that's very old or new), hopefully to keep you entertained. (This will be embarrassing for me, which, by my best guess, is what you will actually find entertaining.)
Here is the the first Quiss comic I ever did, a small stack of which I recently stumbled across at my parents' house. Did you know I used to be a cartoonist? Me, neither; I forgot! I did these in ninth grade to entertain friends, and, eventually, our high school newspaper asked me to do a couple for them, too. I had no idea why they were interested, but it was very pleasing.
Original Quiss Comic, #1 (20th Anniversary Edition)
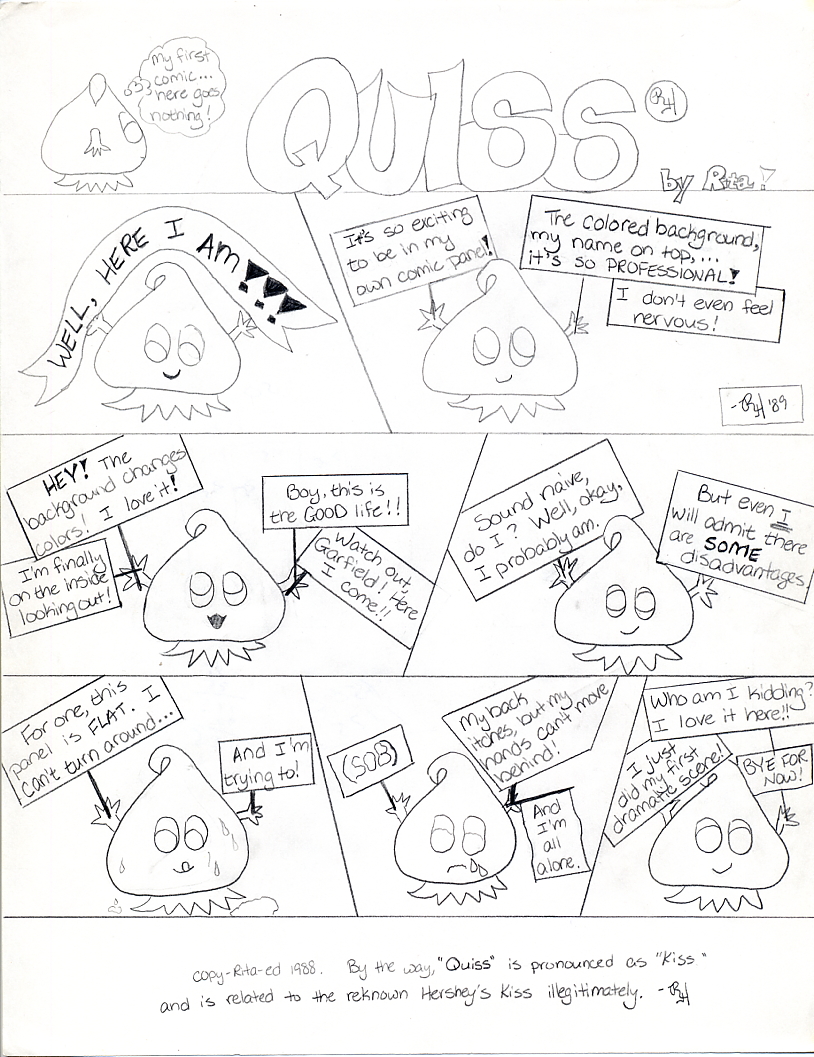
(Clearly I had intentions of coloring this panel.)
Some of you guys whose blogs have lapsed lately, I know you have old art threads kicking around, too. Maybe you could share on your blogs, too!
Love,
r
P.S.
The Quiss comics I found aren't the ones the newspaper ran. I'll look for those.
Add a Comment
I love this idea of using roving instead of yarn for the hair! This will totally revolutionize my doll-making.
hahaha this is the cutest!!